Before they go to their new home, here’s a recap of our Phase One DIY Kitchen Makeover and painted cabinets five years later. I’m answering a big question we see a lot, “How long will painted cabinets last?”. Read on to get the answer!
This sounds a bit dramatic, but this feels a bit like the end of an era! Today I’m sharing a recap of the night before “Demo Day” in our DIY Kitchen. It’s actually probably more accurate to call it “Moving Day with a side of Demo”. Almost everything is being repurposed in one way or another! As I have mentioned in the past, the goal for these painted cabinets was for them to buy us around 3 years before we could save up for a complete kitchen remodel. Since they surpassed that by 2 years, I’d say our mission was accomplished!
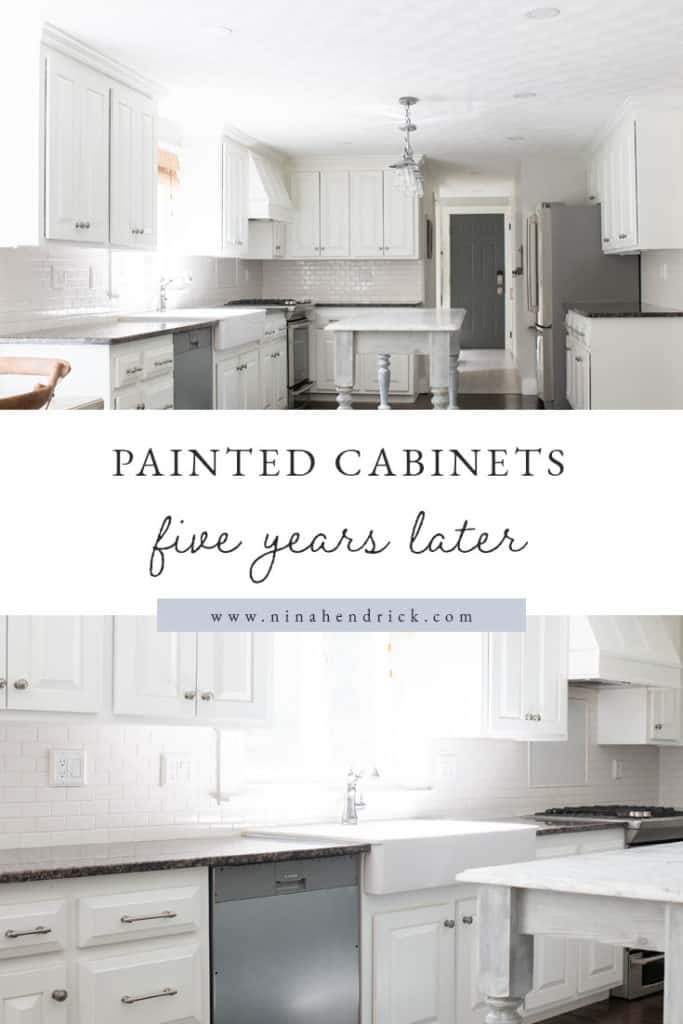
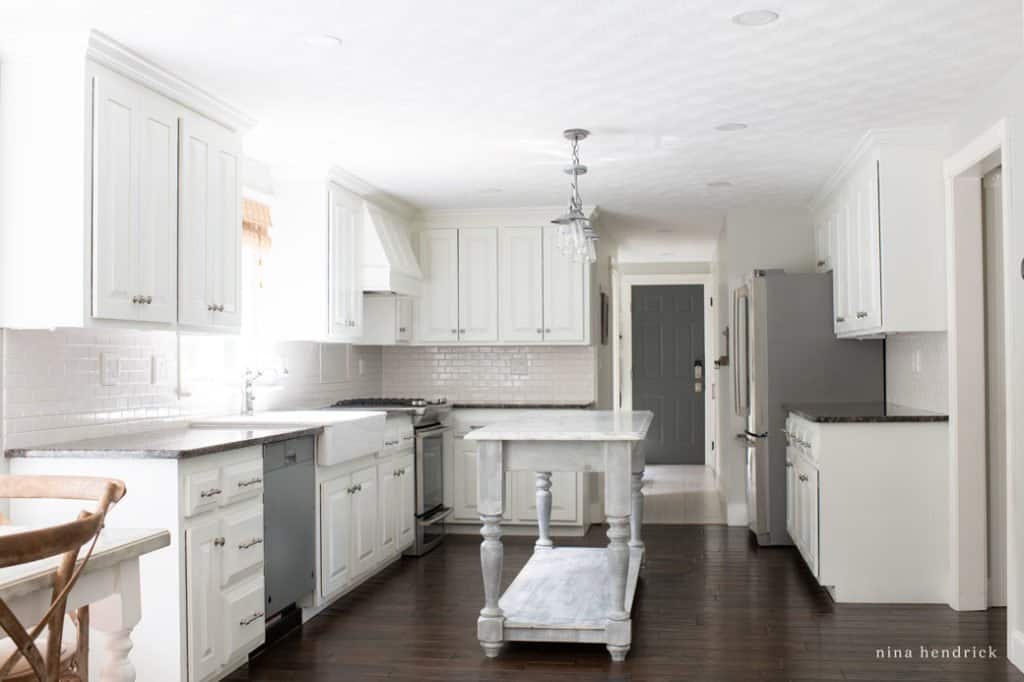
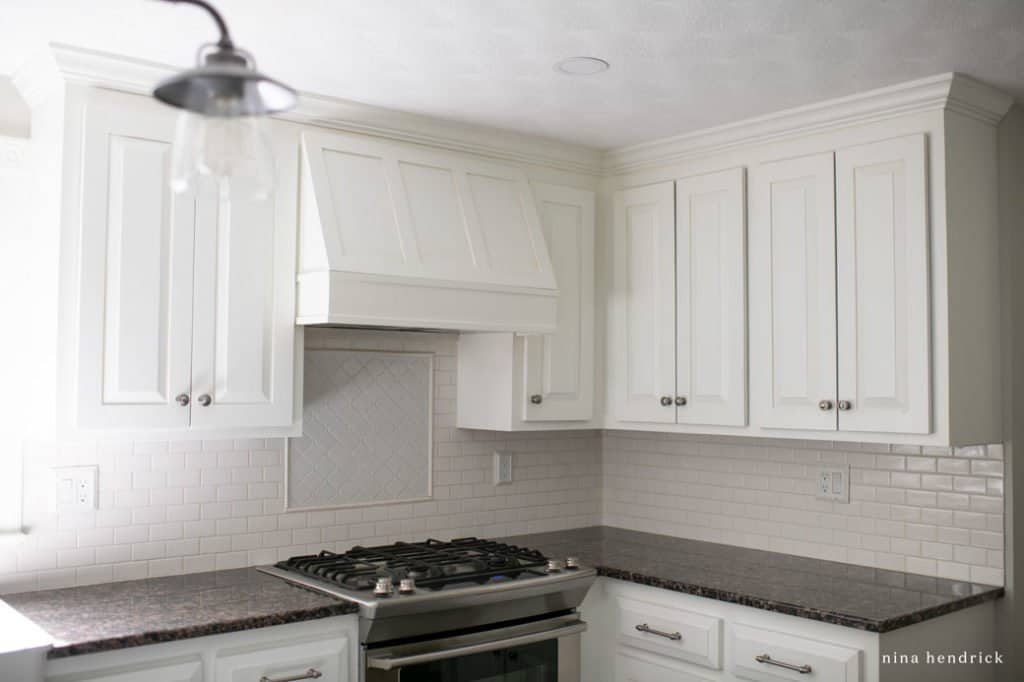
Before we move on to the posts about the Phase 2 Kitchen Project, I wanted to take the opportunity to show some final pictures of Phase 1 and how things have held up. Especially the finish on our DIY Painted Cabinets since it has been by far the most popular project on this blog over the years. This will be the close of a chapter ahead of a future post of our kitchen plans moving forward!

For a quick recap of the project, I began researching and testing methods for filling the grain in oak cabinets about seven years ago when the sellers accepted our offer on this house. By the time we executed the process and began actually painting the kitchen, I had it pretty streamlined, although it was still a LOT of work.
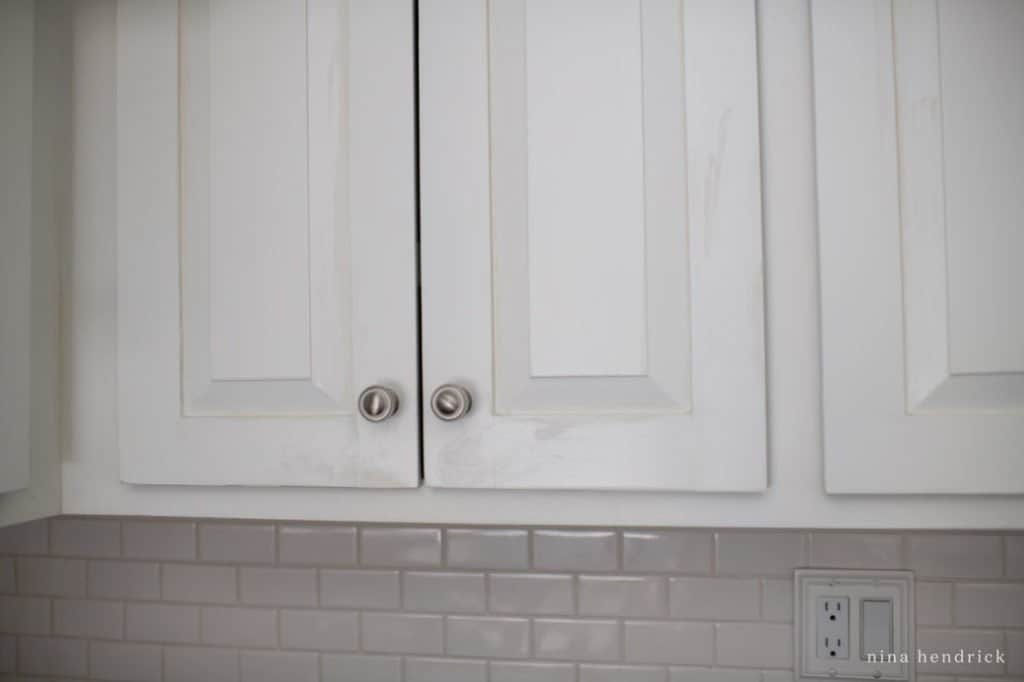
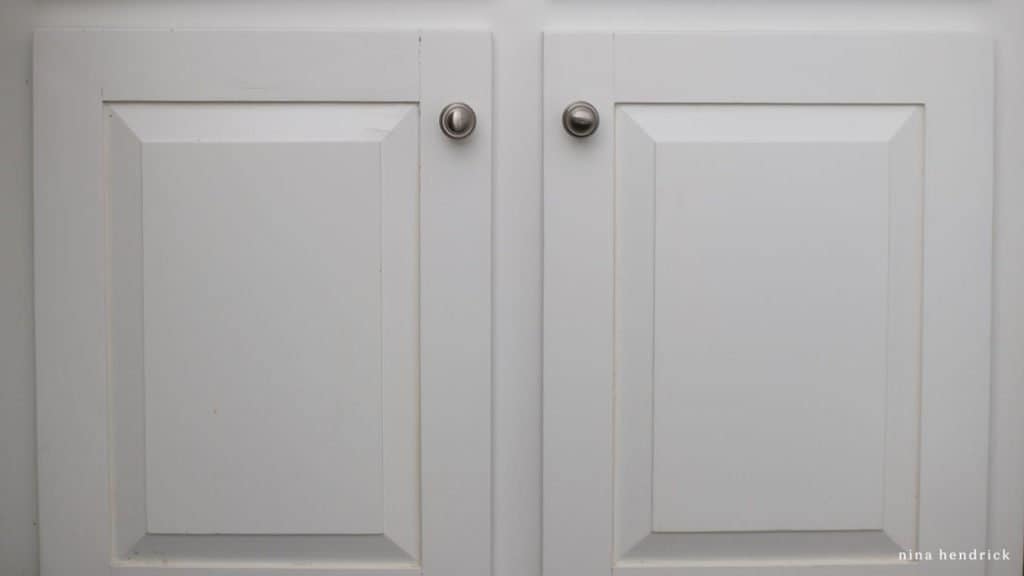
One mistake I made (and shared right away) was that I caulked all of the seams as a final step. Although the seal has held up and hasn’t cracked, the color of the caulk has yellowed over time, while the paint on the cabinets hasn’t. You can see where I wiped away the extra, which didn’t appear until a couple of years after painting.
We have ordered custom cabinetry for our new kitchen, and an interesting (to this novice) element is that the seams are not caulked. Since it’s painted solid wood, they want to allow for expansion and contraction. This does make sense. Just food for thought, even though our door fronts haven’t cracked!
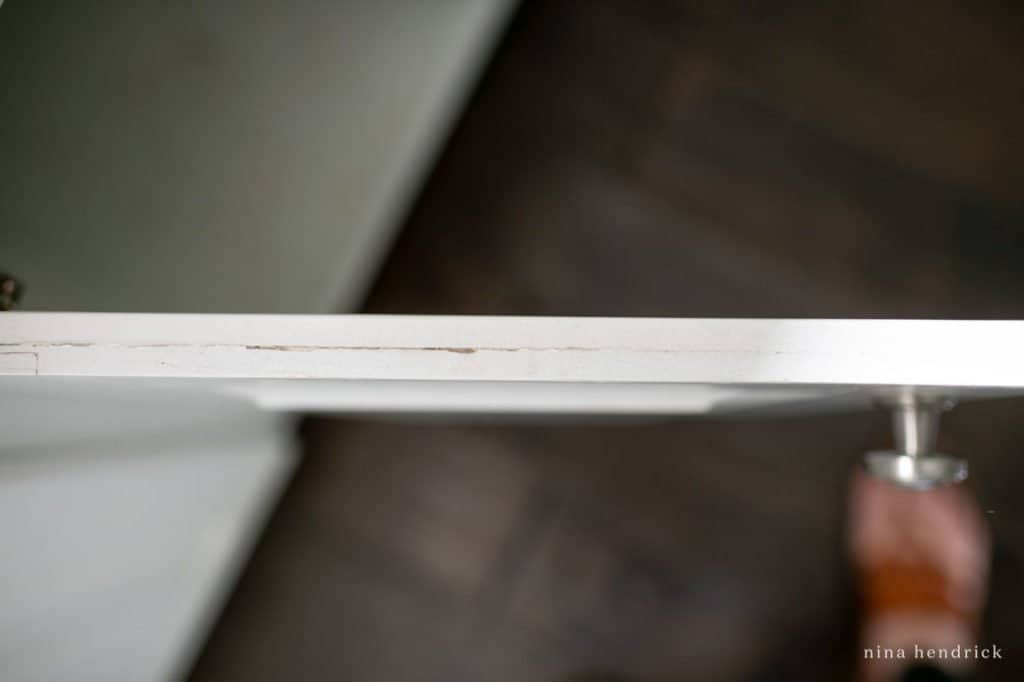
One other detail that didn’t stand the test of time was hiding the crack from where we added a trim piece to build out the doors and drawers.
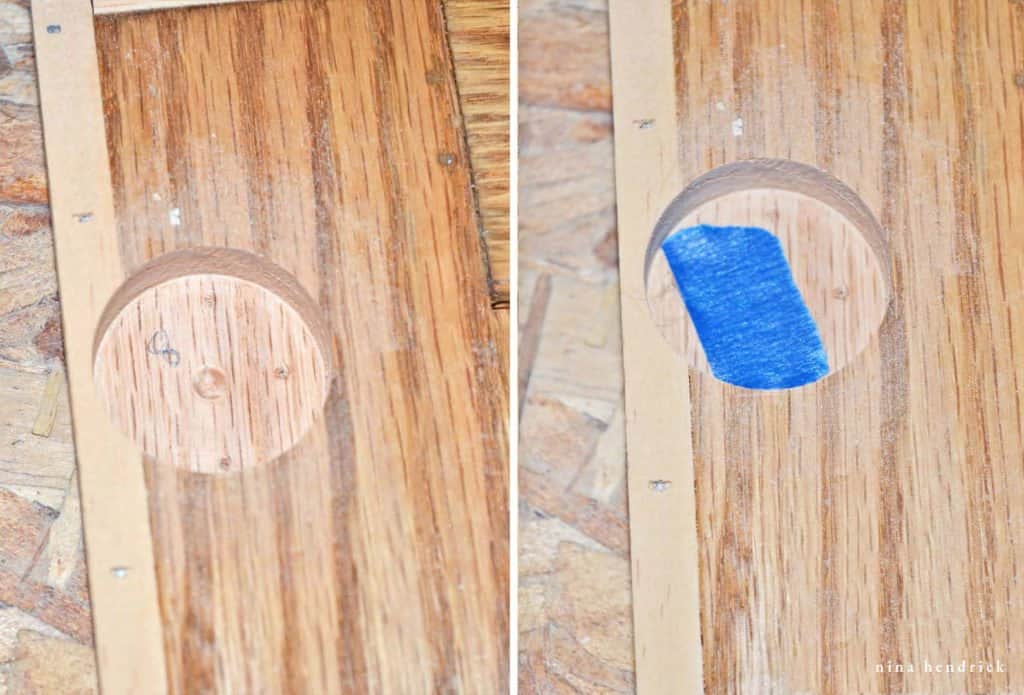
For a bit of background, our cabinet doors and drawers were originally partially inset. It was impossible (and if you know me, I don’t use that word lightly) to find a hidden hinge for the exact — odd — dimension of the inset. Instead, we decided to build out the doors so that they sat on top of the cabinet frames and we could use standard hidden hinges. We used DryDex to attempt to fill in the seams, and it eventually expanded and contracted and cracked. Overall, it wasn’t a huge deal. You couldn’t really tell looking straight on. Caulking ahead of the painting would have (again) been a better choice.
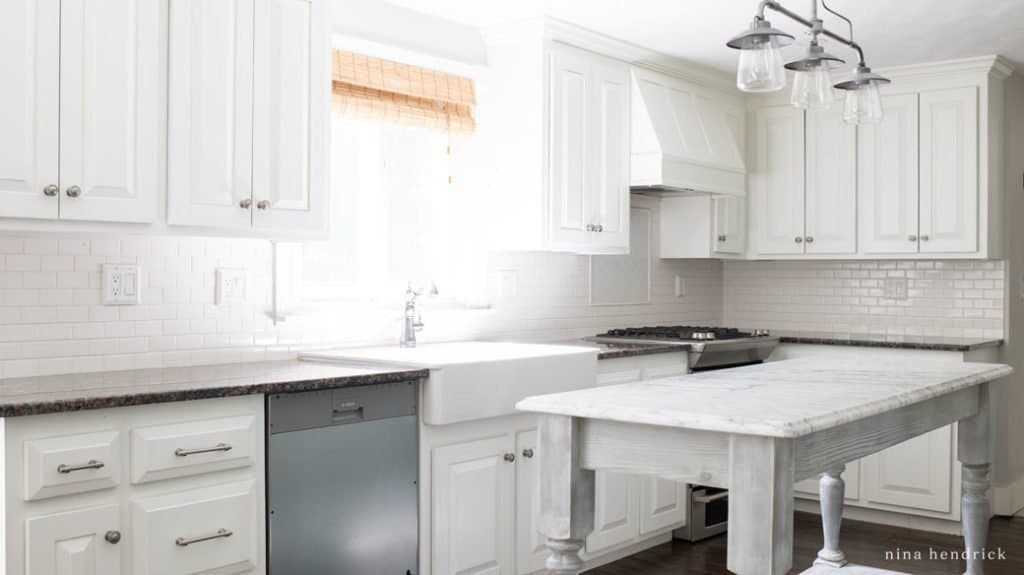
One cabinet didn’t hold up well in particular, and that was the one below the sink. I talked about this a bit in the 2-year recap as well. When we moved in and before we made any changes at all, it wasn’t in great shape. The fiberboard bottom was bowed from moisture and the weight of whatever had been stored in the cabinet. The frame and door on the front also had water damage. When we started the project, we attempted to repair what we could of the interior by reinforcing the cabinet with plywood. This was especially important to support the weight of the farmhouse sink we added.
For the exterior finish, we attempted to use extra primer to cover the water damage. Unfortunately, the doors were already showing some cracking and bleed-through in our two-year recap. At the point when we disassembled the kitchen, it definitely looked a bit rough. The point here is that it will be difficult to get a lasting painted cabinet finish on water damaged wood, and replacing the cabinet is probably a better option.
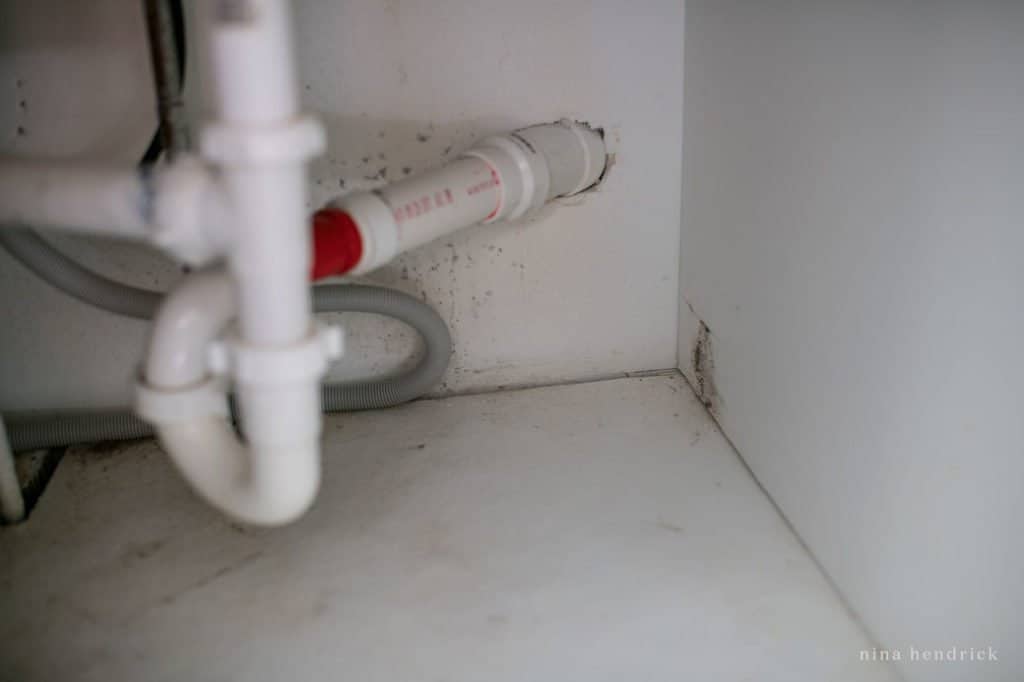
Additionally, we’ve had water damage to the interior of the cabinet from both the upstairs bathroom and leaking from the sink plumbing. By the time we committed to overhauling the room, the interior of the cabinet had black mold and was soft. Not good. Obviously we couldn’t recycle that particular cabinet, and the drywall behind it was removed for the Phase 2 project anyway. We will, however, be saving the sink itself for my parents’ project.
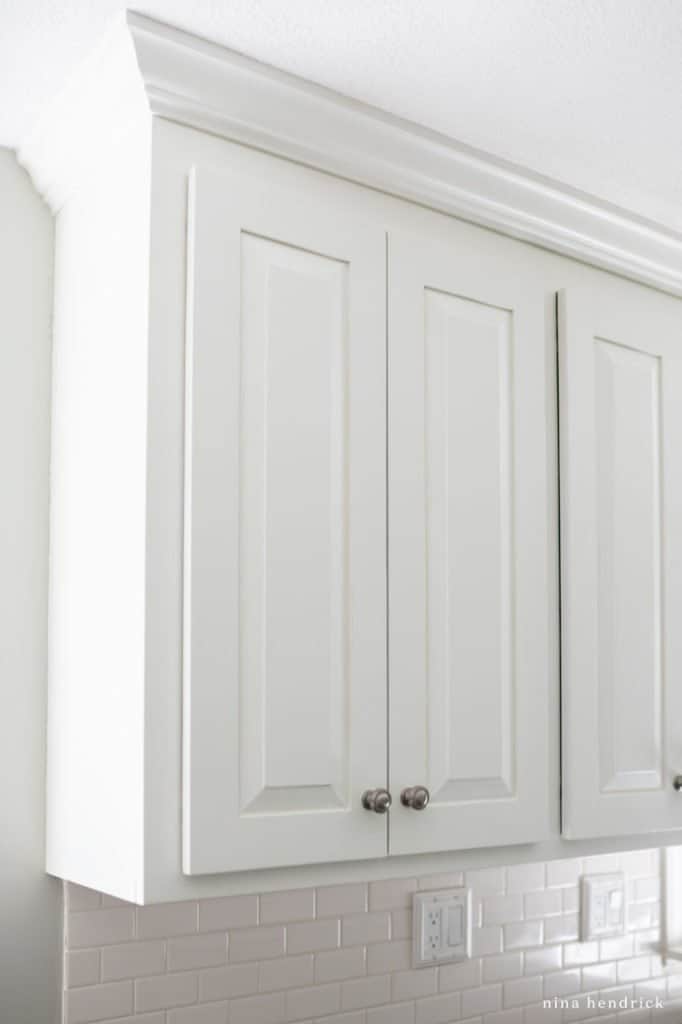
As for the finish on the rest of the cabinets, it has held up really well. Up close, there are occasional dings and dents, of course. We had two little ones when we painted the cabinets originally and then added another baby after. These cabinets have been hit by ride-on baby toys and now beat up by negligent tweens attempting to make their own food. Overall, the finish held up even better than expected. Especially considering we never did a top coat (per the paint manufacturers recommendation).
The interior of the cabinets also looks pretty good still. No complaints! There have been a couple of leaks and spills over time, but they cleaned up reasonably.
I’ll be posting more detailed plans soon, but we’re reconfiguring the entire layout of our kitchen to work better for this room and our family. The water damage and leaking pipes were the major impetus. We’re taking the opportunity to change a few issues since we plan on living here long term. For example, the cabinet drawer and door closest to the range never opened all of the way. The same went for the left door of the fridge.
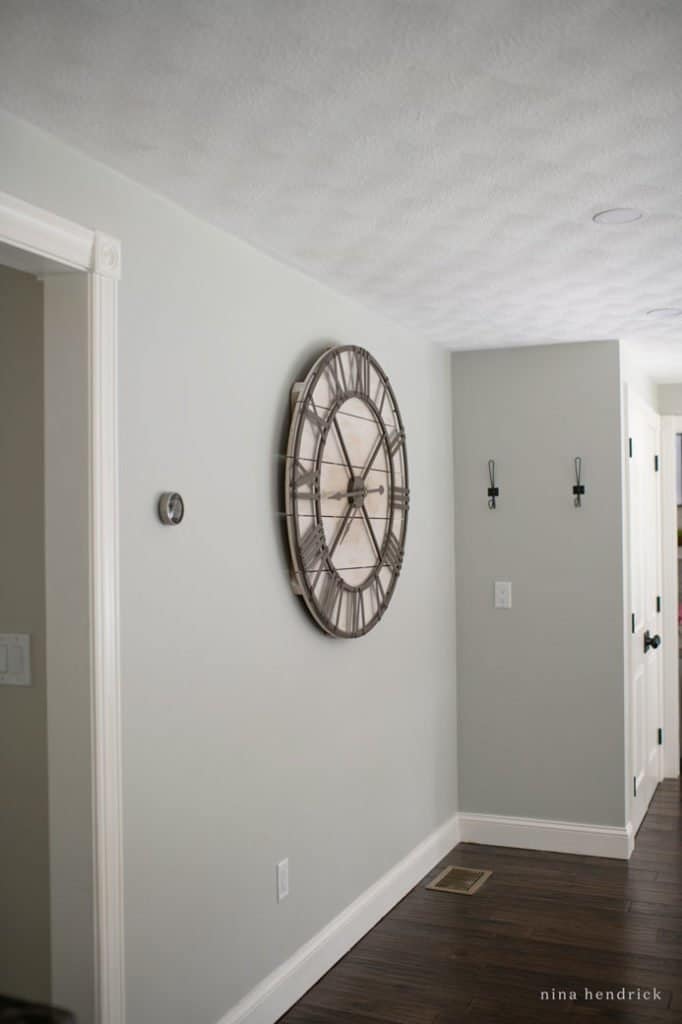
Additionally, we closed off an extra doorway to the dining room in favor of more wall space that we plan to better utilize. The giant (non-working) clock was not the best use of space.
These painted cabinets have held up so well five years later that they’re heading to a new home (with the exception of the wrecked sink base)! My parents are planning a budget kitchen remodel as they get their house ready to eventually sell it. Since their house has a lot of wood, we think a creamier white will work better. I’ll be giving the cabinets a fresh coat. Don’t worry, I’ll be sharing that process all along the way! We’ll have to fill in a few blank spots with new cabinets. As a result, I’ll be able to share the entire grain filling process from start to finish (hopefully even in video format!). Pretty exciting stuff!