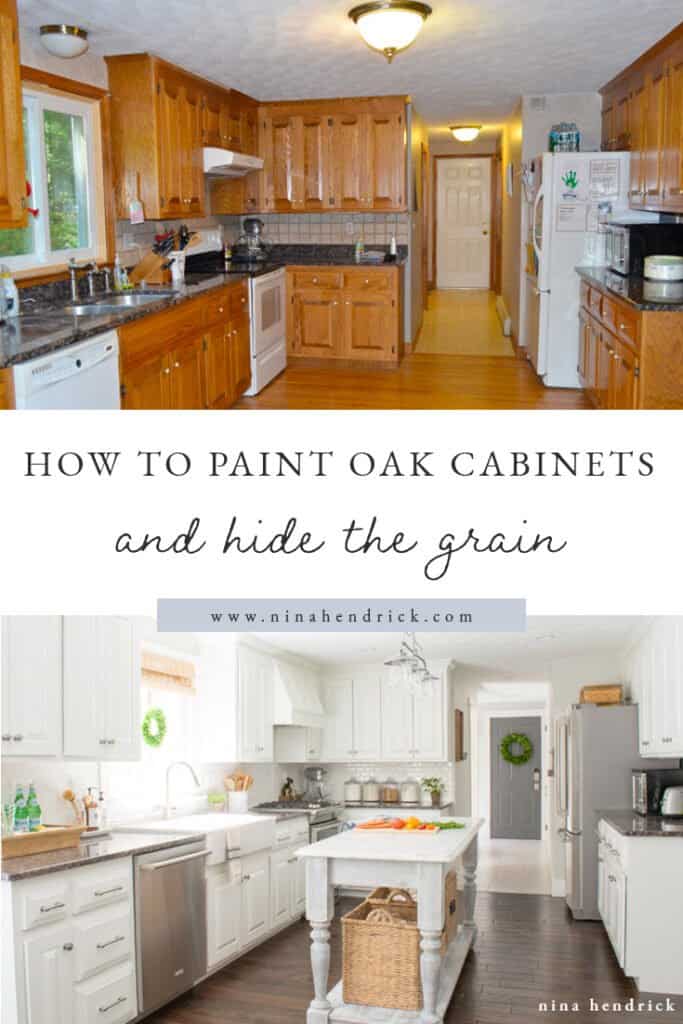
Learn about our proven process for how to paint oak cabinets and hide the grain to achieve a completely smooth and professional finish.
In the past, I’ve talked about how to choose a paint color, some of my go-to paint colors, and how to choose a cohesive whole house color palette. Today I’m going to share my updated tutorial for how to paint oak cabinets and hide the grain. We successfully completed this project by painting oak cabinets white in our kitchen over five years ago to achieve a smooth finish.
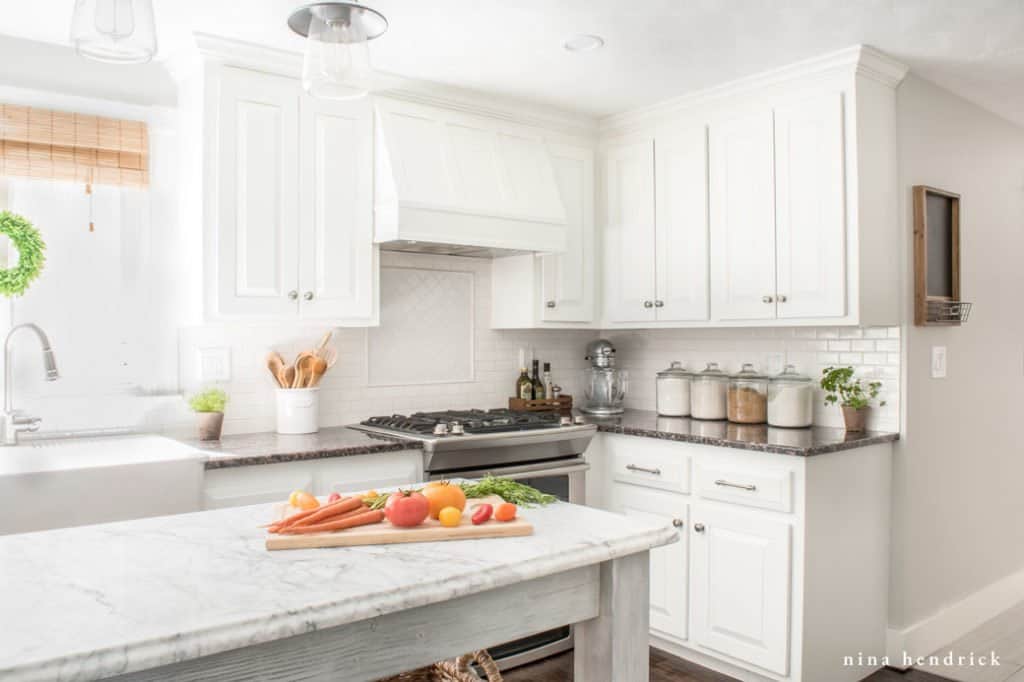
How to Paint Oak Cabinets and Hide the Grain
Originally Published on February 16, 2014
This post contains affiliate links, which means I may get a small commission (at no extra cost to you) if you shop my link. Please see my disclosure if you’d like more info!
What to Know Before You Begin Your Project
While the results speak for themselves, I will be very frank upfront: this project was not quick, nor was it an easy one. I wanted a professional look that would buy us years to save up for a full kitchen remodel. I was not looking for a quick solution. If you’re also willing to put in the hard work, this may just be your answer to having a beautiful kitchen within a reasonable budget!
Executing the project also requires a time commitment. For an average-sized 150 square foot North American kitchen, should you choose to do it all at once, my estimate is about five days. If you choose weekends, it will probably take you about a month.
I certainly don’t mean to scare you off, I simply want you to know that this isn’t a “Paint Your Kitchen Quickly and Easily!” tutorial. This one is for the perfectionists who aren’t afraid of a little a lot of elbow grease. But guess what? If I bought a house tomorrow that had orange oak, I would do it all again! The results definitely validated the hard work.
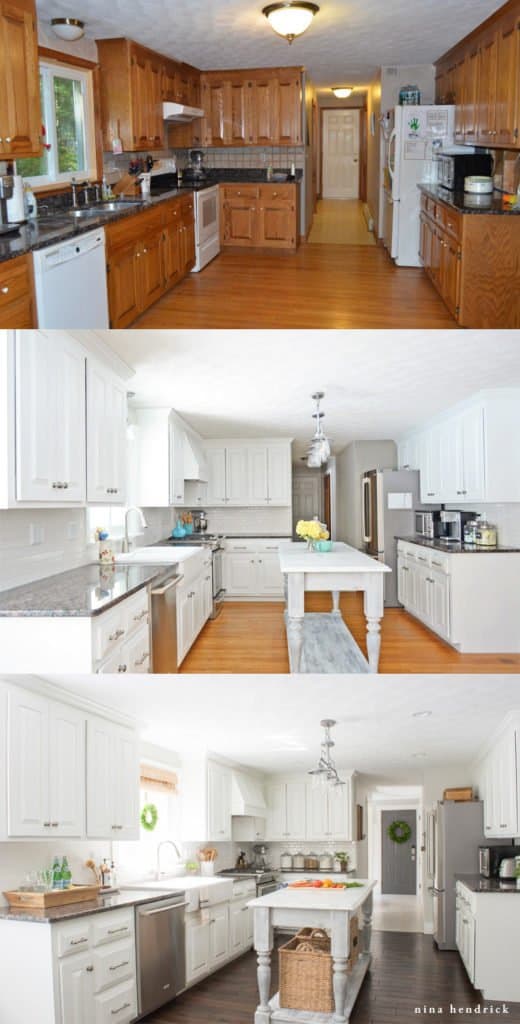
When I set out to do this project over six years ago, there weren’t many resources to be found on doing a project like this, although countless have popped up since, as white cabinets became the norm. I spent many months reading the tutorials I could find, which were more in the “quick and easy” category or didn’t include covering oak grain.
Mostly, I combed through forums for professional painters! I tested many of the products and processes they mentioned, including half a dozen wood/grain fillers, oil-based paints, latex-based paints, lacquers, other enamels, cans of spray paint, chalk paint… the list goes on.
I created a bunch of test swatches, compared them, watched how the paint reacted over time, primarily whether it became yellowed or if the grain showed up. In the end, I was happiest with the results of the process I’m about to share with you, which I found practically by accident. I hope that all of my research will help you as much as it helped me!
How to Paint Oak Cabinets EBook
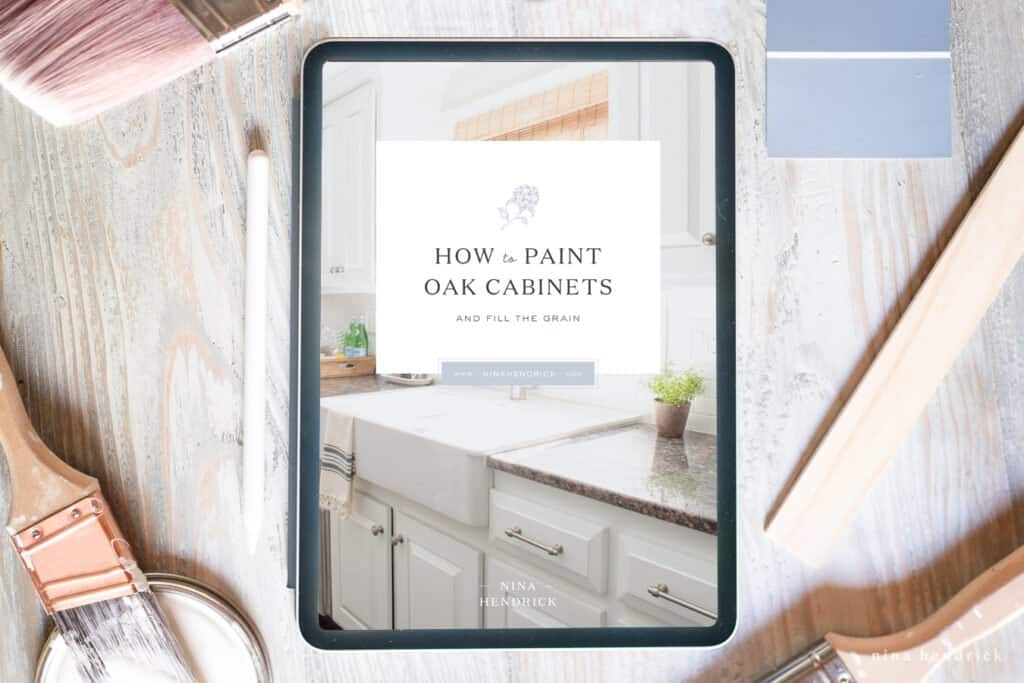
While this tutorial blog post will always be free, this project was admittedly a beast. Frankly, I feel like it’s too much information for one blog post, and you’ll find other follow up posts linked below.
If you’re looking for the entire project conveniently organized in one spot, the ebook is your best bet. It includes an in-depth explanation of what didn’t work, all the frequently asked questions, a budget breakdown, a printable shopping checklist, a review of how the cabinets held up after five years, and much more.
A Quick Disclaimer
My husband and I were already experienced painters when we set out to do this project. In our opinion, it’s not a beginner’s project. If you are just starting out at DIY, we recommend that you speak to a professional about painting your cabinets. We cannot guarantee the outcome of your project. As with all projects, we recommend that you always use proper safety equipment and proper ventilation for paint projects.
I chose and recommended the products I felt were best through research and trial-and-error. There were no sponsors at that time, I chose every product independently. However, this post contains affiliate links, so I make a small commission if you choose to buy your supplies through my links (at no extra cost to you). Read my disclosure here for more information.
Oak Cabinet Painting Questions Answered
How do you paint oak cabinets and hide the grain?
You can hide the wood grain on oak cabinets with a thin layer of Drydex wall spackle. I go through the process of exactly how it works in the tutorial below. Before we dive in, there’s one thing I really want to emphasize. I truly feel that filling in the oak wood grain is what made this project so successful. I know that step is the hardest. However, on our test pieces that didn’t have filler we were left with black grain either after several coats or the grain emerged over time.
Why did you use Drydex as a grain filler?
We tried several products, including many types of wood filler and grain fillers, but we got the best results with the Drydex wall spackle mixed with a little of the sanding dust that remained on the cabinets from the first sanding. I know it sounds strange, but it worked great.
With that being said, please know that this isn’t a magic product. You’ll still see an extremely subtle grain at certain angles on the finished product, just enough grain to know it is wood under there. We weren’t aiming for a glasslike finish. We just knew from previous experiences painting oak that the grain detail sometimes remains black because the paint can’t make it into the tiny cracks. We definitely wanted to avoid grain showing through completely, and this solved our problem!
What kind of paint do you use on oak cabinets?
The best paint for oak cabinets I found is Insl-X Cabinet Coat Enamel in satin diluted and applied with a paint sprayer. Like I mentioned above, a lot of research and testing went into that decision.
Insl-X Cabinet Coat is an acrylic water-based enamel. It was already pretty thin, but through trial and error, we determined that we achieved the best results with our particular paint sprayer when we diluted it 8% with distilled water. The amount may vary depending on the sprayer you use, but no matter what we are being very specific about distilled water. We tried it with tap water and the minerals in our water reacted negatively to make the paint discolor and run. To achieve the correct percentage, that is where a measuring cup (and probably a calculator) will come in handy! Mix it well and record the dilution so that you can mix future dilutions to match.
My favorite aspect of Cabinet Coat, and the reason why I recommend it so highly for painting kitchen cabinets, is that it has really great self-leveling properties. It has provided the closest thing I’ve seen to a cabinet factory finish.
It also never chipped or yellowed within the five years after the project (with the exception of chipping on a spot where the cabinet had rotted beforehand). You can read the five-year review here if you’re curious about the longevity of the finish! Overall, I was hoping for 3-5 years to save up for a full remodel, and the finish more than met the challenge.
What’s the best primer for oak kitchen cabinets?
I used Kilz primer to complete this project, but I’ve also heard good things about the stain-blocking capabilities of Zinsser Cover Stain.
Should I use a paint sprayer on my oak cabinets?
Yes, I highly recommend using some type of paint sprayer.
We have gone back and forth and tried a few different paint sprayers during the years since we completed this project. We struggled with some “orange peel” (air bubbles in the paint) in the early steps of this project but were able to correct it with the proper dilution. At this point, I would recommend the updated version of the original paint sprayer we used.
What is the best color to paint oak kitchen cabinets? Can I choose colors other than white?
Of course, this part will be up to you, but I clearly chose to paint oak cabinets white in our home! With that being said, this tutorial works for any paint color, since the Cabinet Coat can be tinted. I didn’t realize this, so it’s just straight from the can. If I could do it all over again, I would tint it Benjamin Moore Simply White to match our trim, ceilings, and other built-ins.
In its natural state, Insl-X Cabinet Coat seems to have an ever-so-slight blue undertone. Keep this in mind if you are hoping for a warmer color. It’s best to talk to your local paint store expert and see what they recommend.
You can get my tips for choosing a paint color here!
Did You Add a Top Coat or Sealer?
I did not, because Insl-X doesn’t recommend a topcoat. I did apply Polyacrylic with a small foam roller to the flat surfaces inside the cabinets to protect the shelves. I never added a top coat to the cabinet faces and the finish was still undamaged 5 years later.
have a question i missed?
Other Considerations in Our Kitchen Remodel
We had additions to this project that you may or may not have to worry about. These didn’t factor into my estimate of this project taking five days in total.
Here was a list of our cabinet to-dos:
- We had to add trim pieces to the doors to accommodate the new hidden hinges. You can read more about that process here!
- Our previous shelves were warped fiberboard and were covered in shelf-liner, so we opted to replace them and built cabinet-grade plywood shelves.
- We added crown molding.
- We had to do some carpentry to fix and reinforce the sink cabinet to support our Farmhouse sink.
- Some of the cabinets were damaged and sagging, so we also had to reinforce them. They’re not solid wood all of the way through and are made partially from fiberboard.
- We built a custom range vent cover with hidden storage.
Once we accomplished all of these tasks, we could finally start on the painting process. Once you get to the painting, it moves very quickly! Unfortunately, you’re in for a long process before that happy step. I promise it’s all worth it in the end!
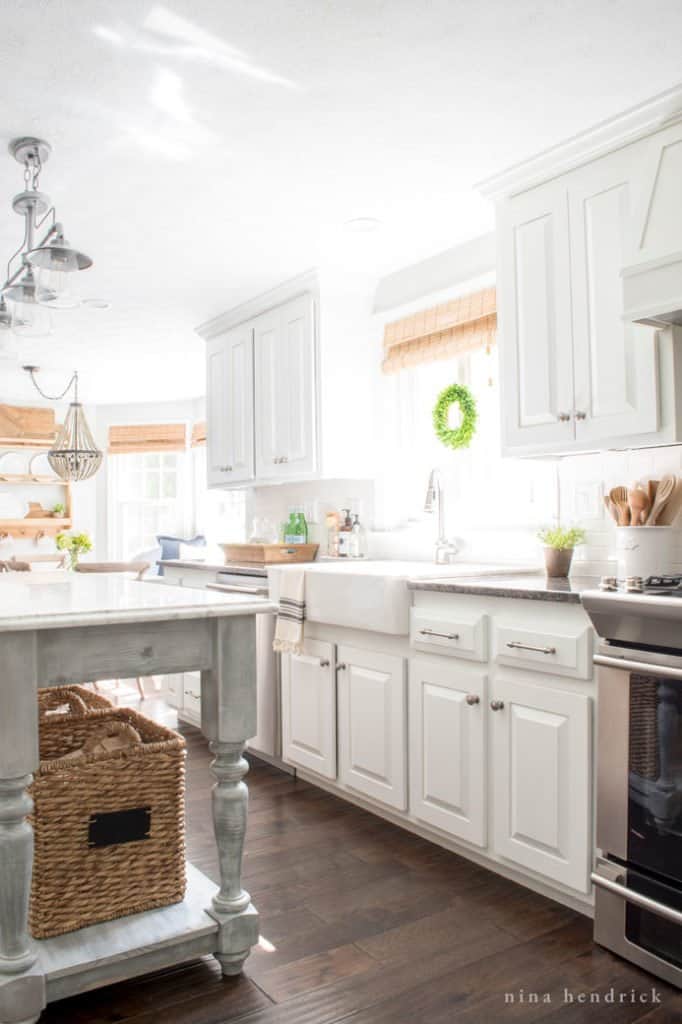
Project Tools & Materials for Painting Oak Cabinets
You can easily shop these items in one place from my Amazon storefront!
Tools
- Orbital Sander
- Step Ladder
- Shop-Vac with Brush Attachment
- 1 1/2″ Putty Knife
- 3″ Putty Knife
- 2″ Angled Paint Brush
- Mini Roller Kit
- Paint Measuring Cup
- Paint Sprayer
- Air Compressor (optional— for spraying dust off cabinet doors and drawers)
- Caulking Gun (optional)
Materials
- TSP Substitute
- Painter’s Tape
- Plastic Sheeting
- 80-Grit, 220, and 320 Sanding Blocks
- 80-Grit, 220, and 320 Sanding Discs
- Drydex Wall Spackle
- Oil-Based Primer
- Insl-X Cabinet Coat Paint
- Distilled Water
- Caulk (optional)
How to Paint Oak Cabinets and Hide the Grain Step-By-Step Tutorial
Step One: Gather Your Supplies
Make sure you gather everything from the list above. Trust me that you won’t be wanting to make a trip to the hardware store partway through the project!
Step Two: Remove Everything from the Room
I mean everything. There will be a lot of dust created! You will want to completely clean out your cabinets, junk drawers, everything. This was a good opportunity for me to employ some tough-love and get rid of the kitchen utensils and items that have never been used. This process alone can take you quite a while, depending on how disorganized you are (and I was very disorganized!).
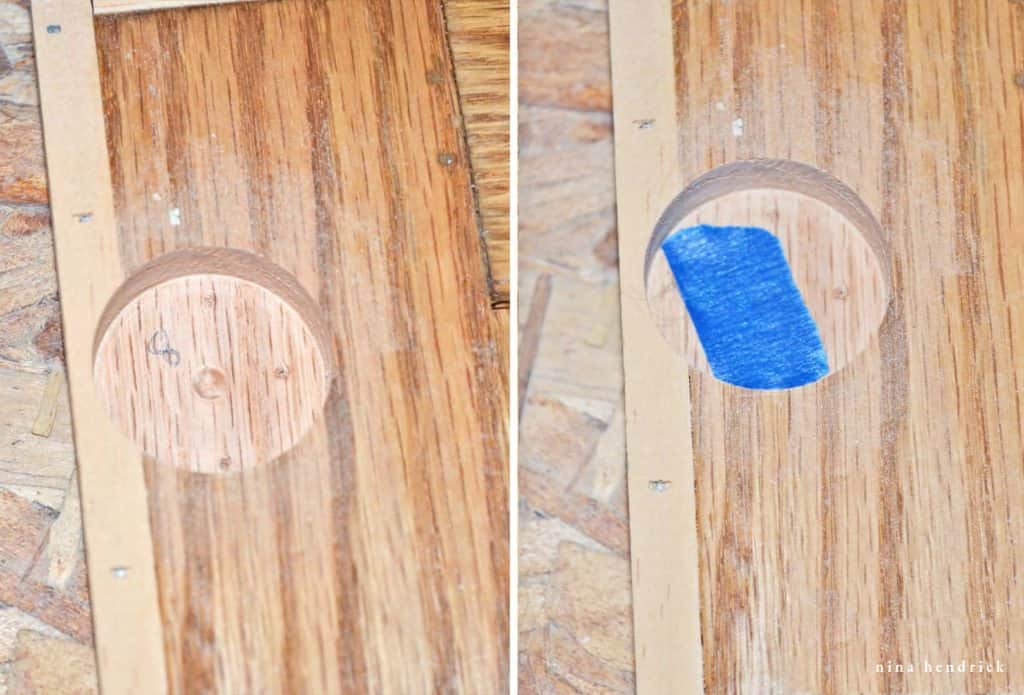
Step Three: Remove and Number Doors & Drawers
If you’re saving hardware, make sure to place it in baggies or envelopes with corresponding numbers. We were replacing the brass/porcelain hardware, so we skipped this step. However, we still made sure to number our doors and drawers, since we have custom-built cabinetry (built in place versus individual pre-built cabinets) each door is slightly different in size. No matter what, it’s a good idea to number everything, just in case.
Step Four: Vacuum Cabinet Boxes and Wipe Down with TSP Substitute
You’ll want to make sure that there’s no dust or dirt in or on any of the cabinets because it will impact your eventual finish. Vacuum everything. You can probably use your regular vacuum for this part if you wish. Then wipe down with TSP substitute. Since we were living in the house while renovating, we wanted to avoid actual TSP. The substitute is a good alternative, but it is still a chemical, so make sure to have proper ventilation while you use it.
Step Five: Remove All of the Appliances
To get an all-over finish, it’s best to remove your appliances and put them out of harm’s way. This means out of the room completely. We tried to delay this step as long as possible to keep our kitchen functional.
Step Six: Seal Off Your Kitchen
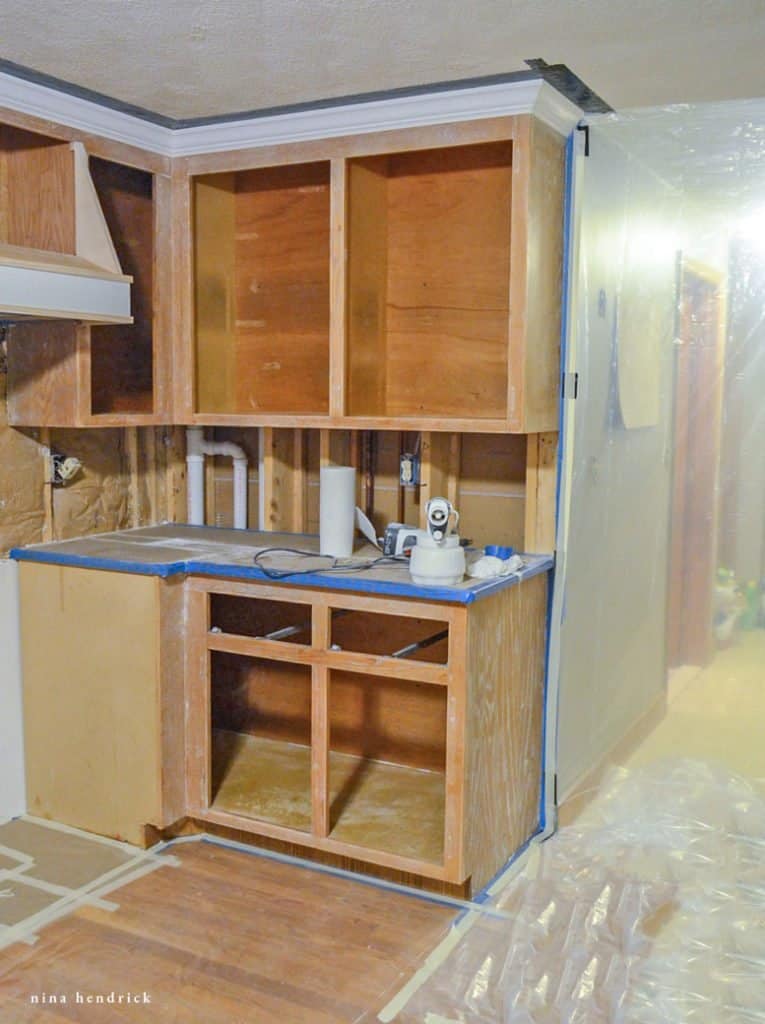
As mentioned in Step 2, there will be A LOT of dust… and also overspray. You’ll want to seal off every opening to other rooms, and completely cover your floors and walls with plastic. You’ll also want to protect your countertops. Anything that you don’t want permanent specks of white paint on, cover it up! You’ll probably end up with a plastic room by the time you’re done! Since we have the textured plaster ceiling, we had to attach the plastic sheeting to the ceiling using Gorilla Tape, since the painter’s tape wouldn’t hold.
Step Seven: Sand Cabinet Frames with 80 Grit Sandpaper
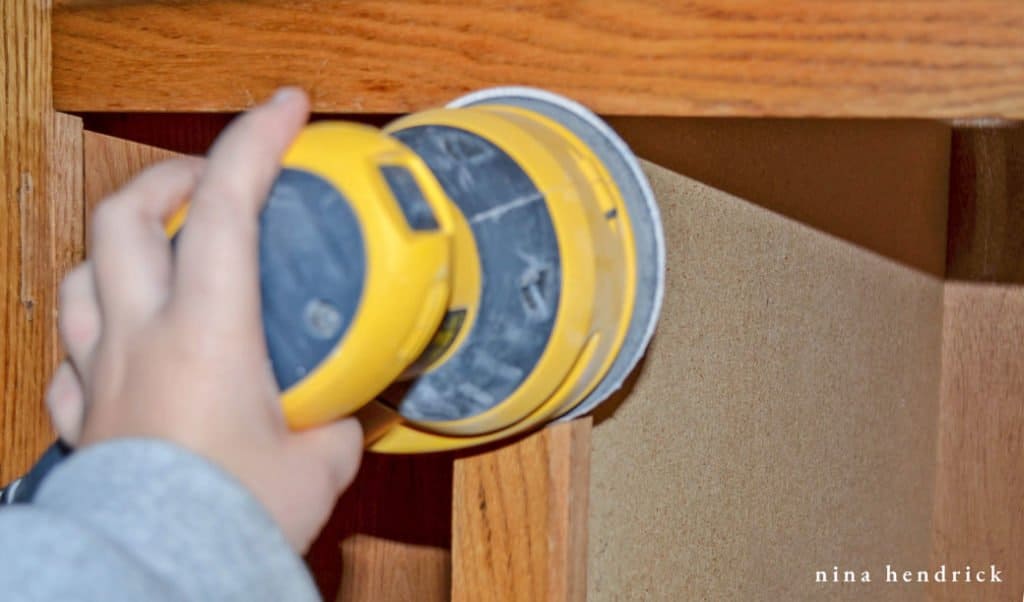
We attached our orbital sander to our shop vac to try to minimize the dust impact on the room as a whole. We focused on damaged areas (there were many, especially under the old hinges and around the sink). It’s okay to leave some dust behind on the cabinet faces, since it’s actually helpful in the next step.
Step Eight: Fill in Grain and Imperfections with DryDex and a Putty Knife
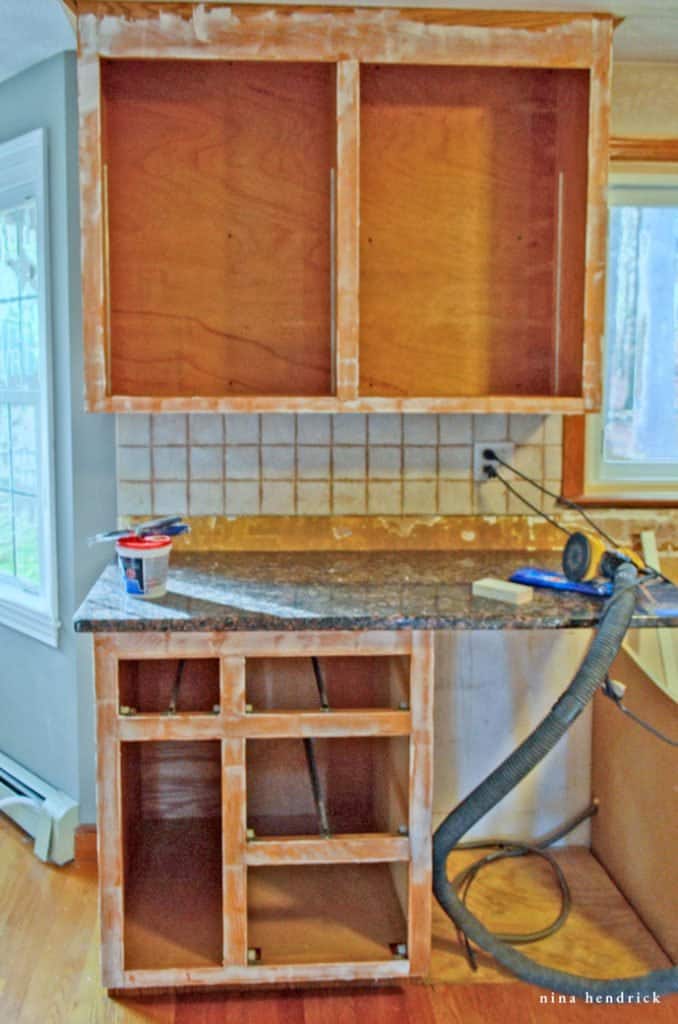
You only need a thin layer of DryDex, just enough to cover the grain. If you apply too much, you will just create more sanding for yourself in the next step (speaking from experience!). Areas with damage or screw holes (like in our case, where the exposed hinges used to be) may require a light second coat of Drydex. Allow for the recommended drying time in between sanding and coats, or else it will pill up and become ineffective.
Step Nine: Sand with 220 Grit Sandpaper
Use your orbital sander attached to your shop vac. This time you don’t want to leave any dust behind whatsoever. Go around with a tack cloth and wipe everything down (Don’t use a damp cloth. It will remove the Drydex from the grain).
Step Ten: Primer
You’re getting there! This is much less of a job if you are only doing your cabinet faces and ends. We opted to paint the inside of the cabinets as well (there were a lot of stains and damage) so I used a mini foam roller and a brush and Kilz Original Primer to get the job done.
It’s important to use an oil-based primer because of the tannin in the oak. Tannin is an orangey-brown oil that will bleed through if you use a water-based primer. We were told that the Cabinet Coat included primer. It does, which works out great on maple or pine, but on our oak test swatch we ended up with swirls of tannin without the primer.
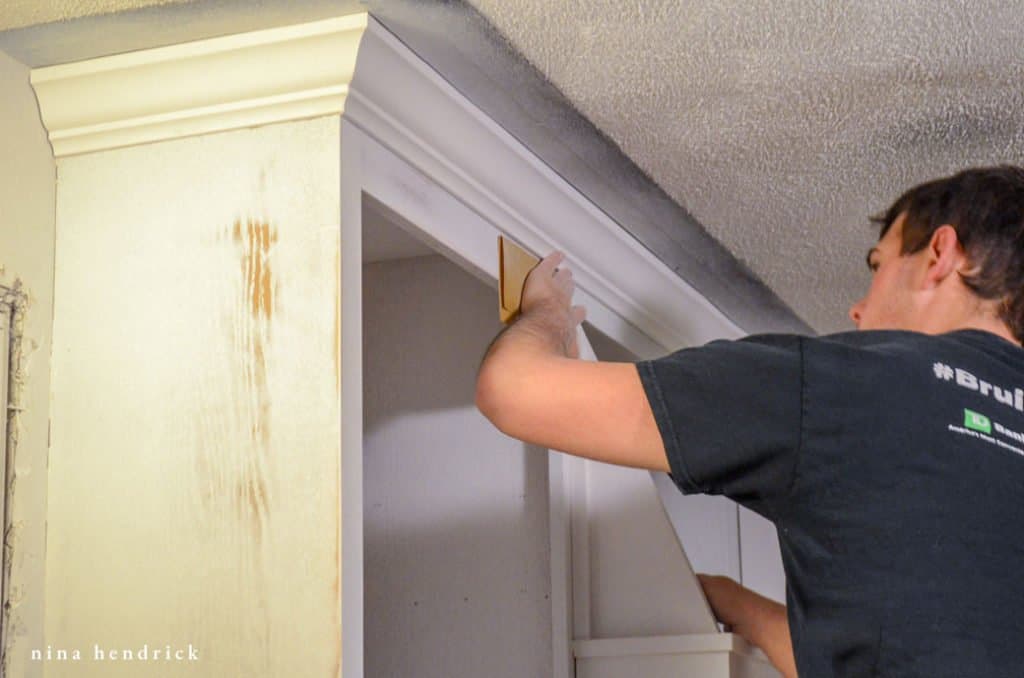
Step Eleven: Sand with 320 Grit Sandpaper
Do you love sanding yet? By this point, sanding is your best friend (HA!). Sand it all down lightly by hand, because the orbital sander will remove too much of the primer. I recommend a sanding block. Trust me, throughout this project, I tested all options. The sanding block is much easier to hold than regular sandpaper. Then vacuum up all of the dust with a brush shop-vac attachment, and run the tack cloth over it again for good measure.
Step Twelve: Primer Again
We learned that it is much easier to get the desired coverage when you use a few coats of primer to create a mostly solid white canvas for the final coat of paint. Really, the primer is your workhorse in this project (well, other than you, that is!). Repeat the steps above until you feel satisfied that the cabinets are white.
Step Thirteen: Prep Doors & Drawer Fronts
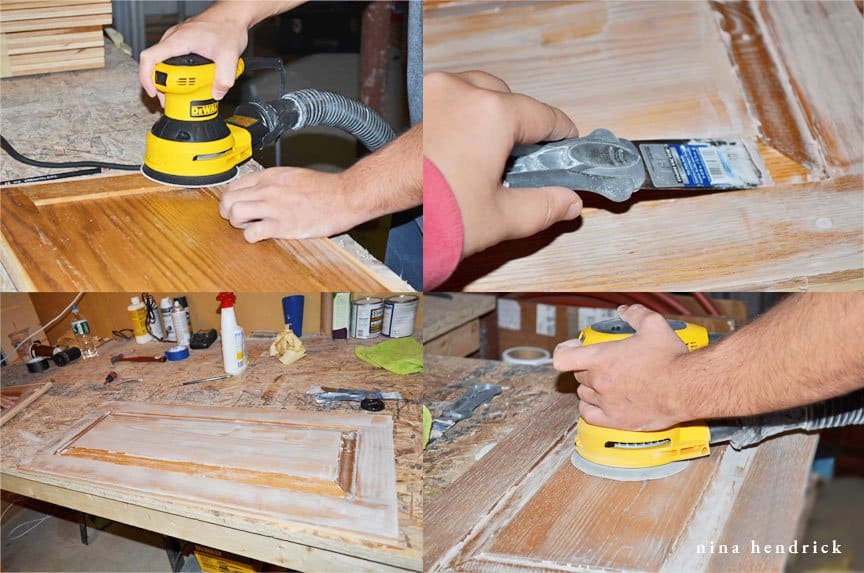
Find a large flat area and repeat Steps 7-12 on your doors and drawer faces. The sanding blocks I recommended are also for this step since an orbital sander won’t get into the door detail.
While using your Drydex, I recommend using a smaller putty knife to get into the detail, if your door or drawer has routed areas.
This is the step where the two optional items on the Materials List come into play- the air compressor and the Kilz Spray Primer. After sanding in between coats it is faster to spray the details with the air compressor to remove dust (rather than using a tack cloth). If you already happen to own one, it’s convenient- but it isn’t necessary to go out and buy one for this project.
Additionally, if you have a space for spraying primer and proper ventilation, it is much quicker to use the cans of spray primer on your doors and drawers. We happened to have access to a professional spray booth, so we brought the drawers and doors there and sprayed the primer on. It definitely got the details better than a brush. It was so much faster, but more costly as we went through at least a dozen cans of spray. As with any project make sure you are wearing a safety mask when spraying with aerosol!
Step Fourteen: Caulk all Cracks and Detail (Optional)
My biggest mistake when we did the project was that I saved this step for last. Five years later, the paint never yellowed, but the caulking did. Learn from my mistake, make sure to caulk before doing the final coat of paint!
I should also mention that this step isn’t required. Wood expands and contracts, which may cause the caulk to crack. After speaking with a local custom cabinet maker, they don’t caulk all of the seams for this reason.
Step Fifteen: Prep your Paint & Paint Sprayer
As mentioned earlier, you will need to dilute the Cabinet Coat with distilled water. It’s best to follow the dilution instructions with your paint sprayer, but it may require even more tweaking. This is where your measuring cup comes in handy! Keep track of how much distilled water you’re adding. Once you figure out the correct dilution, make note of it so you can dilute the refills properly!
Step Sixteen: Test the Sprayer
Whatever you do, don’t immediately point your sprayer at the cabinets and begin spraying. Even after each refill, use a test board (we used an extra leftover piece of drywall) to make sure that your adjustment is correct on your paint sprayer.
Step Seventeen: Paint Cabinet Boxes with Sprayer
Important Tip: Paint small areas and tough angles first!
An example of a tough area is the back of the face frame inside of the cabinet. It’s always easier to fill in a large flat area than to risk overcoating tough to reach spots. Remember, if you overcoat, that means you have to sand again. :) Those awkward angles also become even more difficult to paint if you’re avoiding already wet surfaces.
The best technique is to move the sprayer continuously with smooth, long strokes. The nozzle of the sprayer can be rotated for horizontal or vertical strokes, depending on the direction of the surface you’re painting. We did two coats on the cabinet boxes, with plenty of drying time between coats.
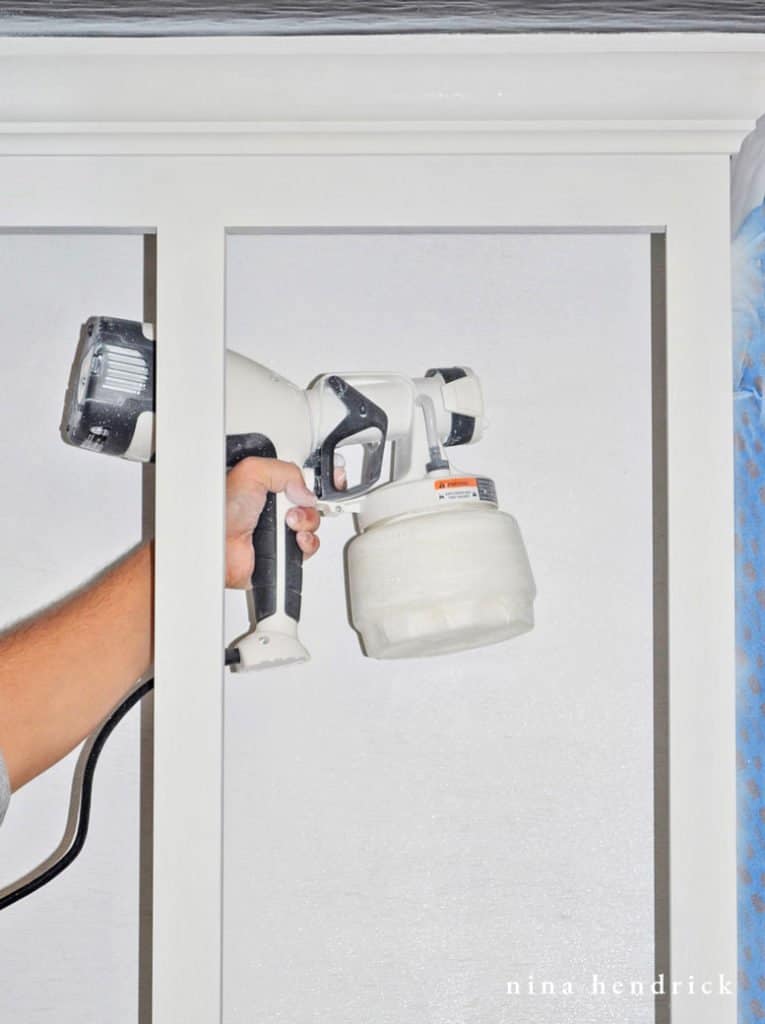
Step Eighteen: Set Up Doors and Drawers and Spray
The doors must be set up in an upright position for spraying. We created a “spray booth” of sorts in our basement by putting a drop cloth over our workbench and putting a piece of scrap drywall behind it. We started with the backs and sprayed with the technique described above.
After allowing for drying time, we sprayed the second coat. We then flipped the doors and repeated the process with two coats. We then repeated the process on the drawers, opting to paint both the outside and interior. Your cabinet doors and drawers may end up requiring more than two coats- but we feel that two is the minimum. After all of our priming, two coats were more than enough for us!
After everything was dry, we rehung our doors and replaced our drawers. It was the moment of truth! I could have cried with happiness (but I’m a little dramatic).
Quick Reference (and Printable) Painted Oak Cabinets Tutorial
You can print the card below as a quick reference while you’re completing the project, but make sure to read the steps above for an in-depth explanation. If you love this project, please don’t forget to come back and leave a five-star review!
How to Paint Oak Cabinets and Hide the Grain
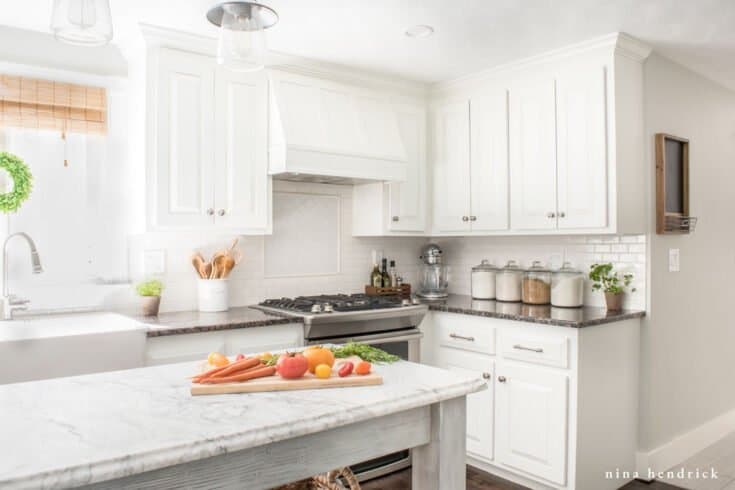
Follow my proven process for how to paint oak cabinets and hide the grain to achieve a completely smooth and professional finish.
Materials
- Orbital Sander
- Step Ladder
- Shop-Vac with Brush Attachment
- 1 1/4" Putty Knife
- 3" Putty Knife
- 2" Paint Brush
- Mini Roller Kit
- Paint Measuring Cup
- Paint Sprayer
- Air Compressor (optional— for spraying dust off cabinet doors and drawers)
- Caulking Gun (optional)
Tools
- Orbital Sander
- Step Ladder
- Shop-Vac with Brush Attachment
- 1 1/4" Putty Knife
- 3" Putty Knife
- 2" Paint Brush
- Mini Roller Kit
- Paint Measuring Cup
- Paint Sprayer
- Air Compressor (optional— for spraying dust off cabinet doors and drawers)
- Caulking Gun (optional)
Instructions
- Gather your tools and materials.
- Remove everything from your countertops, cabinets, and drawers. This is the perfect opportunity to declutter!
- Remove and number doors and drawers. Store any hardware you're saving in labeled plastic bags.
- Vacuum cabinet boxes and degrease with TSP substitute.
- Remove all of the appliances if possible so you can give the cabinets an all-over finish.
- Seal off all other surfaces with plastic sheets and painter's tape to protect from overspray.
- Sand cabinet faces with 80 grit sandpaper using your orbital sander attached to a shop vac to gather dust.
- Fill in grain and other imperfections with a thin layer of Drydex spackle using a putty knife.
- Sand with 220 grit sandpaper. Follow with a dry tack cloth, removing all dust.
- Use a mini roller and brush to prime the cabinets with an oil-based primer.
- Sand the primed cabinets by hand with a 320 grit sanding block. Remove all resulting dust with a shop vac.
- Repeat steps 10 and 11.
- Prep all of your drawers and cabinet doors for painting by cleaning with TSP substitute and repeating steps 7 through 12.
- (optional) Fill all cracks and detail with caulk.
- Prep your paint and paint sprayer with the correct dilution of distilled water.
- Test your paint sprayer to make sure there's no orange peel.
- Using your paint sprayer, paint your cabinet boxes with smooth and continuous strokes. Paint small areas and tough angles first!
- Set up doors and drawers in an upright position on plastic and spray. I recommend a minimum of two coats.
Notes
You do not need to sand again after priming or use a topcoat.
Pin It for Later
Have a question about this project?
Check the comments of this post below, as there are more questions answered! You can also visit the FAQs post here or see how the cabinets held up after five years here. For all of the kitchen details, you can visit this page!

Wow professional job!!! I noticed you replaced your under-
mount sink with a farm sink, and you had to cut your cabinet down. Can you tell me how you went about that??? How did you measure for your sink? I currently have granite but with a cheap drop in sink.
Hi Michele- Thank you! We have all of the details about our Farmhouse Sink here!
We are currently in the process of sanding our cabinets and we just aren’t sure how sanded they have to be? Do they just need a light sanding or are you bringing them back to an unfinished wood? I’ve been a little picky and have sanded some of them right back to natural (with the exception of a few spots that you just can’t really get that well), but am just not sure if that’s necessary.
Hi Rebecca,
We basically brought them back to unfinished wood! That was the only way to open up the grain for the Drydex. Basically you have to open up the grain in order to eventually fill it in. I hope that makes sense!
Beautiful job! What did you have to do to your base cabinet to make it ready for the farmhouse sink?
Hi Kelly- Thank you! We have all of the details about our Farmhouse Sink here!
Hi! I am so thankful for this blog. my husband and I have just spent the last 2 months painting our kitchen cabinets. The boxes are done and look great but the doors (which we just finished today) look awful. We barely survived the first attempt and now we are facing it again. :( I read your blog and I felt like all of our issues were covered here. The black grain shows through and we have the orange peel look. We have the same paint sprayer and we trade a sanding sealer that was recommended on another blog. We are going to sand everything off and try the drydex but i’m a little nervous about mixing the paint to avoid the orange peel look. Can you help me?
Hi Alicia! We found it was best to add the water in slowly in order to thin the Cabinet Coat. For example, try adding in 2% dilution first, then test it and see if there’s orange peel- if so, adjust the sprayer and a another 2% of water. Build your way up until you achieve the correct consistency without orange peel and without over-thinning. I hope that helps and good luck!!
Hi Nina. We’re bored of our lovely solid oak kitchen. Of course not all of the wood is actually solid oak e.g. Cornicing and plinth covers at floor level. You can see that when you contrast the naturally ageing oak. So the question is how does the veneer look when painted?
Thanks
Judi
Hi Judi,
Our kitchen was all solid oak, no veneers, so unfortunately I didn’t research how veneer looks when it’s painted. Sorry I couldn’t be of more help!
Nina
Hi Nina! I noticed when you put the new backsplash in you removed the granite edge piece that went up the wall (I am not sure what it is called) when u removed it was the granite underneath ruined at all? I would like to remove mine as well so the backsplash goes all the way Down to the counter top like yours does now. Thanks!
Hi Colleen! I apologize for being so late to answer, I took a step back from the blog when my daughter was born last winter. This is a really great question! Our countertop was not damaged by removing the matching strip of backsplash, but there was silicone adhesive left behind that we carefully scraped off. Also, a word of caution- in our bathroom the backsplash strip was used to hide a very uneven gap between the countertop and wall. If you discovered something like that, I would recommend installing a thin piece of white trim around the perimeter to cover the gap before you begin your tile.
How wide is your kitchen? Thanks!
Hi Mary, it is 12′ wide! Technically we left less open space around the island than a kitchen designer would recommend- but we can still move easily and open cabinets and appliances without issue- so we are happy with it :)
Did I miss how long this took? That is vital information to be used to convince my husband! From the day you actually started taking things apart to rehanging the cabinets, how long did this take? THANKS!
Hi Amy! It really depends on the size of your kitchen and the pace you choose to work. We did it in phases, during weekends, and took some breaks when it got overwhelming. It took us 4 months. If you wanted to get it done all at once, it could be done in a week straight (assuming the kitchen is the same size as ours!). I know that sounds like a ton of time- but I would personally do it again in a heartbeat!
I think ours is about the same size and layout as yours. I just love how yours turned out! I am thinking about tackling just the kitchen island first because I think that would be cute white either way. Then I can get a little taste for how it will go and make my mistakes on the parts that don’t show.:-) Thanks for the detailed tutorial!! That really helps me see how it will REALLY go. I am in favor of kicking my family out for a week and going for it! Ha!
Did you ever decide on a sealant? We just finished my craft room and are looking to move to the kitchen next. We used Polycrylic on my desk top, but it has a tacky feeling to it, and I’ve already pulled up the paint in several places because my machinery will stick to the desk. It’s been a few months since we’ve applied the Polycrylic. If you used it on your kitchen cabinets, have you had this issue?
Hi Jessica! I actually decided to leave the Cabinet Coat as is- no poly or any other kind of sealant. 6 months later there is no chipping whatsoever, even where the drawers and cabinet doors bump the cabinets. And that’s with two young kids slamming things shut all of the time :) I have been so impressed with the Cabinet Coat!
Hi again. How long did you wait to hang the cabinets and put on your hardware. I have read in some places to wait as long as two weeks!! I was thinking letting it dry for 24 hours….Thanks!! We are starting NOW! =)
I’m so sorry I missed this- I want to make sure the answer is here for future reference- the Cabinet Coat takes about a week to cure! I hope you love your kitchen, Jill!
Thanks for the detailed tutorial! We are getting started in two days on the kitchen in the home we just bought (it has the ugly grainy oak too). We have two weeks to do it – hoping that is enough time!! I am printing out your post to help guide me!
I was wondering if you had made a decision about what sealant you are going to use.
Hi! We’re actually going to leave just the Cabinet Coat, for the time being. It’s holding up very well, and is extremely easy to clean!
Nina, you may be one of the few who can answer this question: We also want to paint our oak kitchen cabinets which are similar to yours, but rather than a rectangular shaped inlay, they are that awful cathedral style inlay. I would rather have a plain flat panel than to see that awful arch (especially on the more narrow cabinets). In all your research, what product could I use to completely fill those deep crevices made by the arch shape?
Hi Pamela!
I have heard really great things about Epoxy Wood Filler, although I’ve never personally used it. I remember seeing a blog post where a whole missing furniture leg was sculpted out of it! I can’t remember the post, but it sounds like it may be something worth looking into. I hope that helps!
http://www.minwax.com/wood-products/maintenance-repair/minwax-high-performance-wood-filler
Nina, I wish to use this tutorial to paint unfinished oak media cabinets/bookcases. Since I am starting with smooth, unfinished oak, do I need to do anything different, or start with the Dryex and follow the steps as shown?
Hi Patty! I would still follow the tutorial, including the Drydex. But- Lucky You- you will probably have much less sanding to do before the first step! :)
Beautiful! Can you share what you did about the hidden hinges for the cabinet doors?
I would love to know about the hidden hinges as well. I just scheduled a painter to do our kitchen (after doing 2 bathrooms I have no desire to tackle the kitchen!) and I am researching hinges. I have been looking into Blum hinges, but am curious about yours. Thanks!!!
Hi Theresa! Changing the hinges was a bit of a process. Our cabinets were partially inset with a 1/4″ lip. We had to first add a thin filler strip so that they would sit flush. Then we had to figure out the correct angle for our overlay before we ordered the hinges. We worked with Blum (http://www.blum.com/us/en/01/20/10/) and they had excellent customer service to help us figure out the particular angles and corresponding parts we would need! Our particular parts probably won’t be of use to you- there are thousands of combinations- but they will help you find the right ones based on your specific measurements. We ended up eventually ordering the Blum hinges from Amazon, as it was the best price. I’ve attached a photo link of the filler strip and recessed space that the hinge went in. As I said, it was a bit of work- but I think it really helped give the room a more professional look. I hope that helps!
https://www.ninahendrick.com/wp-content/uploads/2014/02/Step2.jpg
I’m just wondering if you happened to try out the Benjamin Moore Advance paint that lots of people recommend to paint wood cabinets? They said it has a hard finish and is very self levelling? I have oak cabinets just like these and want to paint them soooo badly but everyone keeps saying I’ll hate the finished product because I’ll see the grain, but I love white and hate my dark oak cabinets! So this summer I hope to find myself painting cupboards! Thanks for all the tips! Your kitchen is awesome!
Hi Lyndsay! I painted my office cabinets and built-ins with Benjamin Moore Advance. It’s true that it has a very hard finish, and it was self-levelling. Unfortunately, a year later it’s chipping. So I crossed it off my list of possibilities! But that is what I paint my trim with in the rest of my house, and I am very happy with it for trim!
What an excellent tutorial! Were your cabinets oak? Mine are maple so maybe I wouldn’t have to worry so much about the grain?
Thank you so much Elaine! Yes, my cabinets are oak. Maple is a very smooth wood and is generally what “designer” white cabinets are made from (Kraftmaid, etc.). Lucky you, you would get to skip the grain filler if you decided to do this process! :) If I had maple, I would still make sure to de-gloss, sand, and prime before spraying the cabinet coat.
Thanks so much for all your info. Do you know f the Cabinet Coat yellows over time? I was told that BM Advance could. Deciding between the two. Also, how long was the curing time? Some say BM takes a few months. EEk!
I have used both products. I prefer the Cabinet Coat for anything that you will be using as a surface (like a shelf), but the BM Advance does work very well for wall treatments and doors. In my particular experience, we didn’t experience yellowing with either product. The Cabinet Coat is especially bright white still! The curing time for the Cabinet Coat was fairly quick, it was only about a week. I would agree about BM Advance, it takes a long time to cure. I grew impatient and put things back on my office built-ins about a week after they were painted with BM Advance and things stuck and chipped the paint.