
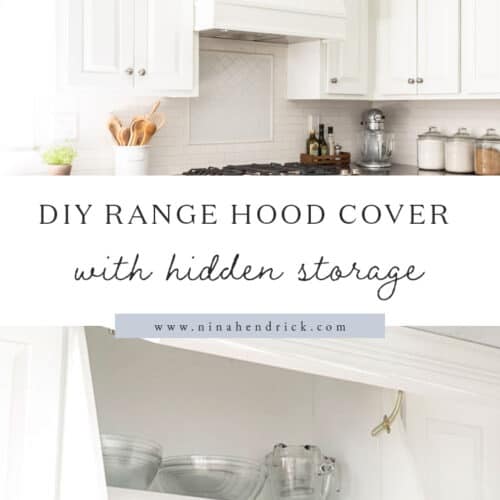
Rather than wasting the space, learn how to use the existing ducting and cabinet above your stove to create a custom DIY range hood cover with hidden storage.
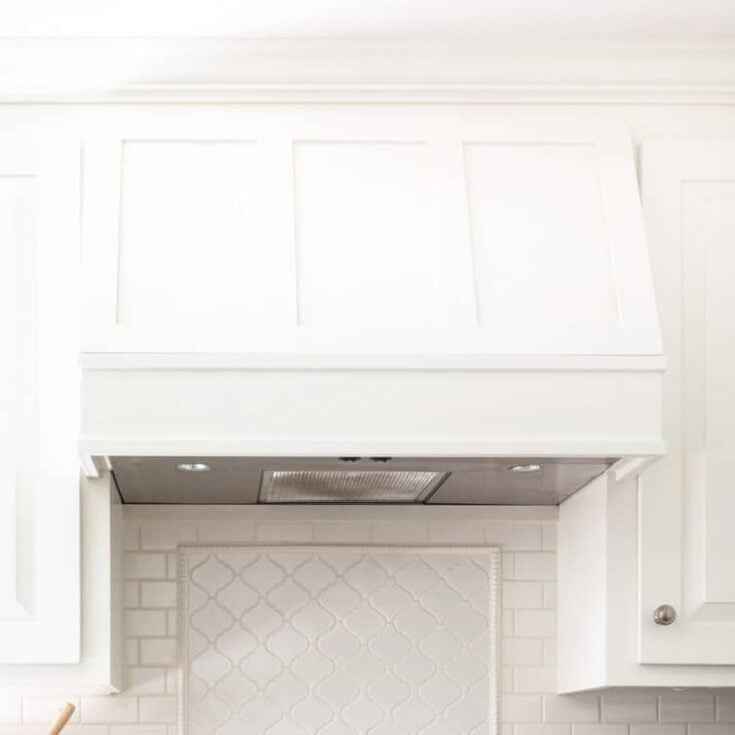
In our painted kitchen makeover, this DIY range hood cover has gotten almost as much attention as my post for how we transformed and painted our dated oak cabinets! Why, you may wonder? Well, not only did it make the ugly space above our range so much prettier, but our new vent hood cover has a secret: you can lift the front for hidden storage!
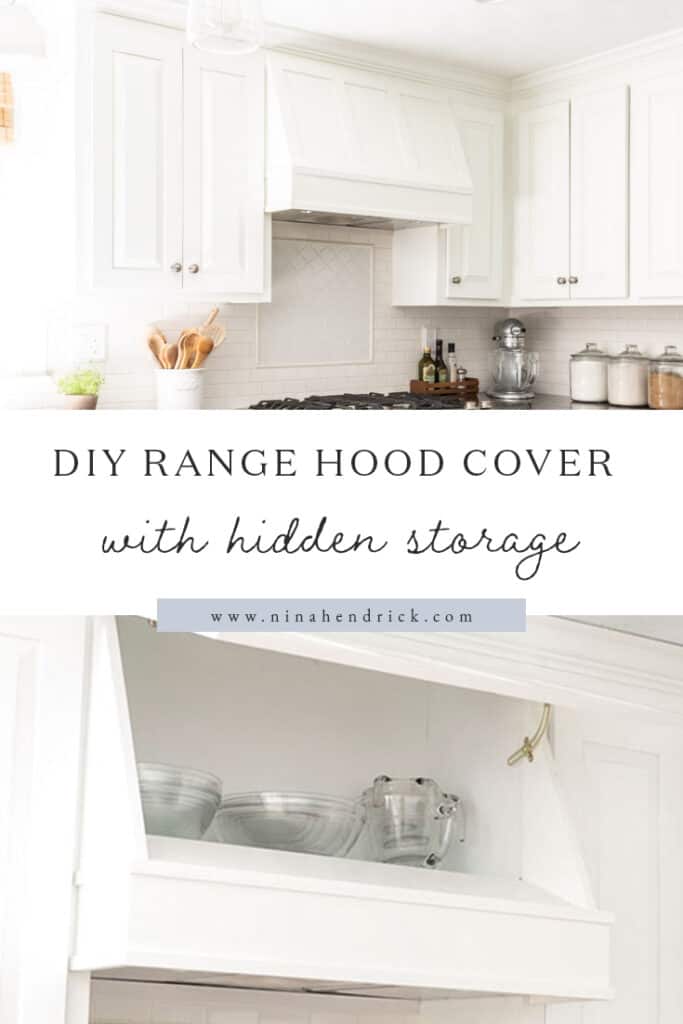
DIY Range Hood Cover with Hidden Storage
Originally published March 19, 2014. Last updated February 17, 2022.
This post contains affiliate links. Please see my disclosures here for more information.
I have to give all the credit for the extremely cool “range hood with storage” factor to my husband Mack. While we were in the planning stages of the kitchen, I presented him with a beautiful high-end inspiration photo of a vent cover with board-and-batten trim detail.
He not only had a clear vision for how he would build it, but he also saw the potential in keeping it functional by recycling the existing cabinet as a hidden storage area. This is especially helpful if you have a small kitchen with a lack of storage!
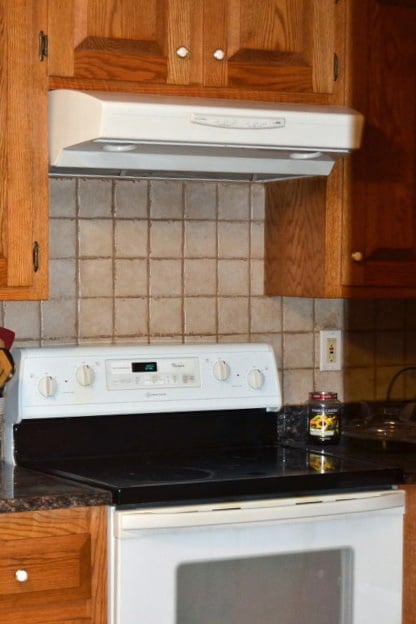
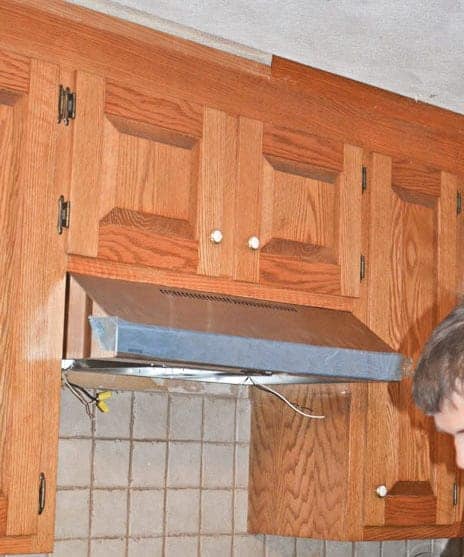
Before
When we bought the house, the white range vent was exposed and prominent. It was permanently discolored and very greasy inside. I knew immediately I would want to swap it out during the kitchen makeover!
We had a few considerations when choosing a new range hood. Most importantly, we had to make sure it would fit the existing ductwork that vented outside, which attached in the back of the current ugly white vent fan.
Choosing a New Range Hood
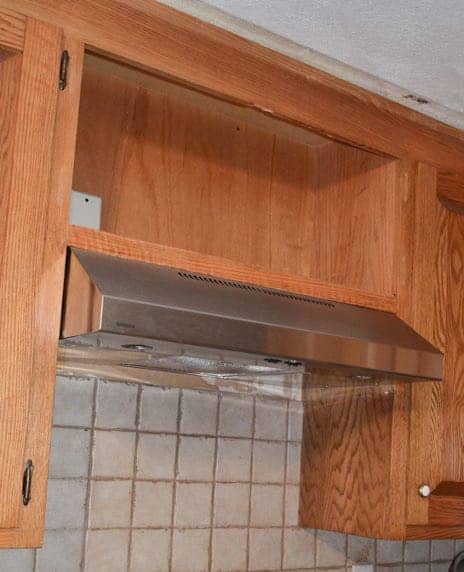
Unless you already have a range hood with a nice angle and buttons on the bottom, chances are that you’ll need a new one for this project. This is the newer version of our range hood. I chose it because it was stainless steel and had the buttons on the bottom rather than the front, so it was perfect for our purpose! Plus, it was pretty inexpensive at under $200.
We followed the standard installation instructions, and luckily it fit perfectly and easily with the existing ductwork. I didn’t get a photo, but it was a simple matter of attaching it in the back at the existing connection, which vents to the outside. They made the range hood to install either out the back or through the top. In order to complete this project without ducts going through your storage area, you’ll need the back installation as well.
DIY Range Hood Cover with Storage Tutorial
Rather than wasting the space, learn how to use the existing ducting and cabinet above your stove to create a custom DIY range hood cover with hidden storage.
Materials
- 3/4" Plywood
- 1x2 Pine Board
- 1x4 Pine Board
- Lattice Moulding for Battens
- Lattice Moulding for Borders
- 1x6 Trim
- Wood Screws
- 1 1/4" Finish Nails
- 5/8" Brad Nails
- Euro Hinge
- Friction Lid Support
Instructions
- Install your new range hood. Make sure to vent it outside, preferably through the back of the range hood.

- Modify the cabinet above your range. This may include taking out the center divider and patching any old holes and damage.

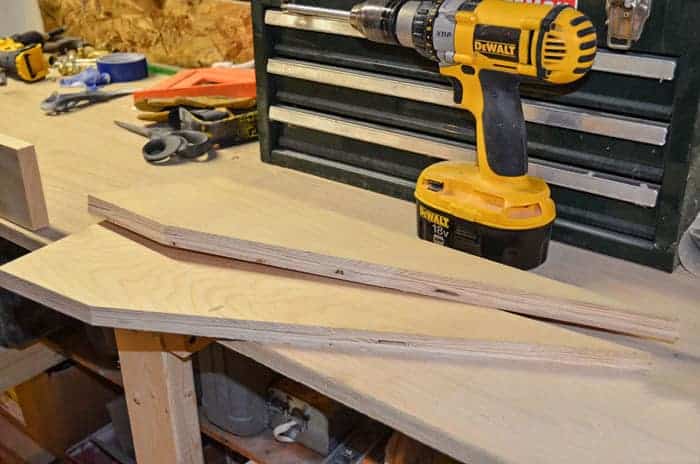
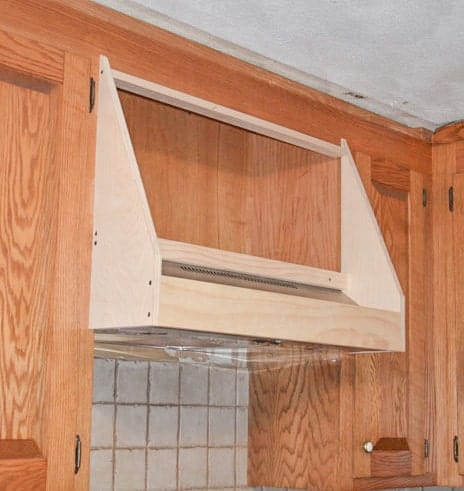
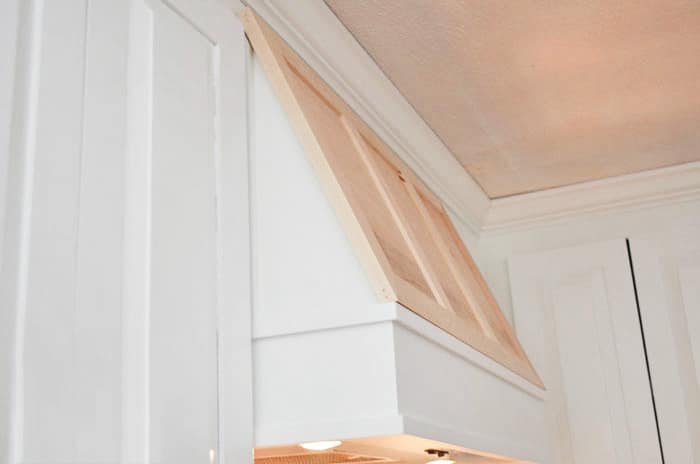
- Measure and cut the plywood for the sides. You'll want to measure from the top of your cabinet to slightly below the range hood, from the front of your upper cabinet past the front of the range hood, and from the bottom to the top of your range hood. From there, create the angle to connect the top front measurement to the top of the cabinet measurement. Test fit your plywood piece for any needed adjustments and then install.

- Measure and add horizontal braces to connect the sides at the top of the range hood and at the front. They will provide support for the bottom panel. Measure, cut and install the bottom panel. The panel covers up the top of the vent, but I recommend leaving enough of a gap so that it directs the air down from the fan to help it circulate.

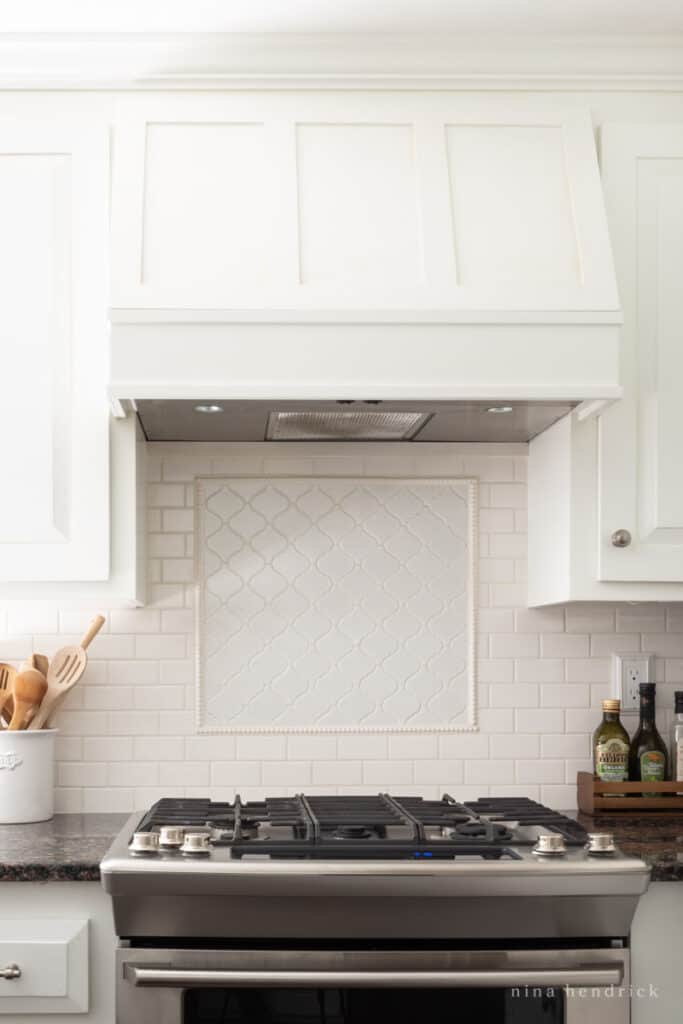
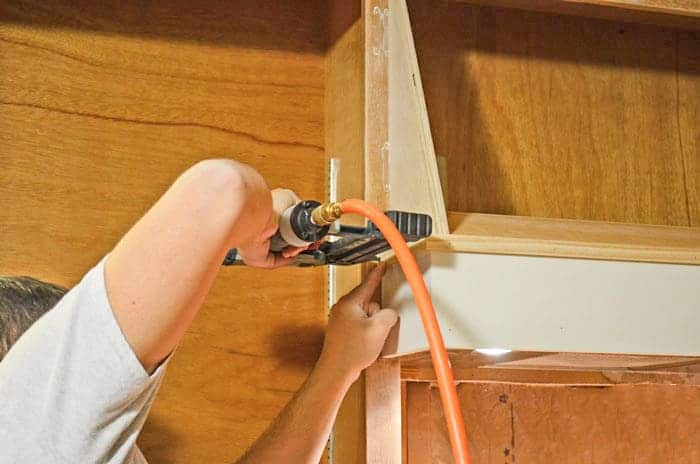
- Add trim for architectural detail. We strategically placed the screws to install the side panels so that they'd later be hidden by trim pieces. Cover structural plywood with 1x6 finish trim using mitered corners around the base of the range hood cover. Optional: lattice moulding detail or border trim as desired.
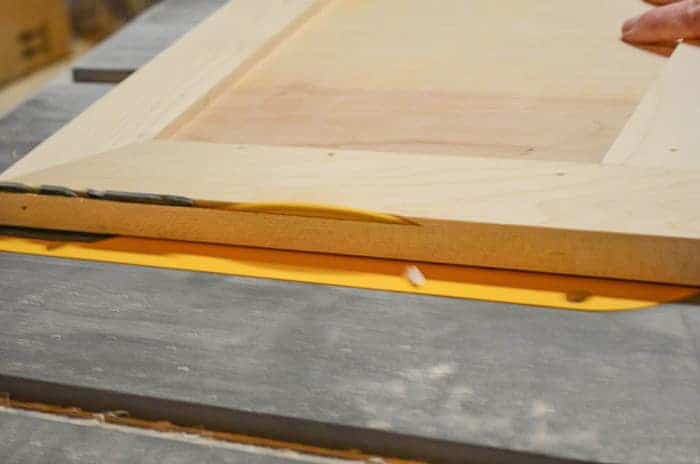
- Build your door. To create the door, first measure your largest outside dimensions of the existing range hood cover opening. This will ensure you'll keep an even reveal after all trim cuts are made. Build your pine frame first. Create a rabbet joint around the inside of your frame using either a router or a table saw and miter the corners of your frame. Measure the dimensions of the rabbet joint and cut and inset your plywood panel. Optionally, add an extra trim batten with lattice moulding down the center on the front of the door.

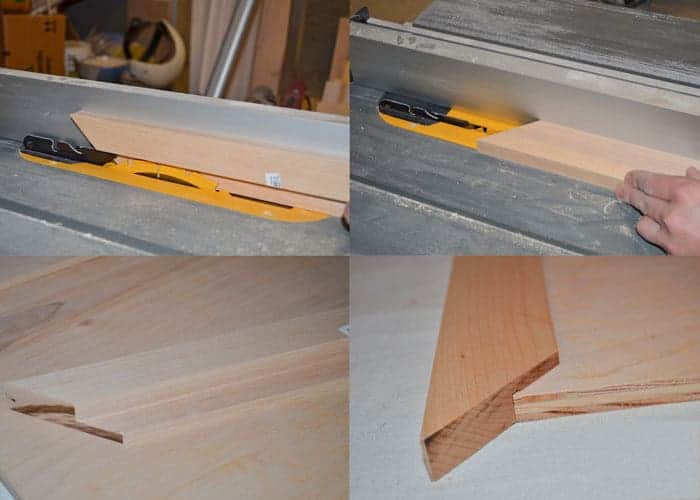
- Template your angle cut for the bottom of the door. Hold up a scrap piece of wood and scribe a mark to identify the angle for your table saw. Cut a scrap piece to test your length and angle to make sure it fits before you cut your door. Trim the bottom edge of your door with the angle you just found using your table saw. Test fit. To get it perfectly flush, sand the bottom of your door until it sits perfectly.
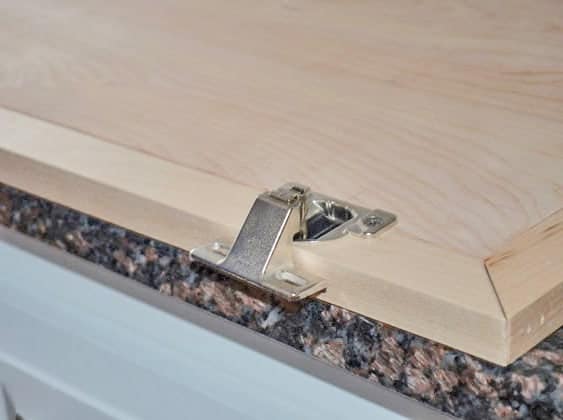
- Use a hinge jig and bit to drill for and install euro hinges. Before drilling into your door, use your test piece from step eight to verify hinge locations. Once you're satisfied, drill for euro hinges and install your door. Install a friction lid support so that your door will stay open when you need to access the cabinet.

- Fill in any nail holes and sand. I recommend painting with a paint sprayer for maximum coverage, especially on the door.
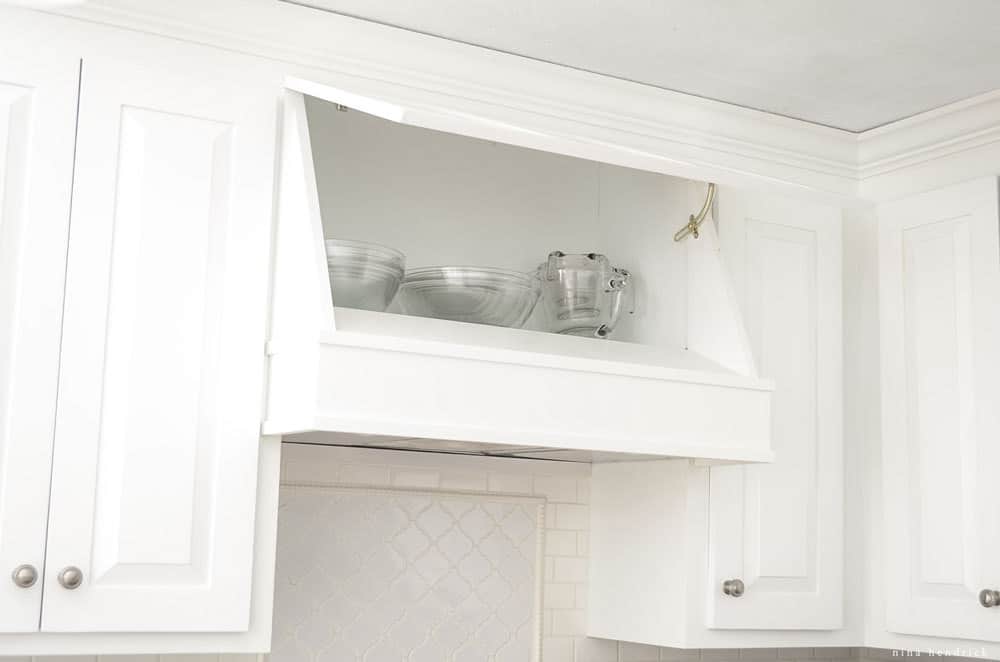
Here’s a view of the friction lid support in action! This is a great place to store less-used bowls. The friction lid support allows me to put things back and take them down without having to worry about the door.
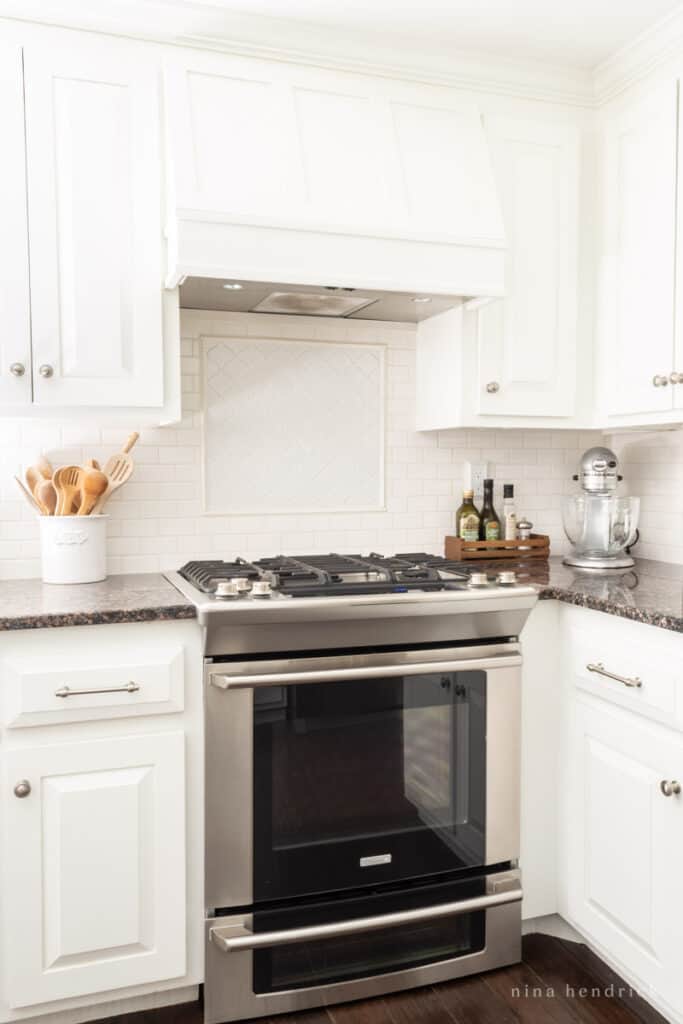
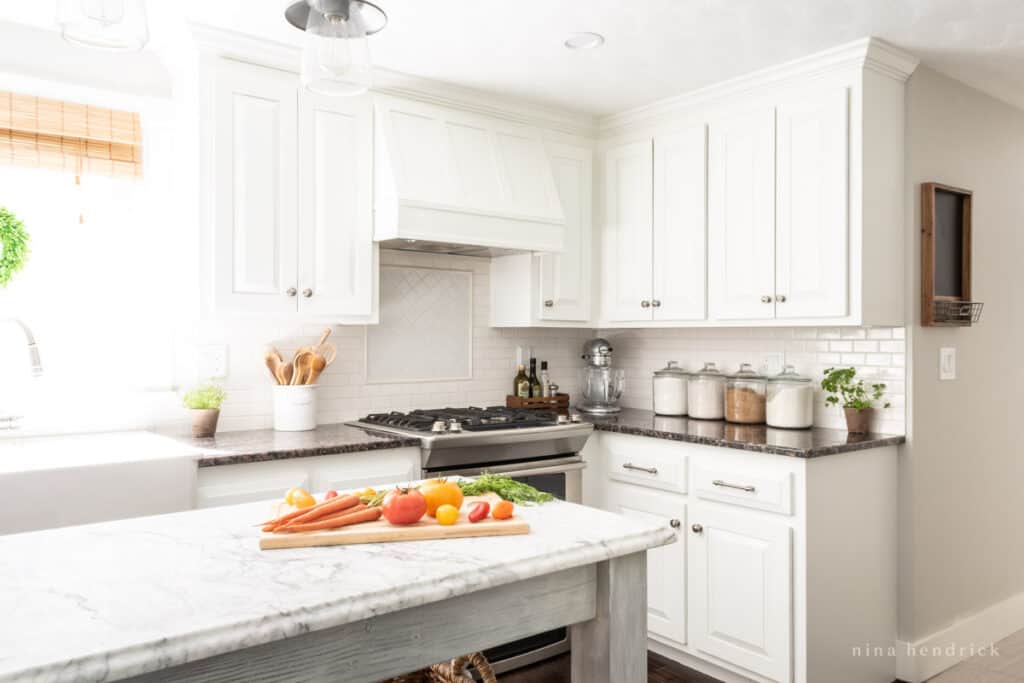
I love the custom cabinetry inspired detail that this DIY range hood cover adds to our kitchen. Of course, I appreciate the bonus that it’s functional. I am extremely lucky that Mack has the skills to not only accomplish my ideas, but he also brings his own brand of logical creativity to our projects. What do you think of this project?
In step 3 in regards to the plywood side it just says “ and then install”. But how do you install the plywood sides to the existing cabinet?
I’m sorry that it was written in a confusing way.You don’t attach the side panels themselves to the cabinet, you assemble the entire frame as pictured and install that. It’s attached to the original cabinet at various points with screws (the top has visible screws in the photo).
Great idea, plan to start this project tomorrow I have all brand new cabinets , flooring and appliances so this will be the final finish . Thank you for the idea.
you’re creative! I wish I could do the same in our kitchen too
Really neat project! Just made one of these for our kitchen reno. It came out really well, but I am having trouble with the euro hinge, which have not used very often. Can you explain (or preferably show me a picture of) how the eurohinge is connected to the cabinet? Thanks Paul
Hi Paul. Unfortunately we no longer live in that house, so I’m unable to show you. I apologize!
Beautiful! Your directions were extremely helpful! We are definitely going to use your methods to paint our oak kitchen cabinets. Plus my husband is a carpenter who can build the range hood with storage. Great idea! Thank you for putting this together. I can’t wait to get started!
That’s so exciting, Julie! I’m so glad it was helpful to you. Best of luck with your project!
I love this concept. I have a very small kitchen, therefore I am always thinking and searching for ways to maximize space; this is it!!! I’m hoping I can recreate this range hood…Pure genius!
Hello,
First of all, I absolutely love this idea and want to build something similar in my home. Do you feel like the 200 CFM hood you bought works well enough? I’ve read some reviews that say that CFM does matter and others that don’t. What are your thoughts? Thanks for sharing such an awesome DIY!
We’ve never felt that it was underpowered for the space!
This exactly what I need for my small kitchen, def gonna start on this diy project ASAP now that I see the steps needed ??Thank you ?
Does the fan build but a brownish film from the blower fan onto the swinging door, as it is now trapping the exhaust fan into your new vent cover?
Hi, Justin! I apologize, I’m not sure I understand your question… the fan is vented to the outside of our home through ductwork. Is that what you mean?
Hey there! I love this❤️. I currently have a microwave that doesn’t have ductwork that vents it outside. Do you know if there is a way I could make it work with a recirculating vent? This is a band aid project for 5 yearsish, so I don’t really want to add exterior ductwork yet. If you have any ideas I’d love to hear them!
Awesome makeover! Thank you for sharing! :)
This is exactly what I’ve been looking for! I’m so glad I found this blog and blog post. Thank you!
So happy that it was helpful to you! :)
Wow, this is an amazing idea! Thank you so much for sharing. Giving me lots of ideas for the kitchen of our new home :)
Hi! I love this idea and how well you executed it. We want to replace our above the range microwave and do something like this. I’m curious what the thickness of the plywood was used? It looks to be 3/4″ but I want to make sure. Is that the same plywood that was also used for the door because the stiles and rails of the door are most likely 3/4″ which would make the plywood closer to 1/2″ thick? Thanks!
Hi Heidi! Thank you so much! Yes, exactly- we used 3/4″ plywood for the frame, 3/4″ pine boards for the stiles and rails, and then 1/2″ plywood for the center panels. Thanks for bringing this to my attention, I will make a note to update the post :)
I am curious about the ductless airflow too
Hi Amber,
There is an air duct at the back of the vent that was already in place from the the previous hood.
We are doing a few remodels to our kitchen and we have to same vent system about ours. how do you get the air to vent back out?
Hi Hannah,
Sorry I missed this! There is an air duct at the back that was already in place from the the previous hood.
Hi again,
I am curious what your measurement is from your cooktop to the bottom of the hood. I am seeing codes that specify that combustable material has to be 30 inches at least from cooktop and the hood you used has a max placement of 24 inches above the cooktop. We bought the same hood and just realized that. Did you know about that or did you just do it anyway? I don’t want to have to take it down when we sell, that’s the conundrum im having. Thanks for your thoughts.
It is slightly over 30″ from the flame to the vent. We placed it in the same location as what was already there, opting to reuse the ductwork rather than ripping apart the wall. Since the range vent is more powerful than the one that was in the location previously, I’m not sure why the manufacturer says 24″- but ultimately we were more concerned about the local code than the manufacturer’s recommendations. It all passed code and works well!
However, if you are getting ready to sell, I would call your local building inspector and the manufacturer to discuss- we are not planning to ever sell, so we were doing the project from a much different perspective.
Okay. Sounds good. Thanks for your quick reply. :)
Holy cow! This is an awesome idea! I am totally keeping this in the back of my mind for my future kitchen makeover. Thanks!
Great idea that I may modify to fit my daughter’s kitchen needs. She is an interior designer and told me the other day that a bad or standard range hood ruins a kitchen for her; she has trouble getting past it. This might be the starting point for her new kitchen! By the way, what is the hardware called that is supporting the front “door”? I am needing that for another project and cant find locally. Thanks for a great idea.
Hi John! It’s called a Friction Lid Support. We purchased ours right at our local home improvement store in the hardware aisle, but they also have them here: http://www.ebay.com/itm/like/171180669935?lpid=82.
I think this is an amazing idea. Well executed!!!
Thank you so much, Brittany!
Thanks so much for this idea. We had been thinking about buying an insert and a liner because that’s the only way I was aware of. But even that DIY idea cost upwards of $400 here in Alaska. Thanks so much for this idea. It looks beautiful and we are doing the same thing!
You are very welcome!! Best of luck to you with your project :)
That looks SO great! I wouldn’t dream it had been DIYd… Awesome job:)
Thank you so much Alanna!
love love love this idea- so resourceful!
Thanks Stephanie!! :)
Fabulous idea! I never thought to do that but it totally makes sense!
Cher @ Designs by Studio C
Thank you Cher!!
I love that idea, such a great way to make use of a wasted space. Going to have to pin for when we finally get to buy again and not be renting because of the military.
Thank you so much! And thank you for your family’s service!!