Planning a bathroom remodel? Get inspiration plus design tips and tricks from this renovation so you can create a bathroom you love.
A bathroom remodel can be an exciting and rewarding project that can make your home more enjoyable and functional. From simply changing out fixtures to entirely renovating the space, the possibilities for a bathroom remodel are endless. Make sure to plan ahead, know the limits of the project, and enlist the help of experienced professionals to make your dream bathroom a reality. With all of this, you’ll be able to enjoy a beautiful, comfortable bathroom for years to come!
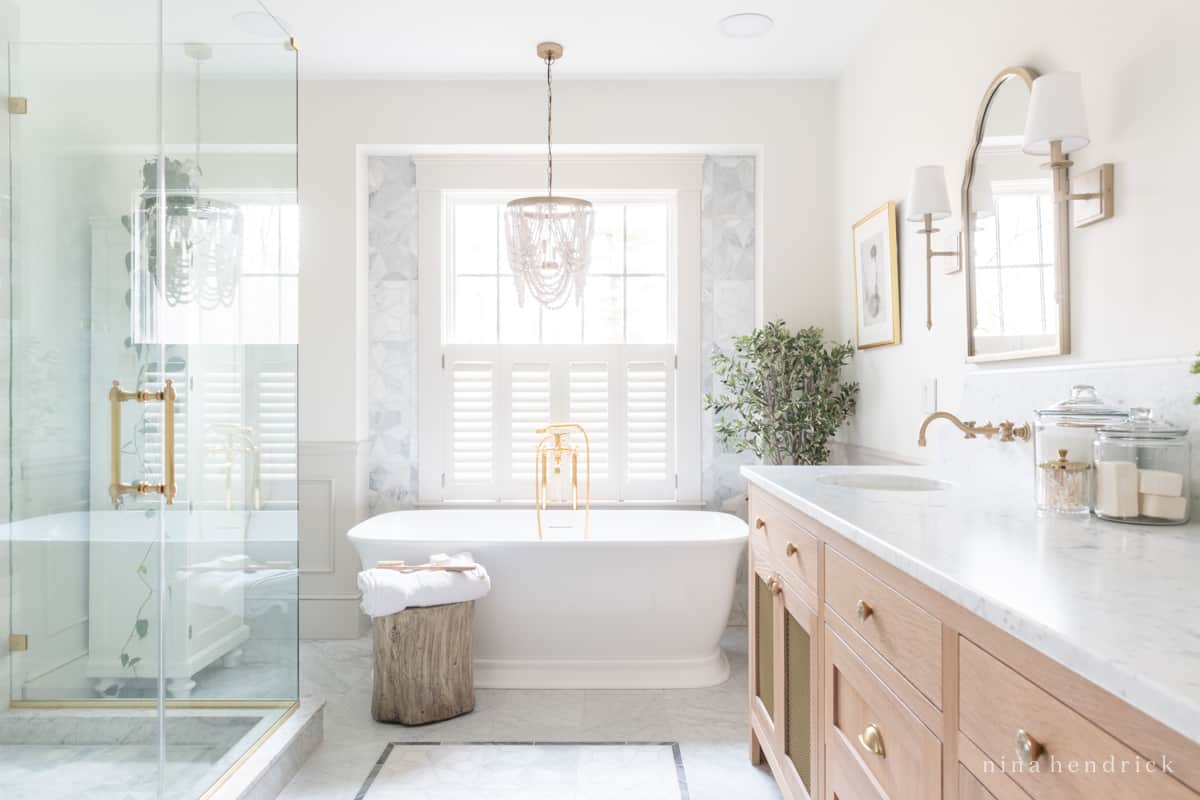
When we completed our primary bathroom makeover in 2021 in our Massachusetts Colonial, we had no plans to move anytime soon. However, by July we’d bought a new home and said goodbye to the house we’d been renovating for nine years straight. Our new Cape in New Hampshire was mostly move-in ready, but one space that was desperately in need of some help was the primary bathroom. After settling in for a few months, we decided it would be our first project. And that’s how we ended up doing back-to-back primary bathroom remodels!
This post contains affiliate links, which means I may get a small commission (at no extra cost to you) if you shop my link. Please see my disclosure if you’d like more info!
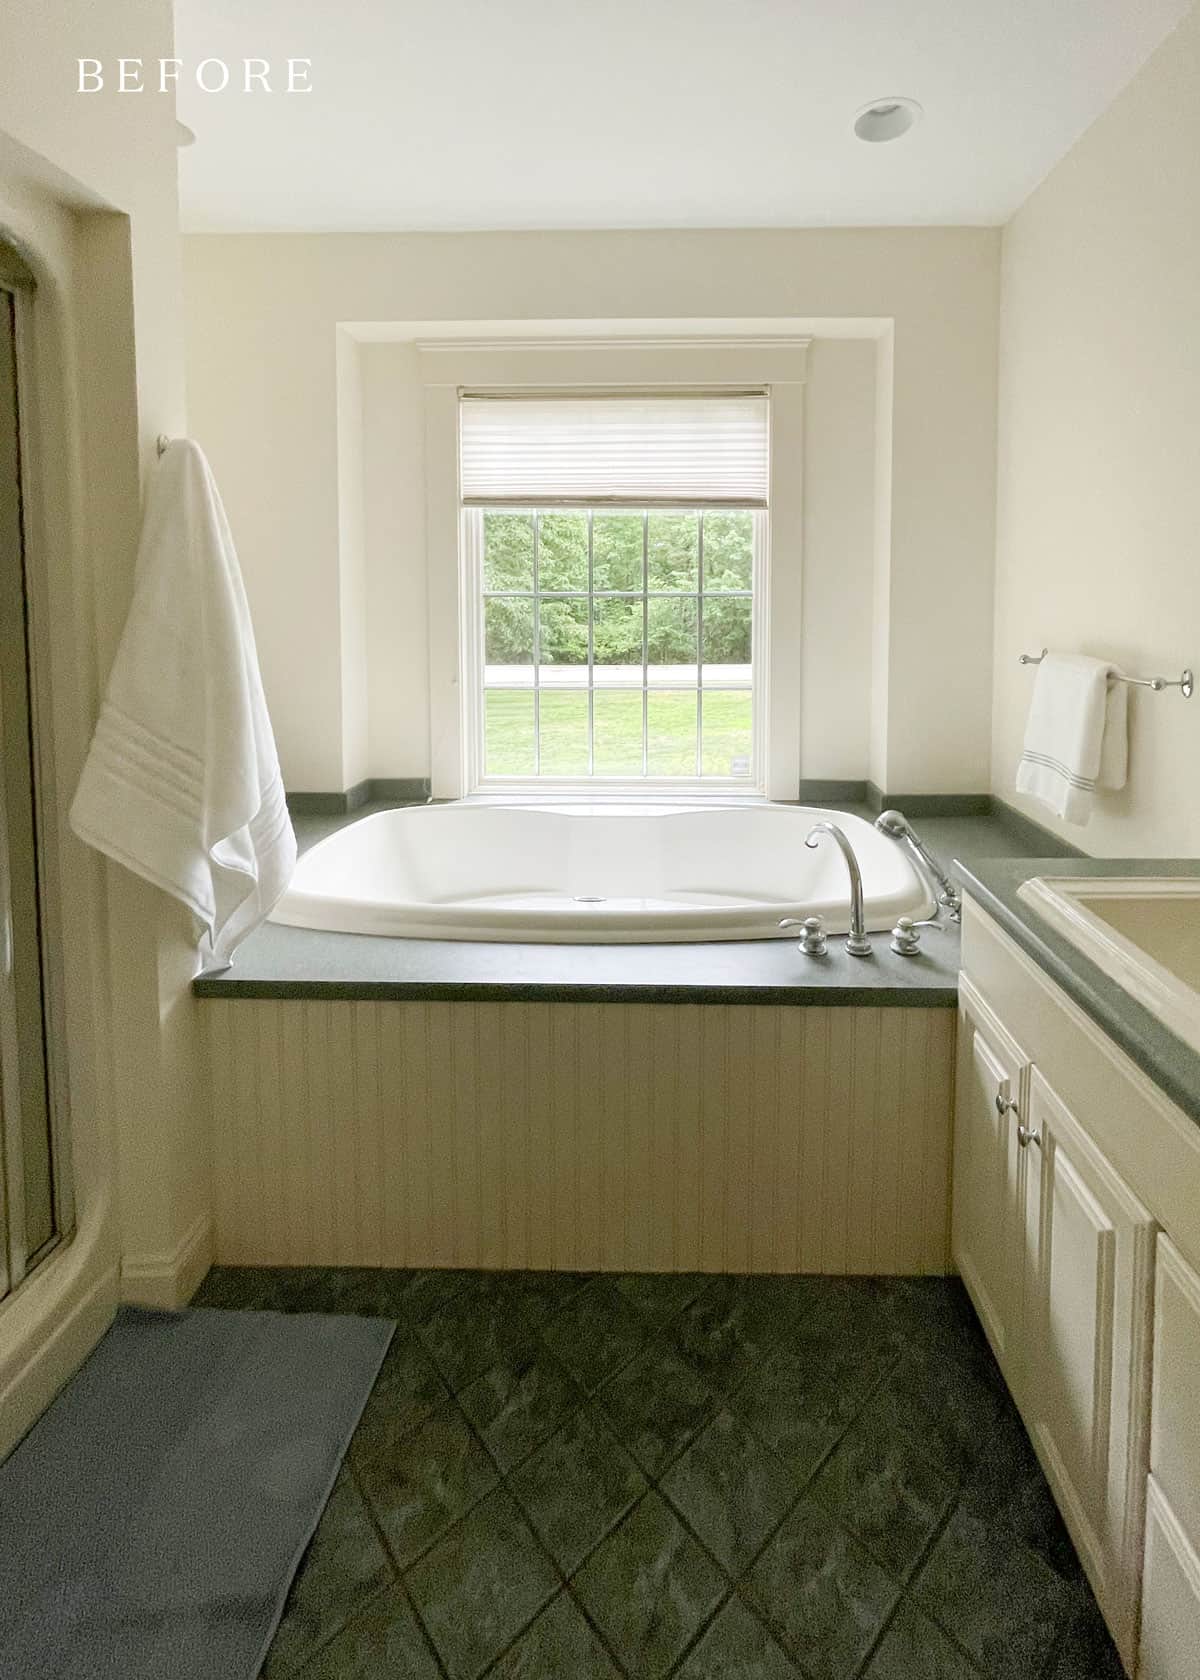
Bathroom Before Photos
The house was built in the early 2000s, but somehow this particular room looked like a flashback to the 80s. With laminate cabinets and countertops, green tile, and a giant (non-working) built-in bathtub taking up half of the room, it was ready for an upgrade.
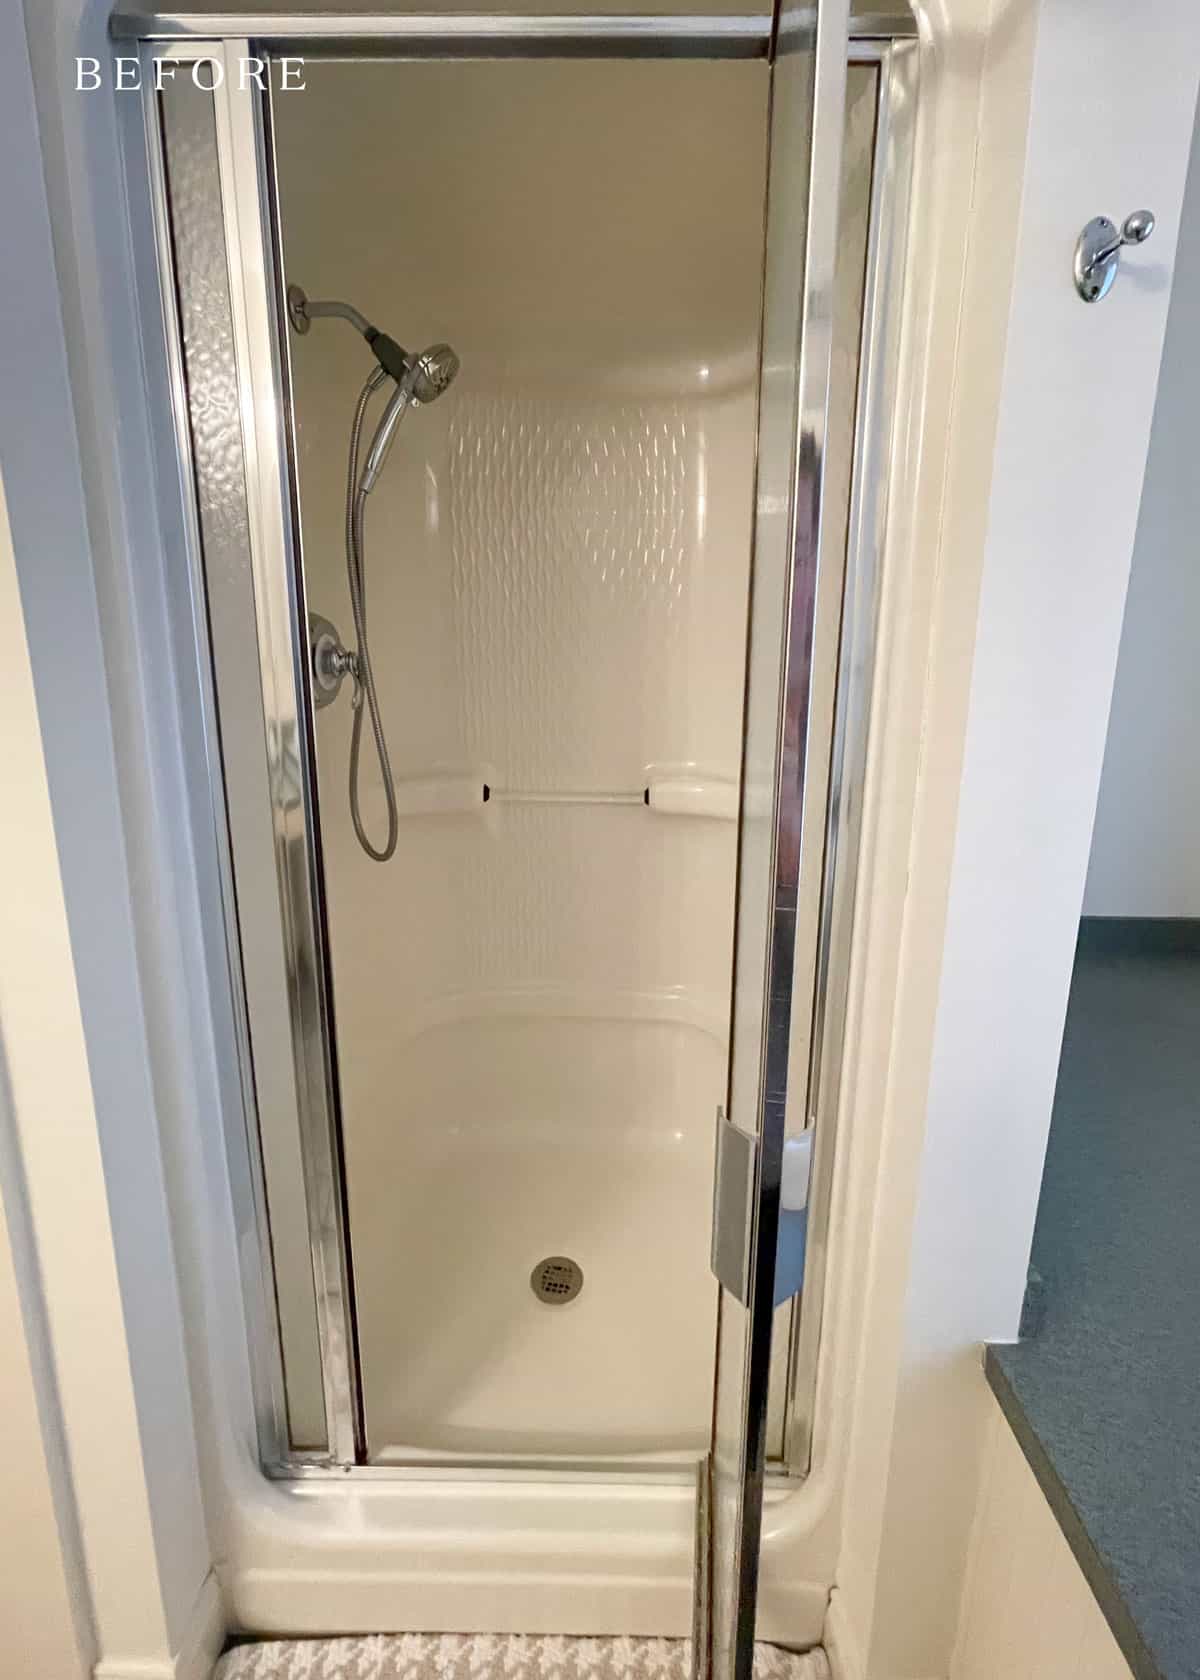
The shower height was one of my husband Mack’s major complaints. I’m shorter, so I was able to fit comfortably below the spray, but the rounded “shower capsule” still felt pretty claustrophobic even to me. Poor Mack wasn’t even able to take a shower standing up!
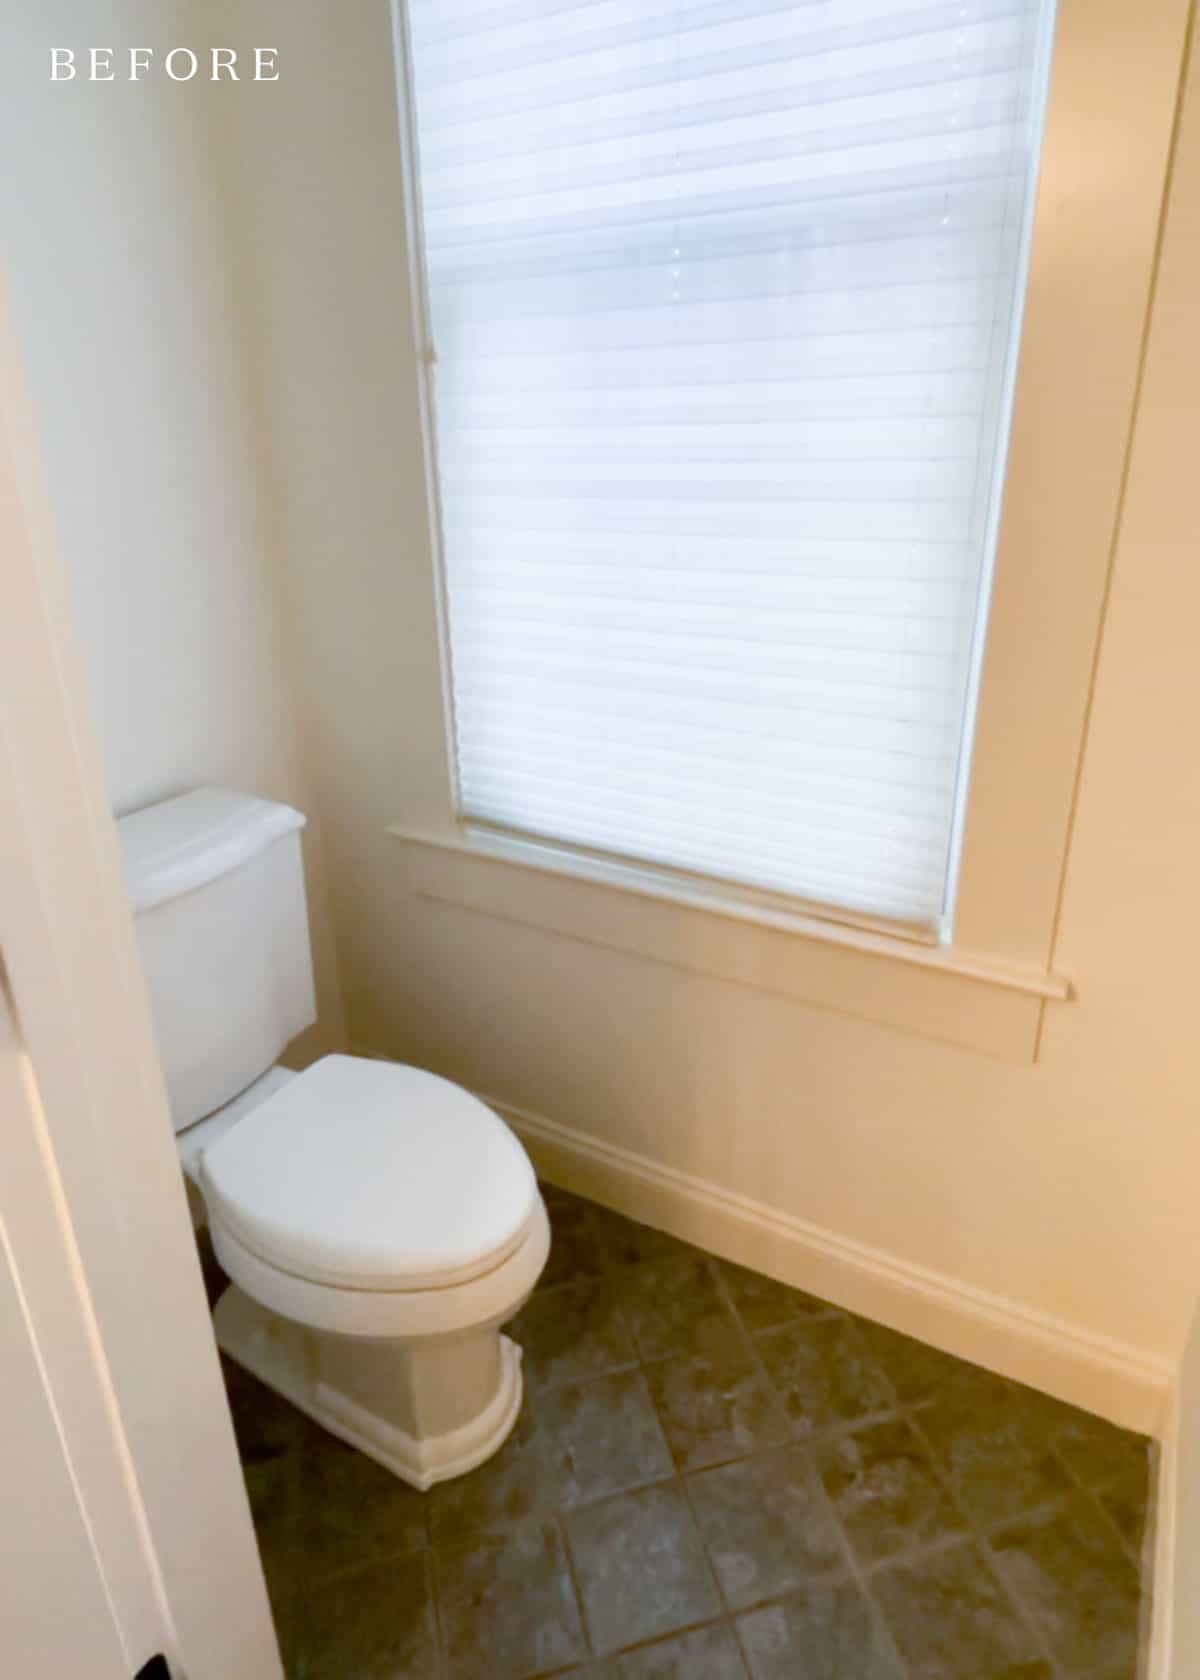
I had always liked the idea of a water closet, but in this case, it felt like an icebox. This first-floor primary suite was the furthest point on the radiant heat loop, and with the large window that dominated the small water closet, it seemed to be unable to keep up during the chill of the New Hampshire winter. Also, the window was a privacy nightmare.
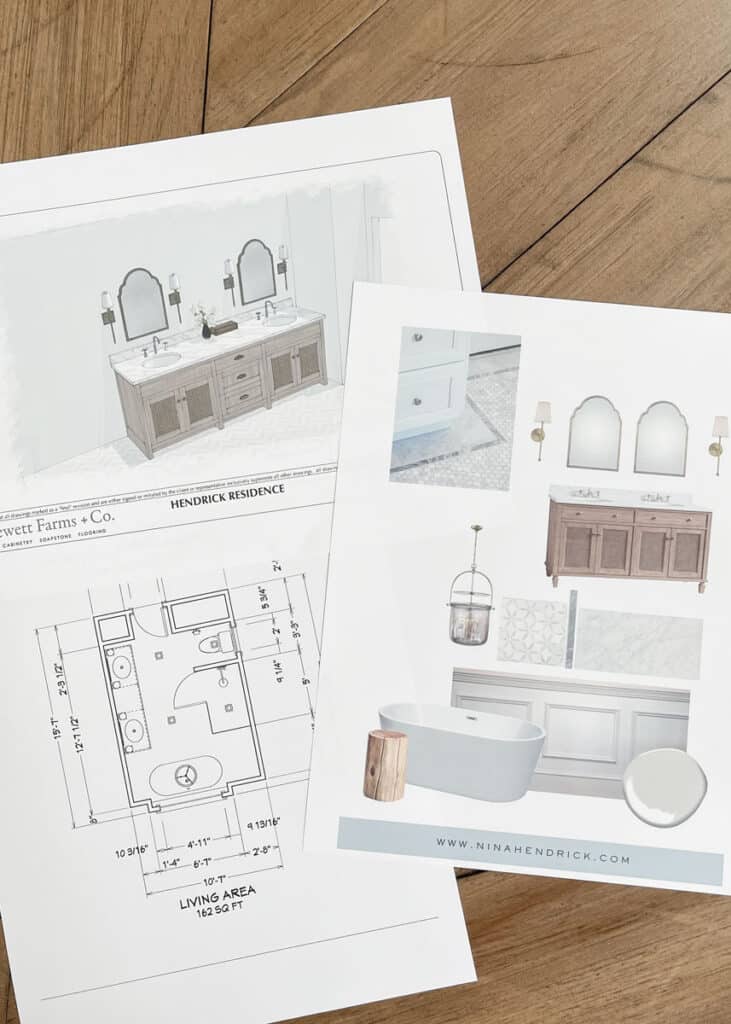
Redesigning the Bathroom Floor Plan
We knew that we’d be redesigning the bathroom floor plan during this bathroom renovation, although we’d be staying within the existing layout and square footage. Our priorities were:
- A larger walk-in shower with a glass enclosure
- A warmer space: we decided to eliminate the water closet plus get rid of the giant tub and surround, which would allow some heat to radiate that was previously trapped in all of the dead space around the tub.
- We decided to install an additional layer of radiant heat under the tile using an electric system. Double radiant may sound like a lot, but trust me, this bathroom was chilly!
- Natural light: Although there was a large picture window in the room’s front, I wanted to also preserve the natural light from the water closet window. My solution was to find a smaller, energy-efficient window that could also be installed higher up for privacy.
If you’re looking for more bathroom design ideas, I rounded up all of my favorites in this post!
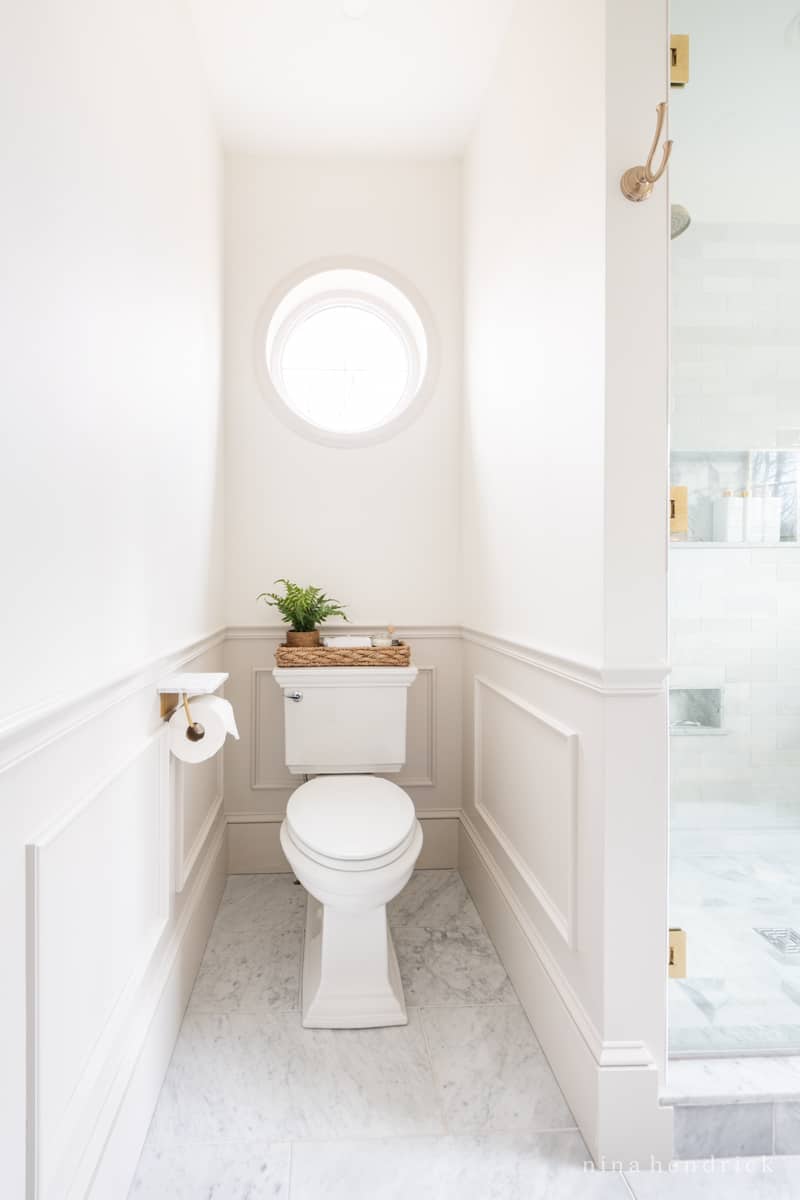
Toilet Nook with Round Window
After playing around with different floor plan designs in Chief Architect while trying to keep the general layout of the plumbing intact, I came up with a layout that opened up the water closet and rotated the toilet. I was able to find a round window to go above the toilet that complements the coastal exterior of our house. Our contractor added a dividing wall to house our shower plumbing.
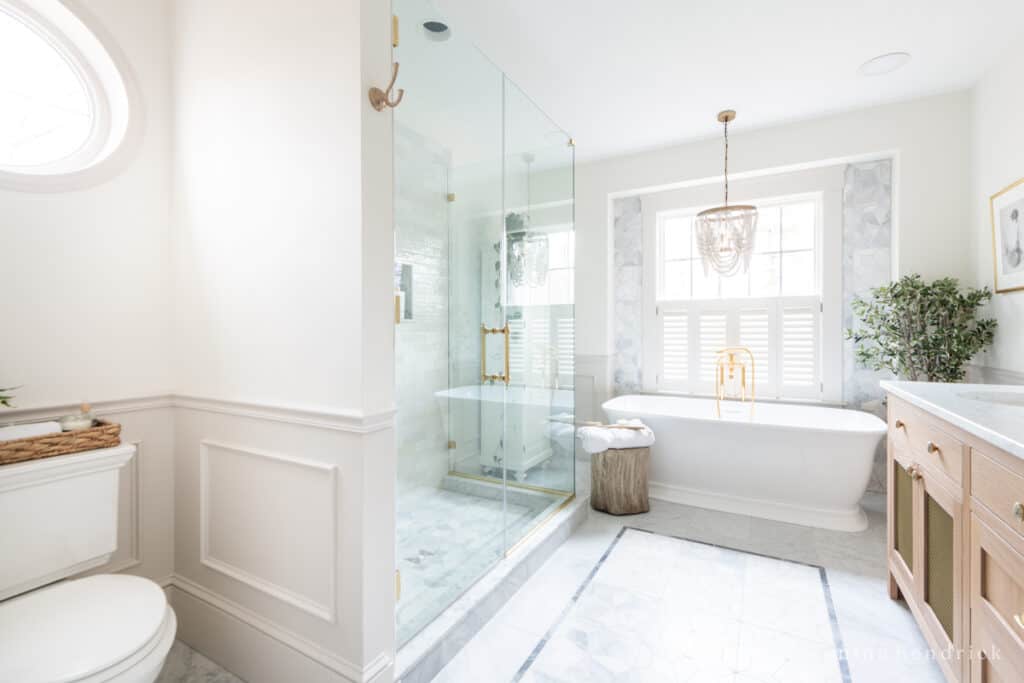
This floor plan design allowed for a larger shower and replaced the oversized tub with a freestanding model that was still generously sized. The new vanity went in the same exact spot as the old one, which simplified the plumbing.
Managing the Bathroom Remodel Project
We hired a contractor to handle the permits and most of the subcontractors, like the electrician and plumber, for this project. Although we knew that would add to the total cost of the project, we simply don’t have the capacity for DIY that we did in our last house. I wrote a post about when to DIY and hire things out here — of course, it will always be a personal decision, but that post goes over some of the pros and cons!
To offset the labor costs, I did the sourcing and acquisition of most of the fixtures and materials. There were certain things that my contractor was able to get better pricing on and that he handled, but for the most part, he was happy to have the purchasing details of the design elements off of his plate.
For the timeline, we were hoping to have the bathroom complete within a couple of months. With delays between back-orders and our contractor’s schedule, it ended up going well past that. We were still in the pandemic’s aftermath here, and I’m attributing both timeline delays and surpassing estimated costs (which I had calculated based on my research of the average cost of a bathroom remodel) to that timing.
Designing a Custom Vanity
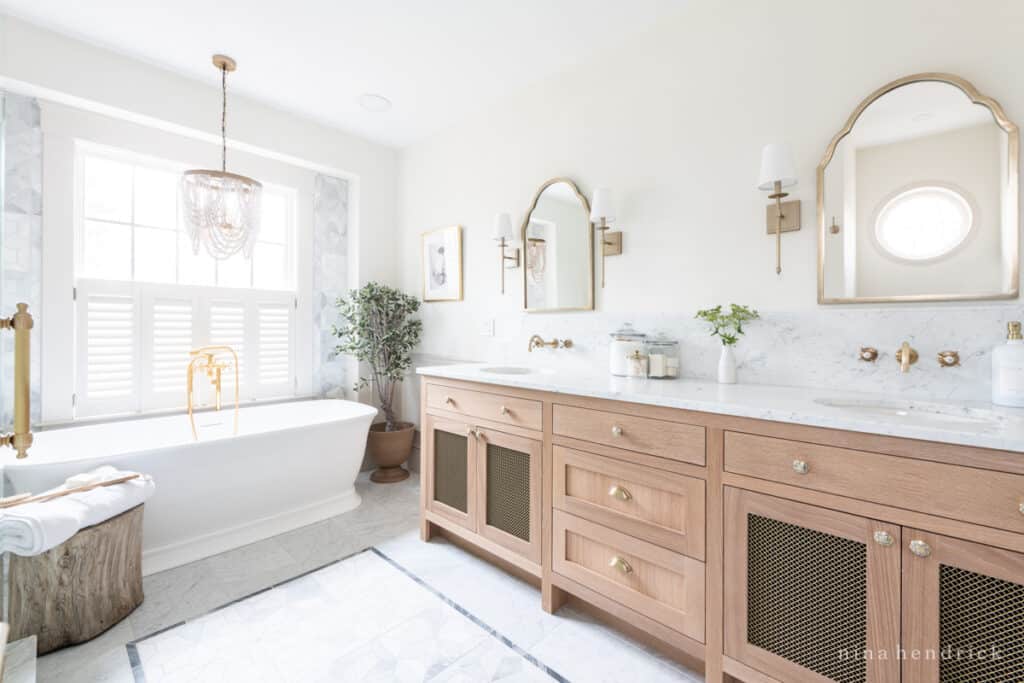
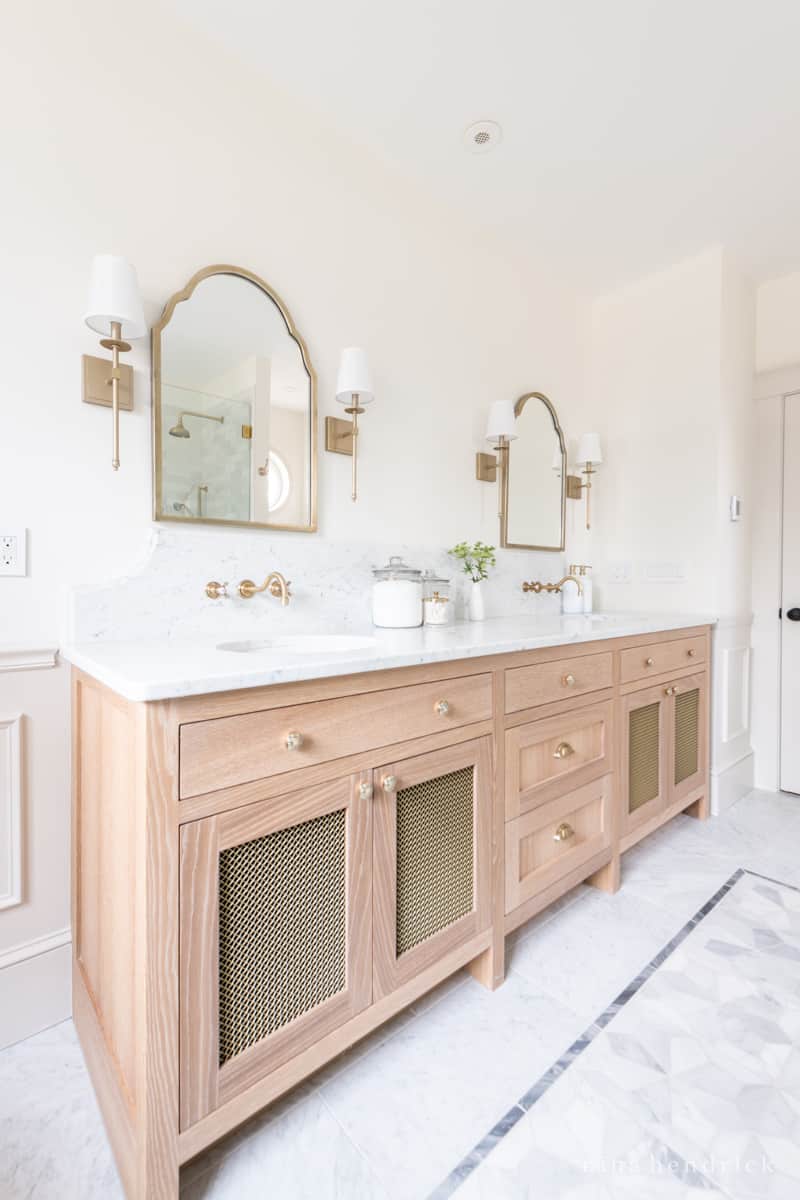
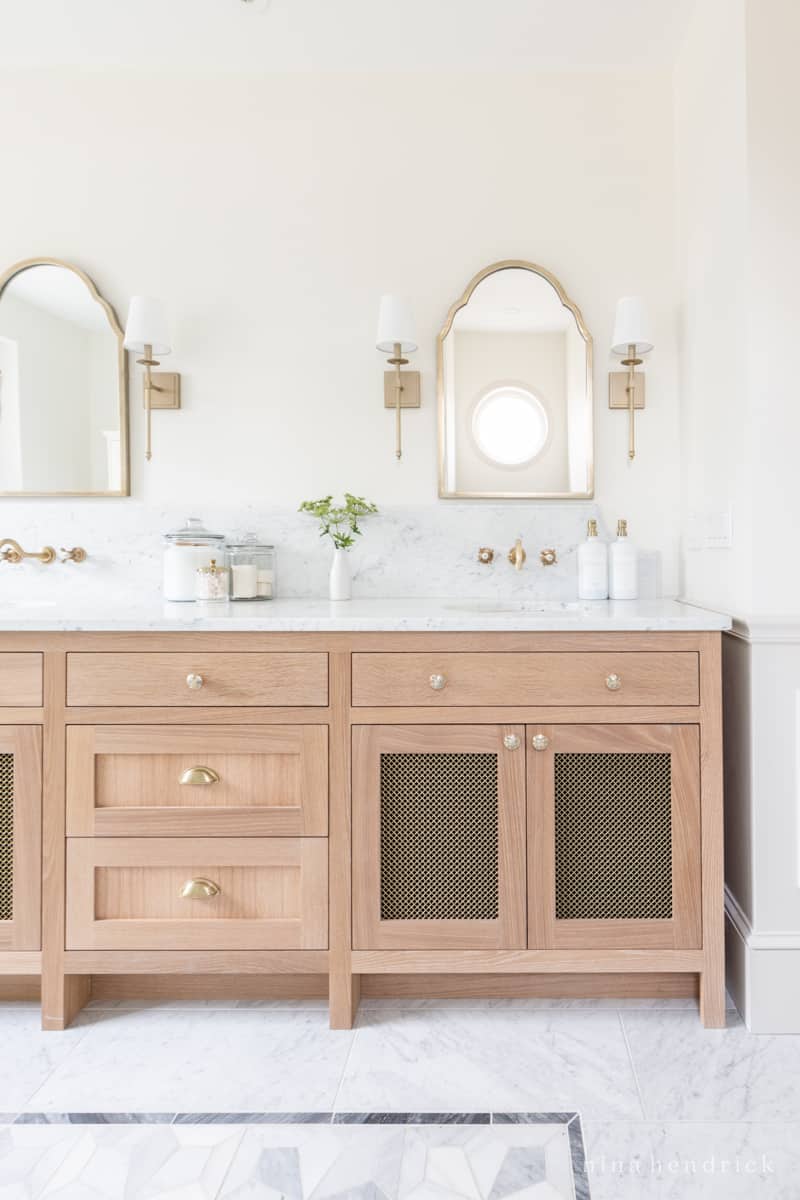
After determining our new bathroom layout, I began searching in vain for a new sink vanity that fit the extra long dimensions (96″) of our bathroom. I knew that similarly to our last home, I hoped to add a natural wood vanity to bring some warmth into the space. Bonus points if it had some sort of cool detail on the door panel.
After my search turned up nothing, I finally accepted that I’d need to work with a cabinetmaker to design something custom. I went with a local and well-regarded company, and they came up with drawings from my ideas for a white oak vanity with gorgeous door detailing. Initially, I was very excited.
However, by the end, we have to say this was one area we simply weren’t blown away. While the vanity turned out beautiful, it’s rather simple for what it cost to create in both money and mental energy. Perhaps the headache of having to chase after the cabinet company sours my perspective on the finished product. Communication was poor along the way, and it was very late for the projected end date with little explanation or apology.
You could get a very similar result with this popular vanity. You could even swap out the door panels for mesh like ours fairly easily. Sure, it’s a little smaller, and we would have had to move some pipes, but the result would have been pretty similar for a fraction of the cost.
That is not to say that every experience with a custom vanity would be a bad one. My mistake here was to go with the “popular” company. I’m sure that there are many talented local freelance woodworkers who probably could have done the job quicker and with better customer service!
Vanity Countertop
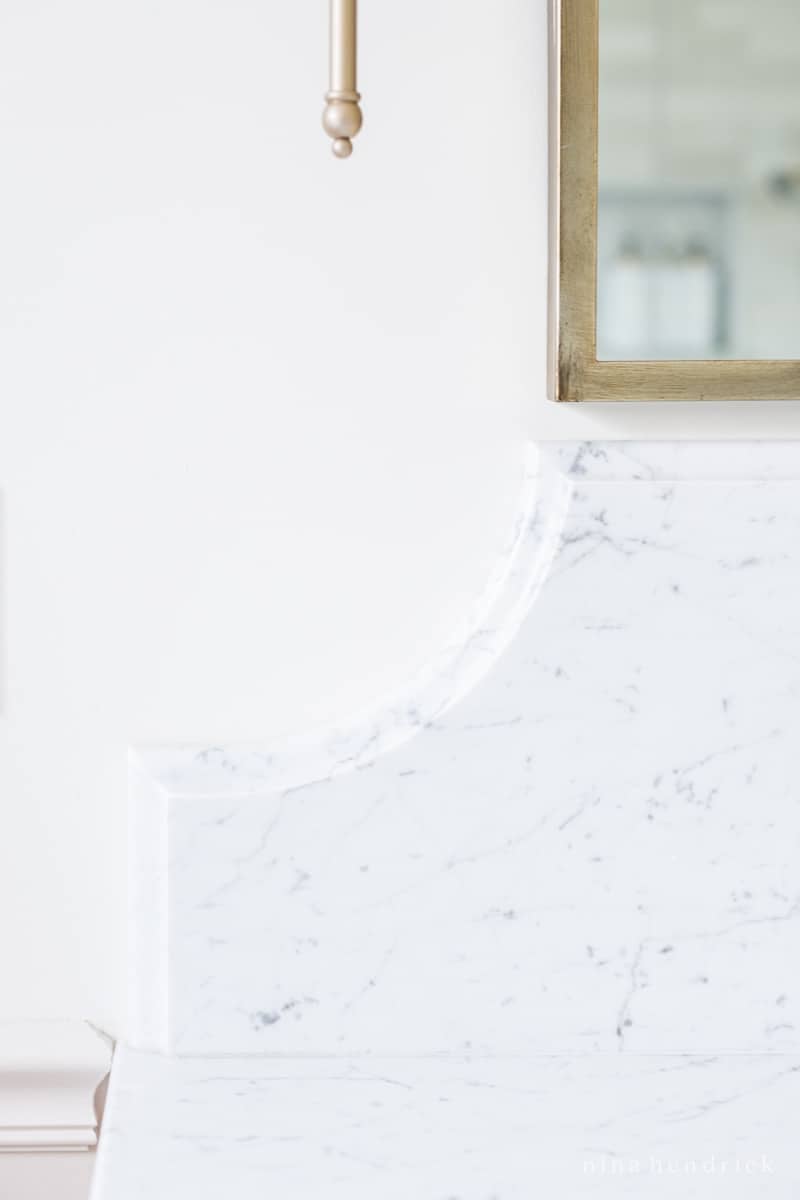
It’s probably no surprise that I chose marble for the counter surrounding the sinks! I’ve been loving the concept of decorative slab backsplashes, and it was fun to design one with a swoop on either side.
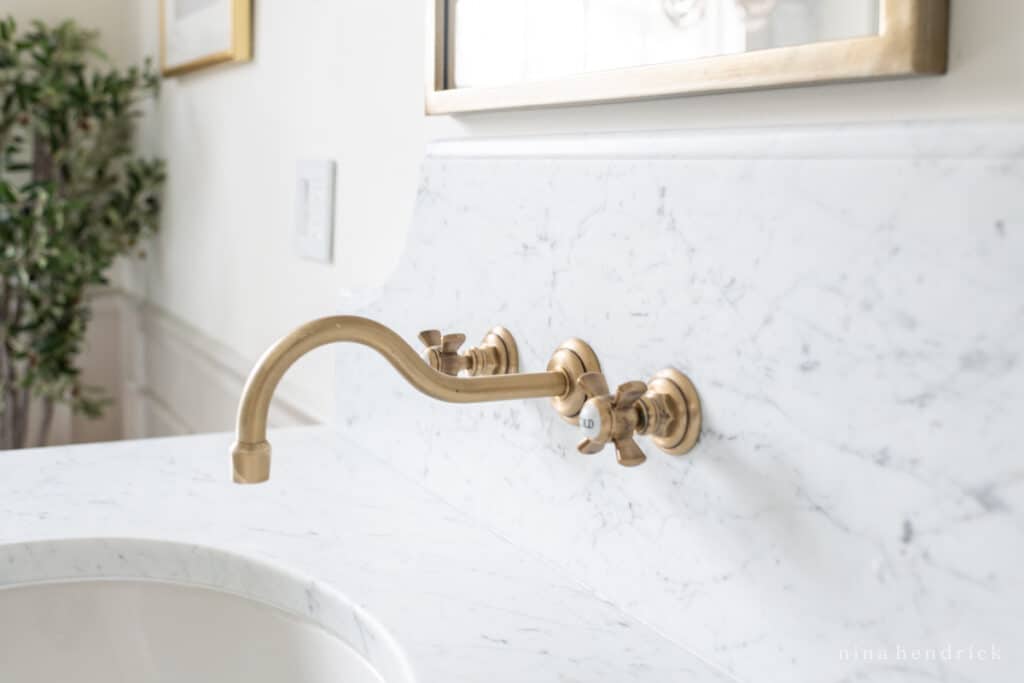
I also knew I wanted to have the faucets mounted on the wall. This proved to be a tricky installation and I’m not sure it’s one I’ll repeat (although I’ve learned by now to never say never)! It took a lot of coordination and reading over the specs to make sure we lined everything up correctly.
Brass Bathroom Hardware
As I found in my previous bathroom remodel, brushed brass has many names and it can be difficult to get things that are all the same tone. I had initially planned to mix metals, but the post-pandemic back-orders on certain items limited my choices and I just couldn’t make that work the way I’d hoped. In the end, I stayed within the brass family for everything.
Faucets
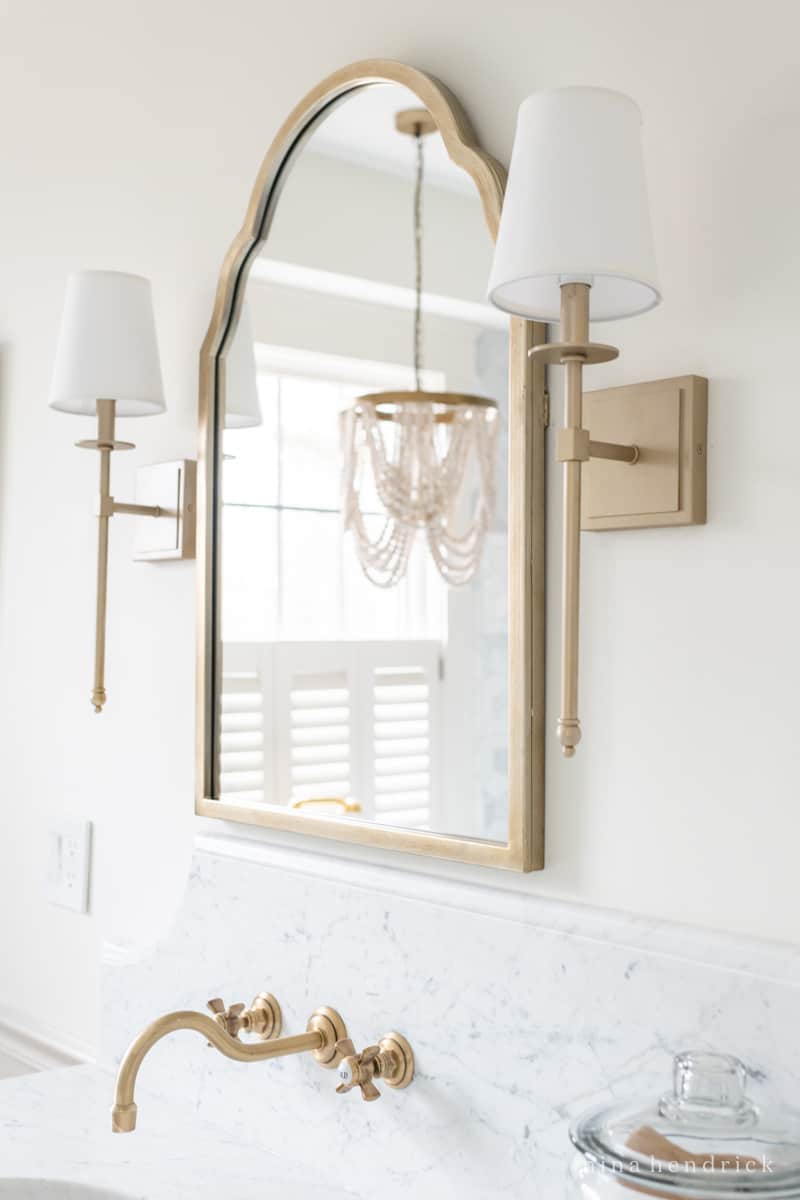
The faucets and mirrors were a pretty close match to each other, but the light fixtures (similar sourced) turned out to be a completely different shade. I used champagne gold spray paint on the light fixtures to get them to match.
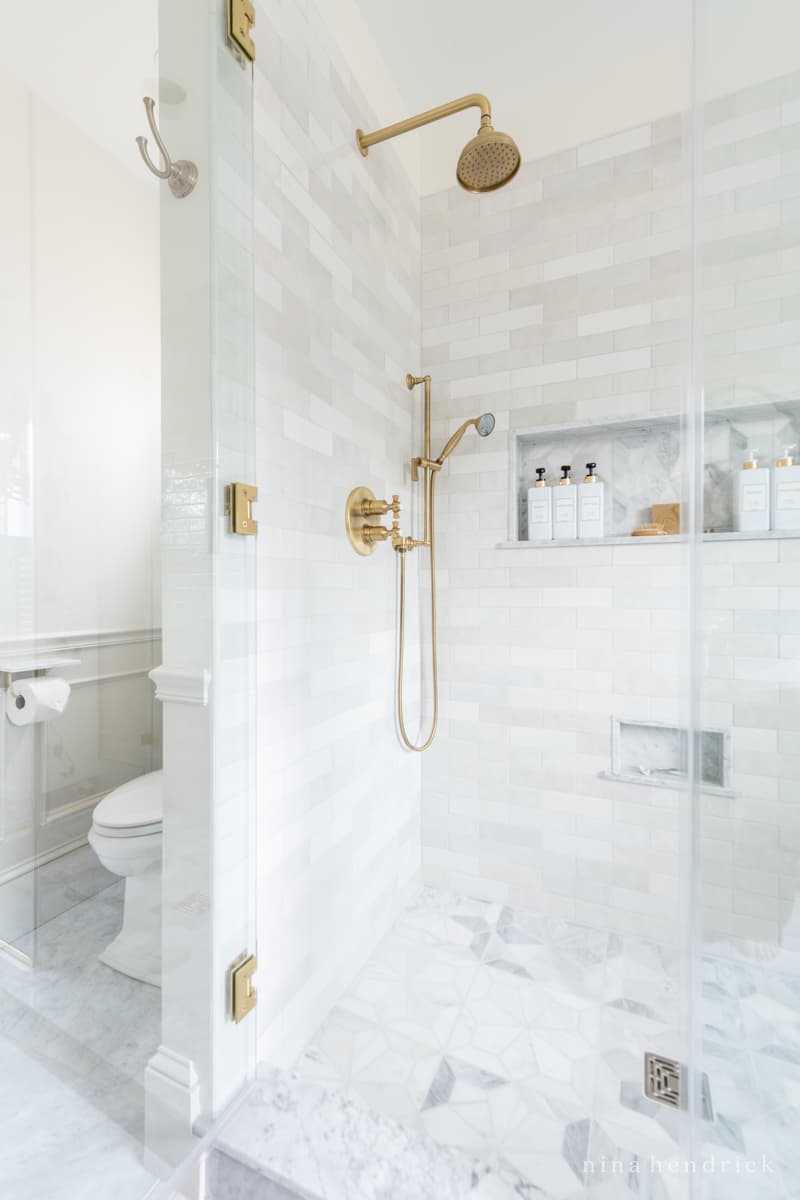
Shower Hardware
The shower system (sold out, similar sourced) is the same as the sink faucets. I was also able to get the glass installers to match that finish with the shower door handle and clips.
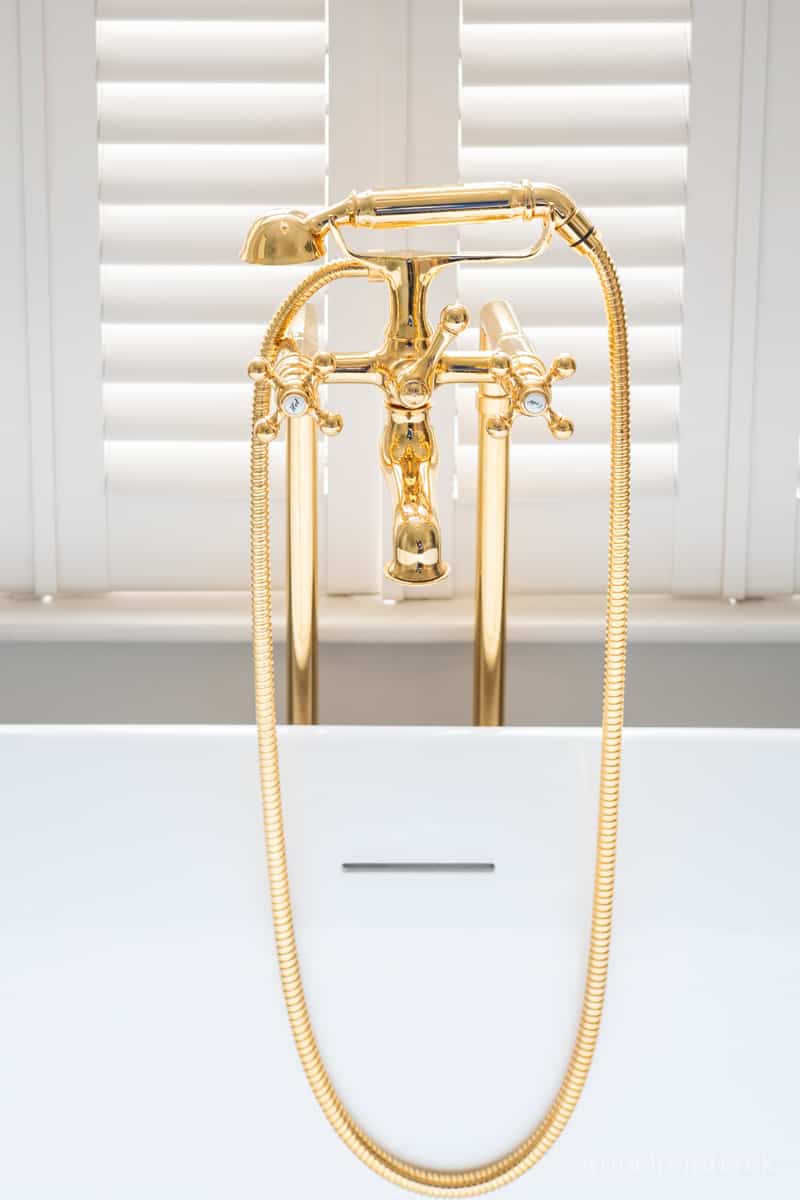
Brass Tub Filler
The tub filler is a warmer brass tone than the sink fixtures. When it first arrived, I was frustrated that it looked so different in person than the photos, but I decided to work with it. Honestly, with delays and lead times, I didn’t have much choice. If it had been available, I would have gone with the polished nickel and mixed metals. I’m hoping the brass ages over time, but I suspect it has a polished finish on it.
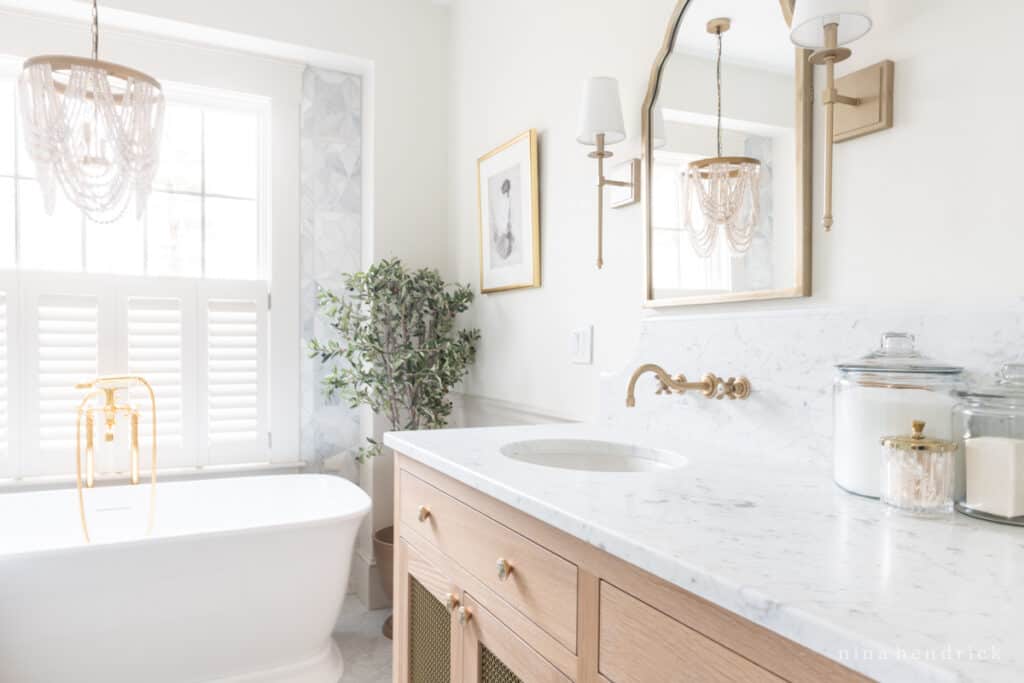
To compliment that difference, I chose a frame for the nude artwork to match and also carried that warmer brass into the small storage accessory on the vanity.
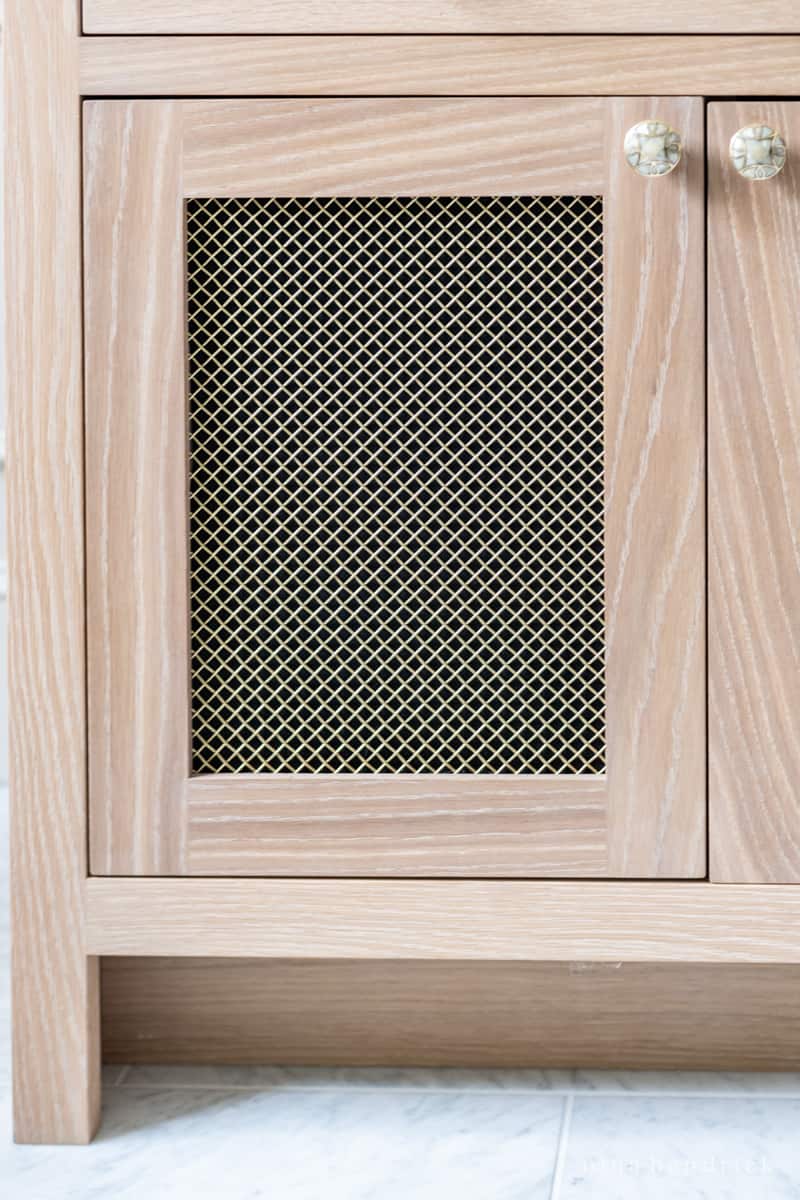
Mesh Vanity Doors
I know I briefly touched on this detail above, but I love the mesh vanity doors. Here’s a source for similar mesh.
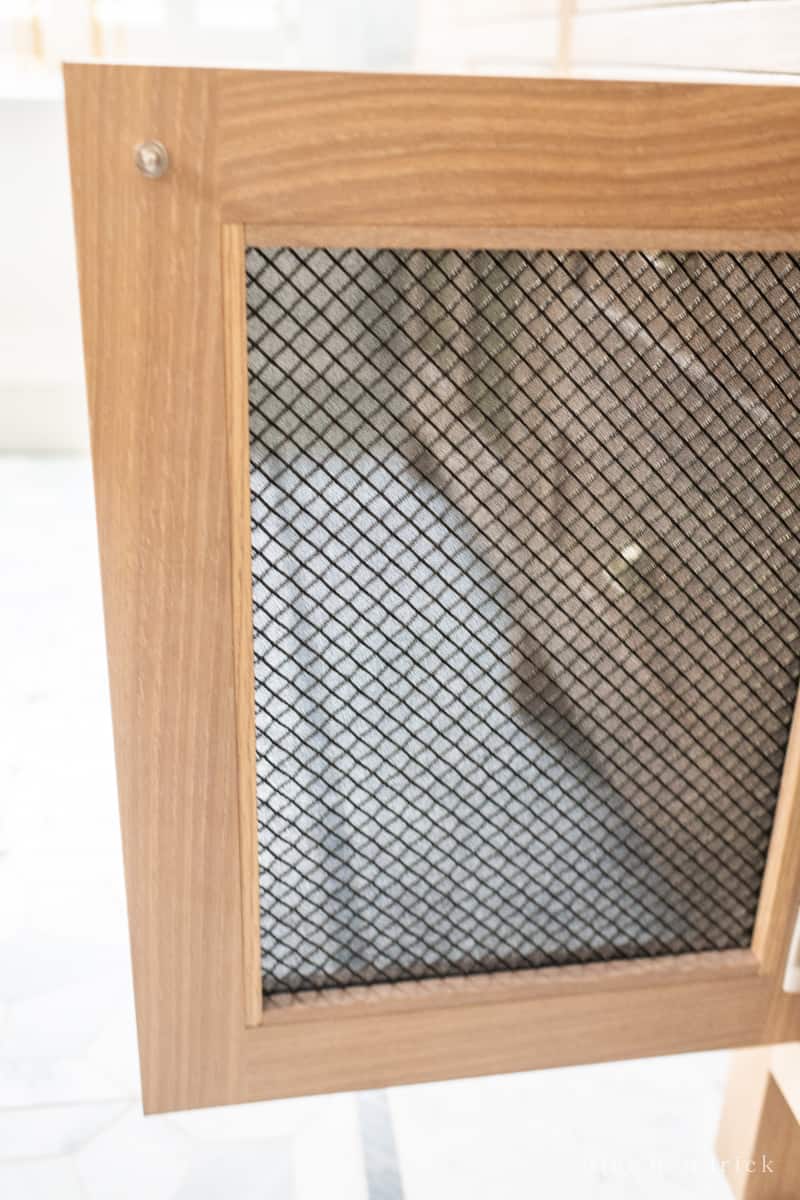
To give some privacy behind the mesh, I had black speaker fabric installed. I love this bit of contrast in the room!
Choosing Bathroom Tiles
After a stay in the new Presidential suites at the Omni Mount Washington Resort, I felt so inspired by the bathroom design. As a side note, hospitality interior design and architecture are some of my favorite sources for inspiration! It’s part of the reason I love to travel.
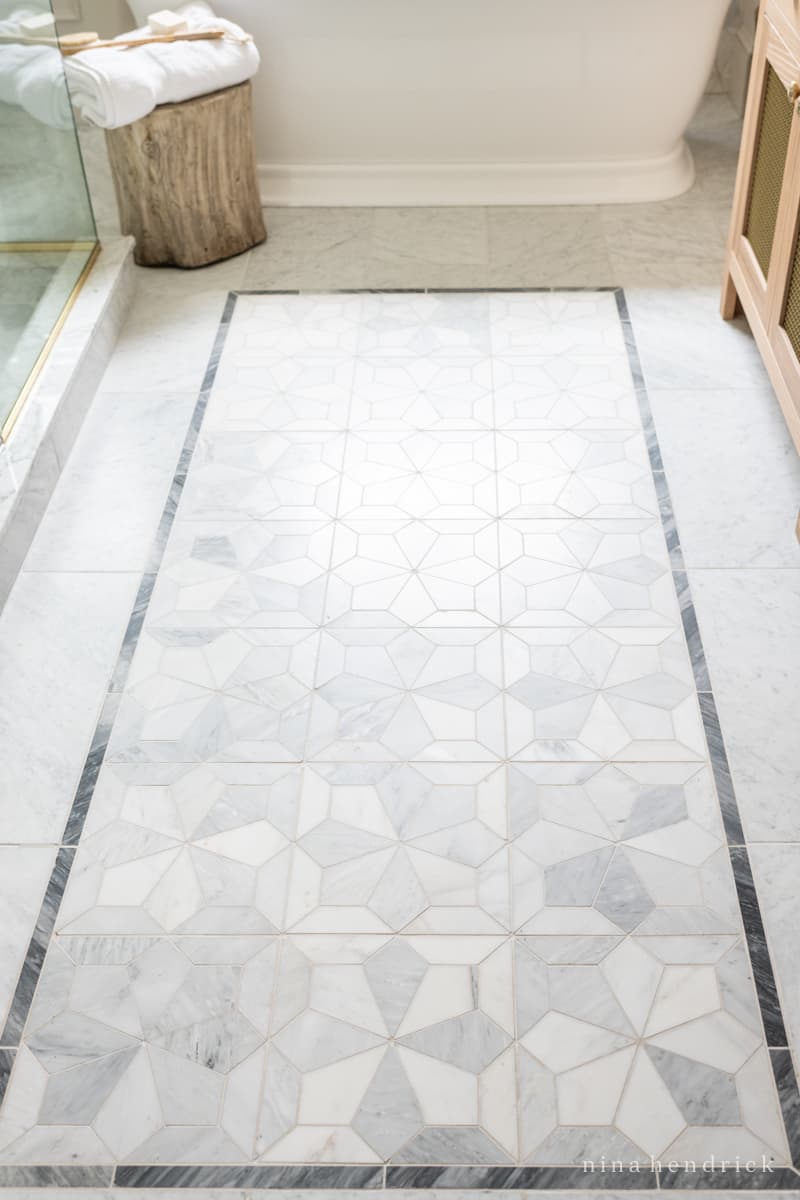
Floor Tile Rug Inlay
The Omni’s new bathrooms feature marble floor tiles with a rectangular frame of contrasting border tile with a tile “rug” inlay. I knew the contrasting border was an idea that I wanted to use in our bathroom remodel along with the larger marble tiles around the perimeter. Instead of the herringbone for the inlay, I fell in love with this Blomma mosaic marble.
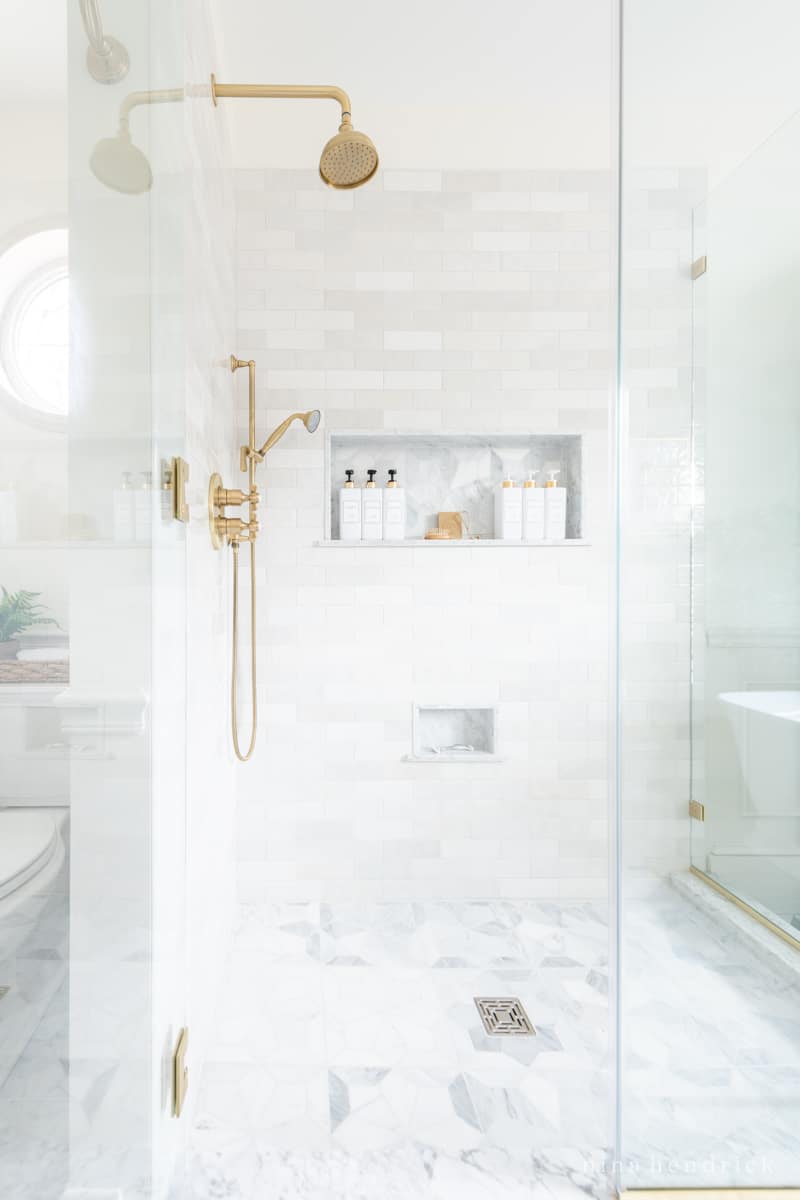
Shower Tile
For continuity, my design repeated the mosaic on the shower floor and the soap niche. The wall shower tile is the Cloe zellige-style subway tile in cream. I wanted to do something slightly different from marble for the shower walls and this was the perfect choice! It’s also the same tile I chose for the kitchen backsplash, which ties it to the rest of the house.
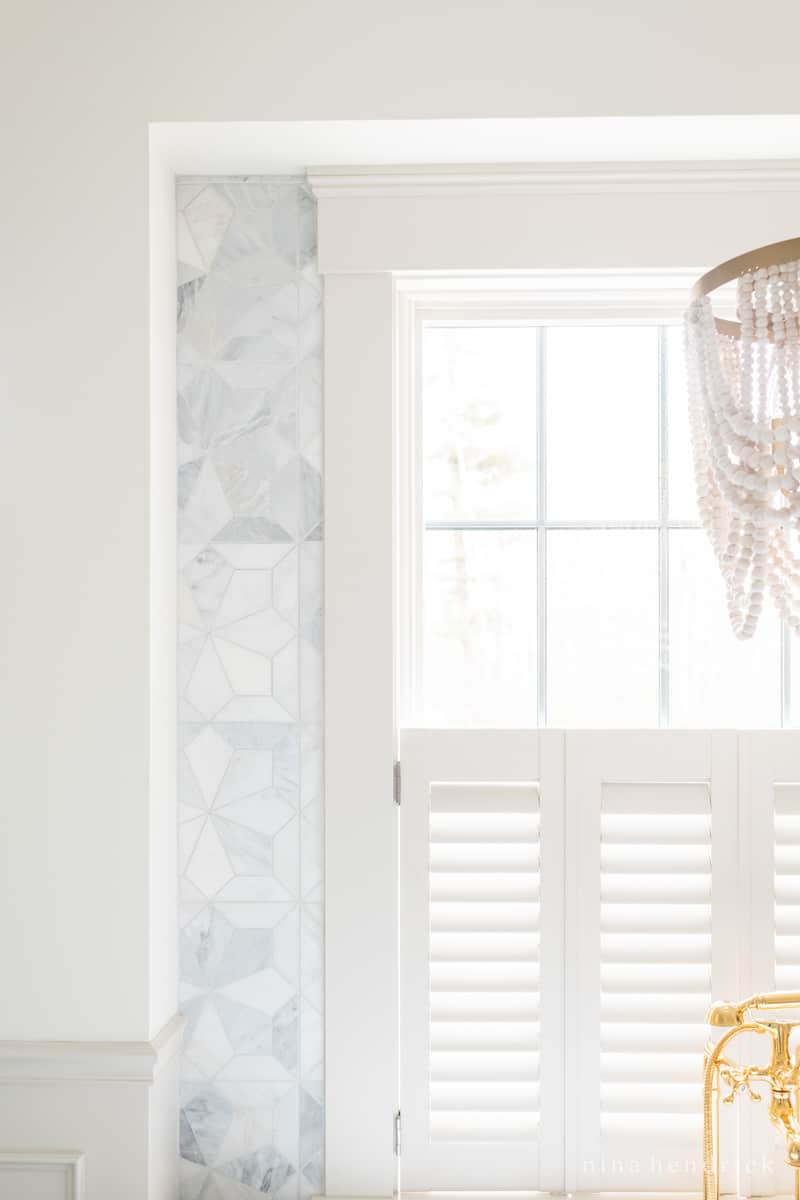
Tile Feature Wall
I also thought that window bump out behind the tub needed a little extra something, and although the tile didn’t fit there perfectly as I had hoped, I still love the tile feature wall.
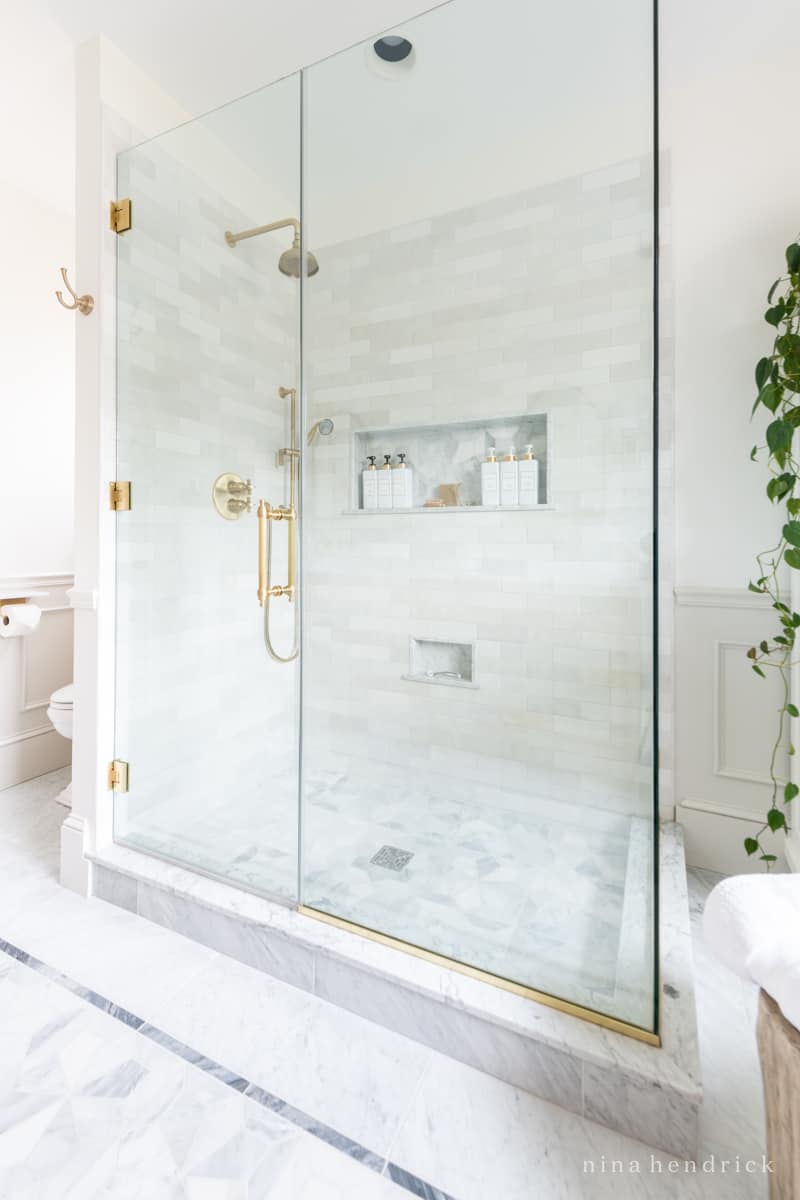
Shower with Glass Enclosure
As you may remember, the shower was one of the key drivers behind the entire bathroom remodel. Pretty much anything would have been an upgrade, but this spacious shower with a glass enclosure is a major upgrade!
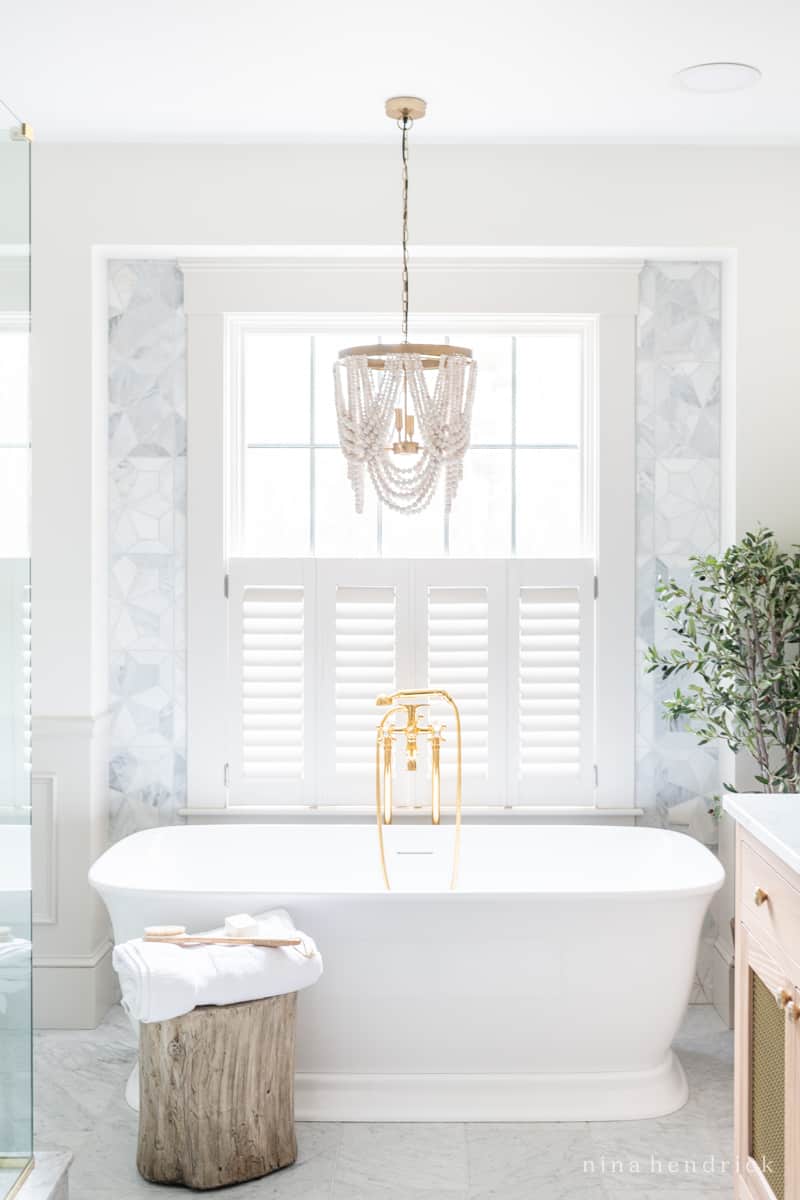
Freestanding Bathtub with Chandelier
This is my absolute favorite part of the bathroom. I take baths here almost nightly and it’s so relaxing. I loved the idea of the stump stool from the Omni. It’s the perfect little rustic nod to our beloved New Hampshire in the otherwise timeless and traditional bathroom. And the wood bead chandelier ties in with the vanity and the stool and feels so luxurious.
Custom Bathroom Window Shutter
We love the natural light that the picture window behind the bathtub brings in, but since the front of our house has an uninterrupted view from the road, we knew we’d need more privacy. I considered a clear privacy film of some kind (some are nearly invisible, they’re pretty cool!), but in the end the easiest option was a window treatment. I had a custom cafe shutter made by this company and had it color matched to the Benjamin Moore Pale Oak contrast trim. I love the shutter, it allows for the perfect balance of light and privacy!
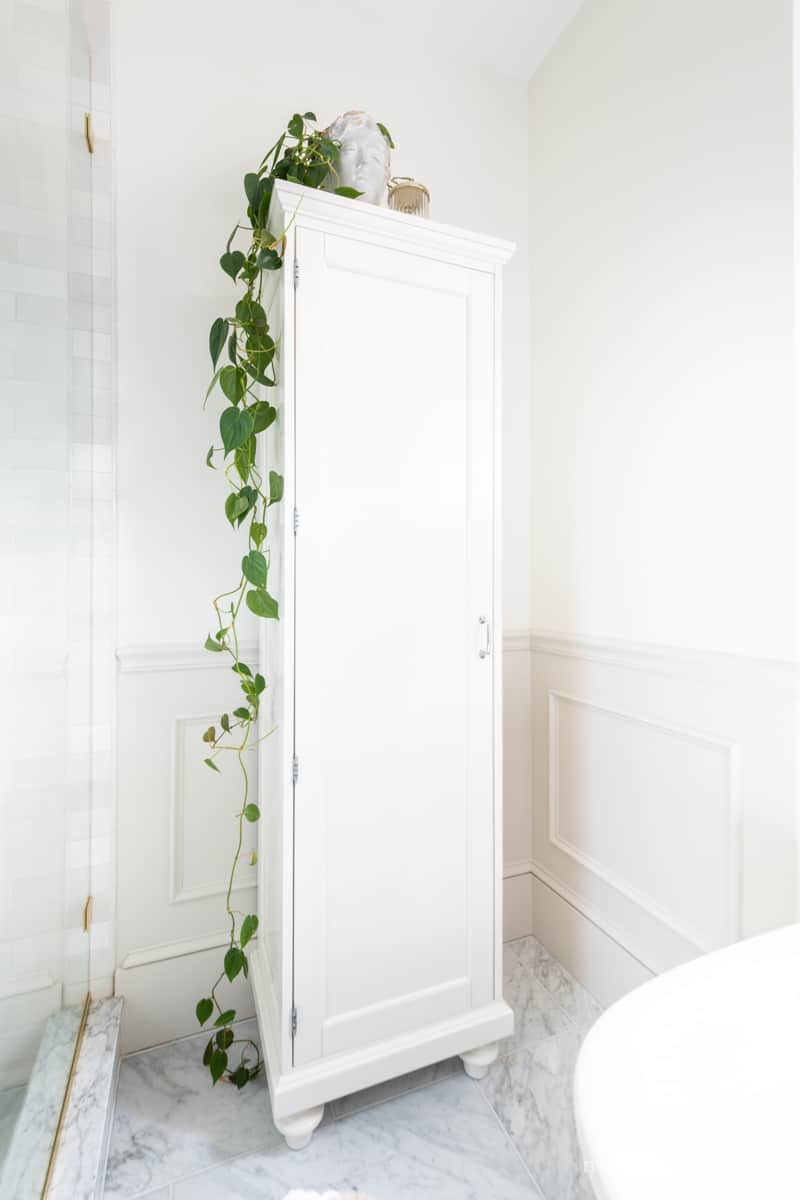
Bathroom Storage
Since we don’t have a linen closet, we added this storage cabinet from our previous home. It’s the perfect place to store towels and overflow toiletries. It’s discontinued, but you can get the same look with this cabinet in white! Because I designed the vanity with a lot of storage, we really needed little beyond that. You can see more of my bathroom storage ideas here!
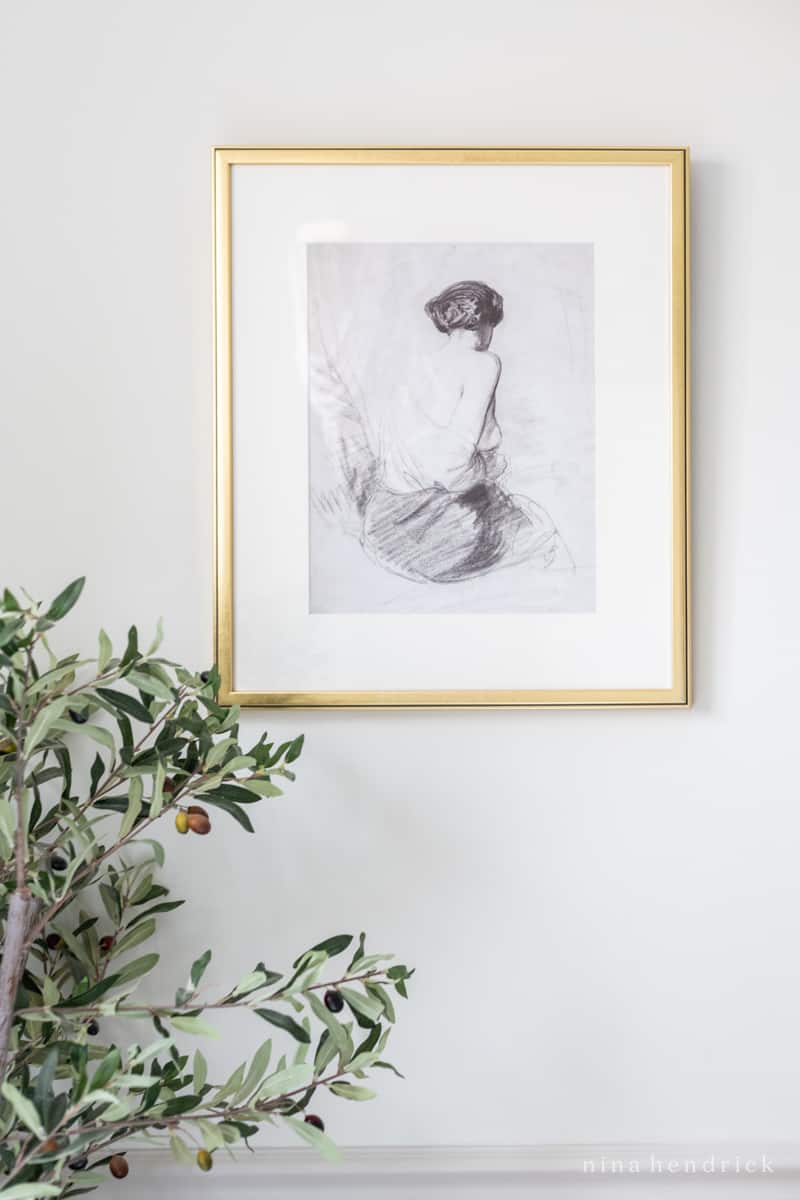
Bathroom Artwork
I know I briefly mentioned the artwork above, but I just think this is the perfect “bathroom” art. Isn’t she beautiful? I loved that it was both modest and feminine. After purchasing the digital print, I uploaded it to Framebridge, and they created a custom frame. They did a great job!
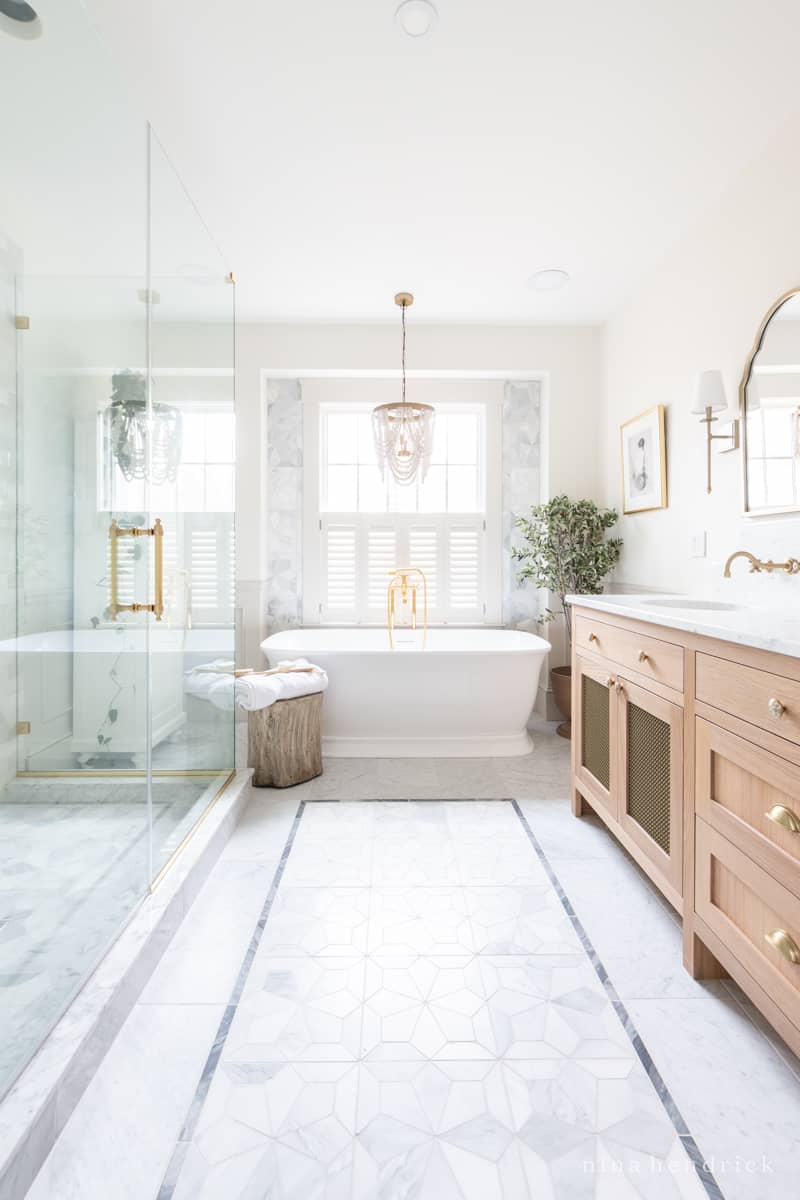
Overall, even though there was a long road to finishing this bathroom, I’m just so pleased with the end result! I feel so lucky to call this space my own. I hope that these ideas and the lessons I learned during this project help you as you embark on your own bathroom remodel!
Source List
Trim Paint Color: Benjamin Moore Pale Oak OC-20
Wall Paint Color: Benjamin Moore White Dove OC-17
Ceiling Paint Color: Benjamin Moore Chantilly Lace OC-65
Large 12×24″ Marble Floor Tile
Grout: Mapei Frost
Contrasting Gray Marble Border Tile
Blomma Mosaic Tile
Shower Walls: Cloe Subway Tile in Cream
Toilet: Kohler
Toilet Paper Holder with Marble Shelf
Round Window
Shower System (Similar, Discontinued)
Refillable Bottles
Storage Tower (Similar, Discontinued)
Grecian Bust Planter
Freestanding Bathtub
Tub Filler: Italian Brass
Wood Bead Chandelier
Stump Stool
Favorite Soft White Towels
Bath Mats (Not pictured to show tile detail, but these are amazing)
Olive Tree
Planter: Taupe
Artwork
Frame
White Oak Vanity: Custom, Similar Here
Similar Mesh and Fabric Backing
Cup Pulls
Knobs
Countertop: Bianco Carrara Honed Marble
Sinks
Faucets
Mirrors
Sconces (Similar, Discontinued)
Glass Jars
Brass Lid Storage Jar (Similar, Sold Out)

Wow- I loved your previous design and this one as well. The curved vanity backsplash and faucets are a favorite, as well as the tub and shower. Can you give the overall dimensions of the whole bathroom? Also, you mentioned “chief architect” and can you explain if that’s a program or person or what? Thanks again for sharing this special space.
Thank you so much, Phyllis! The overall bathroom is approx 10’x12′. Chief Architect is a design program for creating floor plans and renderings. I specifically use Home Designer Pro.
Really ‘beautiful job’ Nina …. loved everything ….
Thanks so much, Linda!
It is beautiful, but where do you hang towels? I see only one towel hook next to the shower. Hand towels next to the vanity?
My hand towel hooks are backordered, unfortunately, but they’ll go between the mirrors and to the right of the sink. There are hooks on the door also and I just added some suction cup hooks to the shower glass!