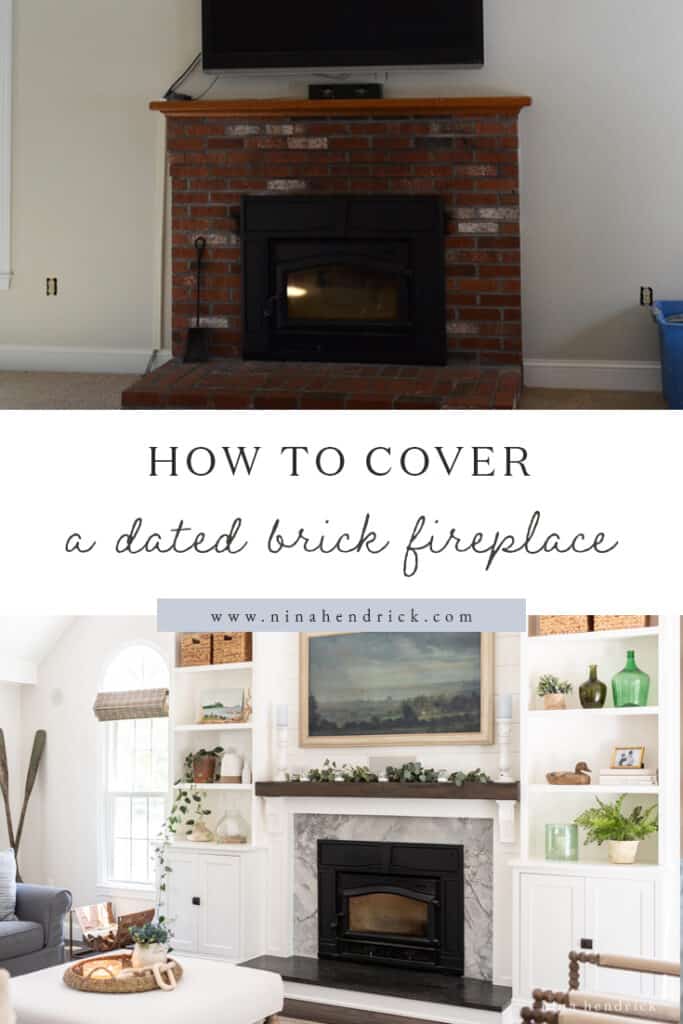
Learn how to cover a brick fireplace with wood to transform it from dated to timeless style with stone, painted wood, and a solid rustic pine mantel.
When we first moved into our 1980s colonial, I knew pretty much immediately that I wanted to transform the dated brick fireplace in our family room. In this post I’ll show you step-by-step how you can follow our process for how to cover a brick fireplace with wood in order to give it a cleaner and more modern look! You can also see more of our family room here after we later added surrounding built-ins.
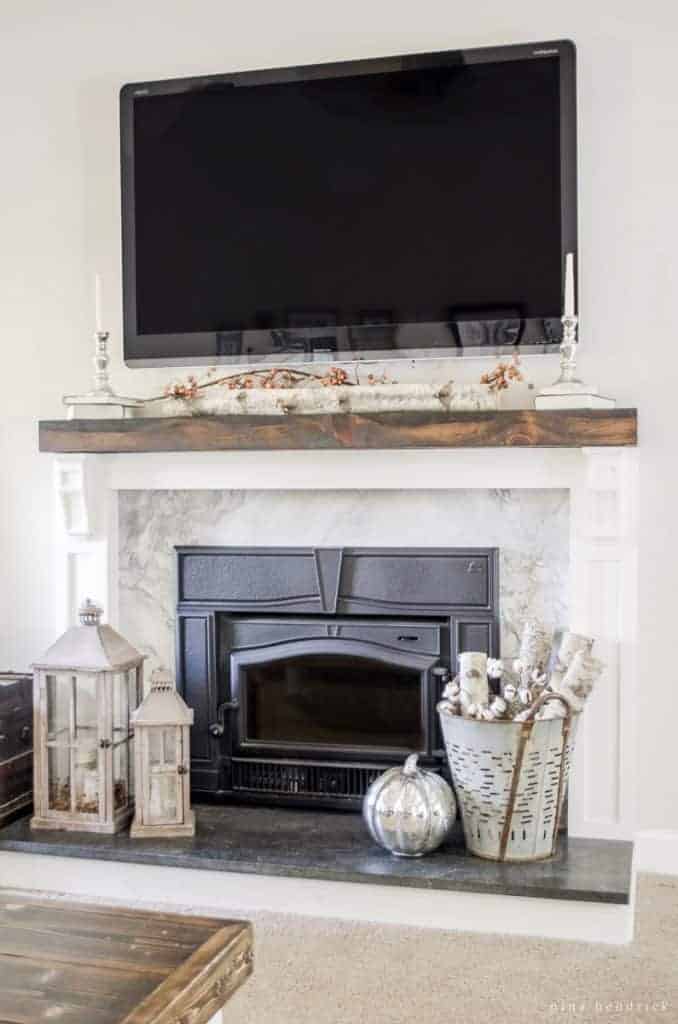
Originally published September 21, 2014
What can I cover a brick fireplace with?
The most simple and inexpensive option for covering a dated brick fireplace is simply to paint the brick. It makes a big impact for a great value. Painting the brick fireplace was a temporary option I considered before we ultimately covered it with wood and stone. If the project was further away in our renovation timeline, I would have gone for it!
Here are a few more ideas for covering your brick fireplace:
- you can cover a brick fireplace with stone veneer
- or you can use concrete for a modern look
- a recent trend I’ve seen everywhere is to use plaster
- you can use shiplap or planking for a coastal look
Ultimately, we covered our fireplace with wood and stone with the intention of later adding built-in bookcases and a backdrop for our TV.
Why Cover a Brick Fireplace with Wood?
Ultimately, the main reason to keep your brick and cover the fireplace with wood is to save money. Brick is a solid base for attaching wood and giving your formerly brick fireplace a built-in appearance. By keeping the existing brick as a base you can save both time and money along the way.
Our Brick Fireplace Before
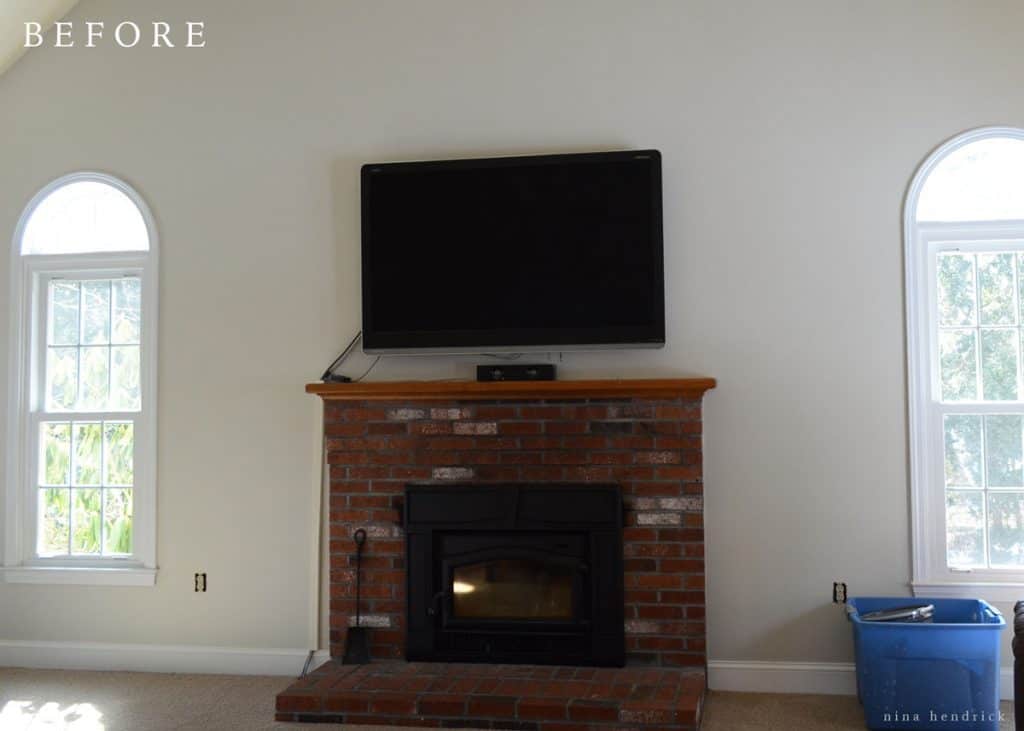
Before we had a classic brick fireplace, and it certainly wasn’t horrible, especially once the walls were no longer yellow. However, it simply wasn’t what we had in mind for our space. The scale was also a bit off with the high cathedral ceilings.
Our two major challenges were the smoke-stained brick and the bumped-out top courses. We also knew we wanted something different for a mantel. As a result, we got to work creating a stone and wood fireplace that complements the rest of our improvements.
Demo of a Brick Fireplace
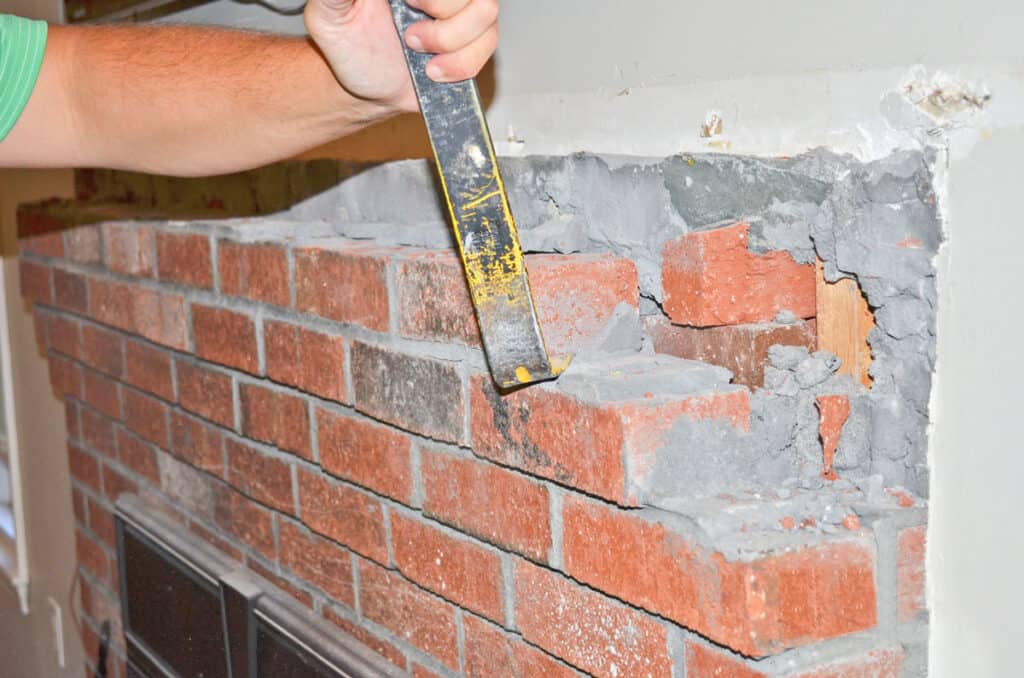
First up: cue the demo.
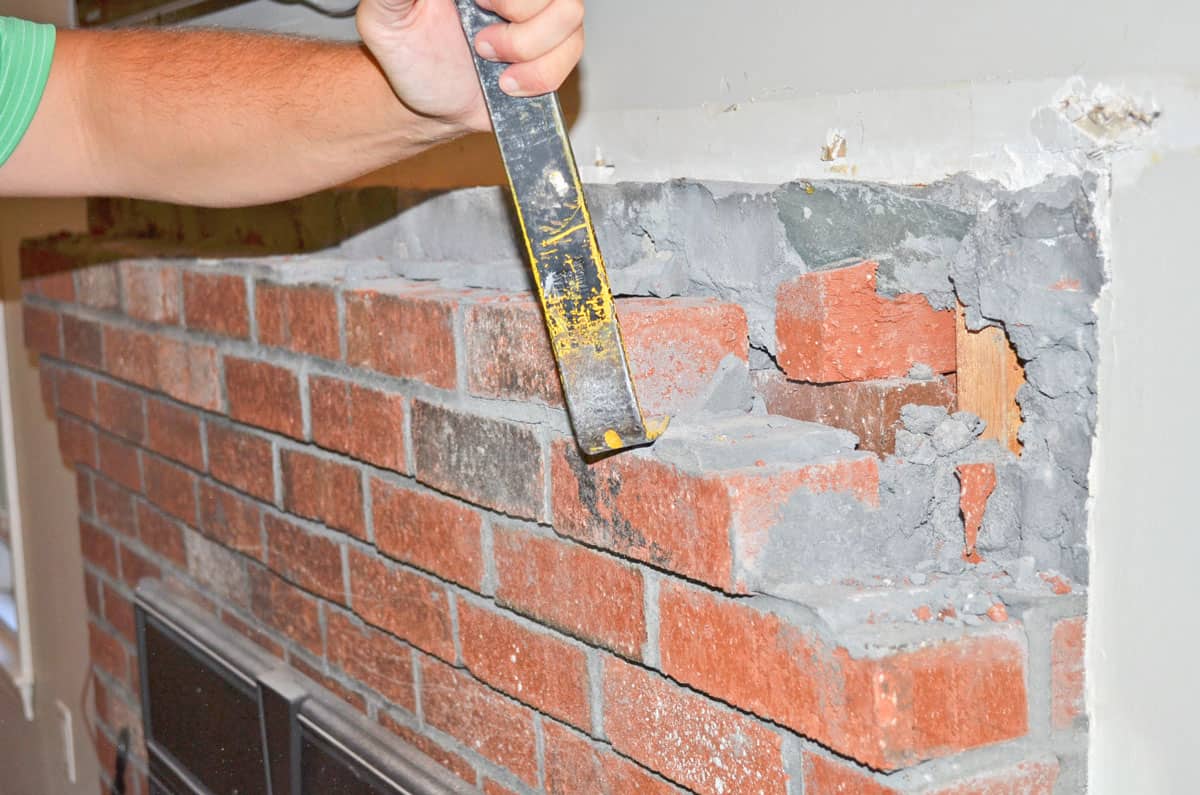
We made a big mess and removed the top courses only. We used a combination of a crowbar, chisel, sledgehammer, and a regular hammer. I love demo!
This is what it left us with.
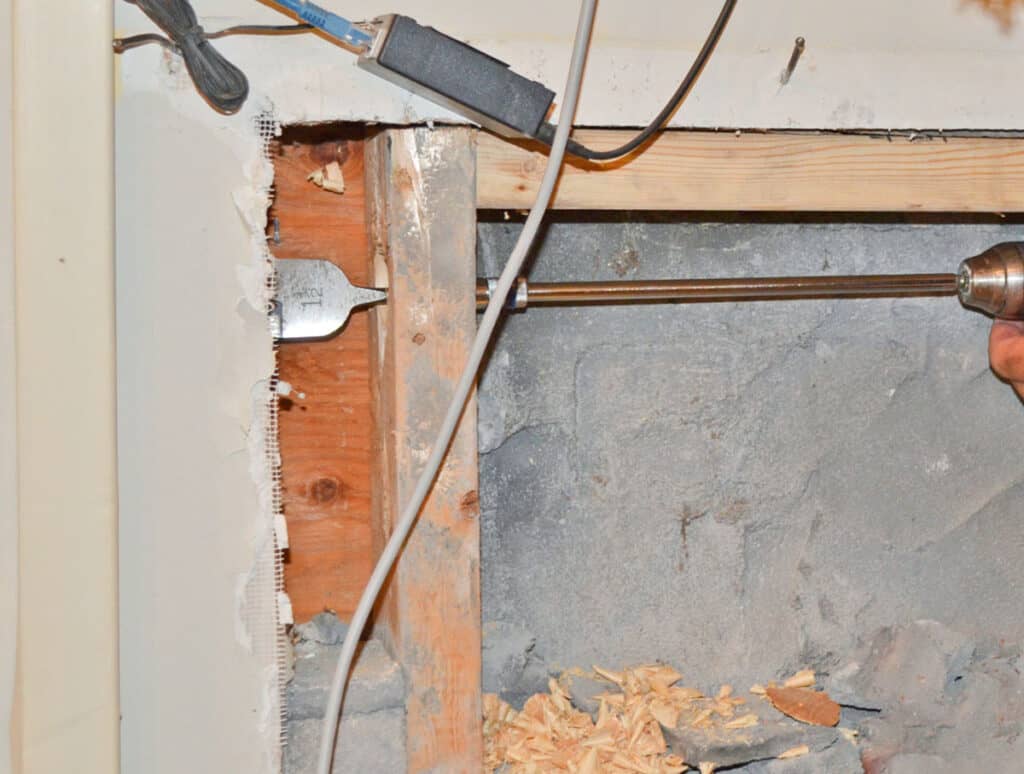
We took advantage of the giant gaping hole in the wall to create a tunnel for the ugly TV wires, so they would no longer be exposed. You can read more about how to decorate with a tv above your mantel here!
Building it Back Up
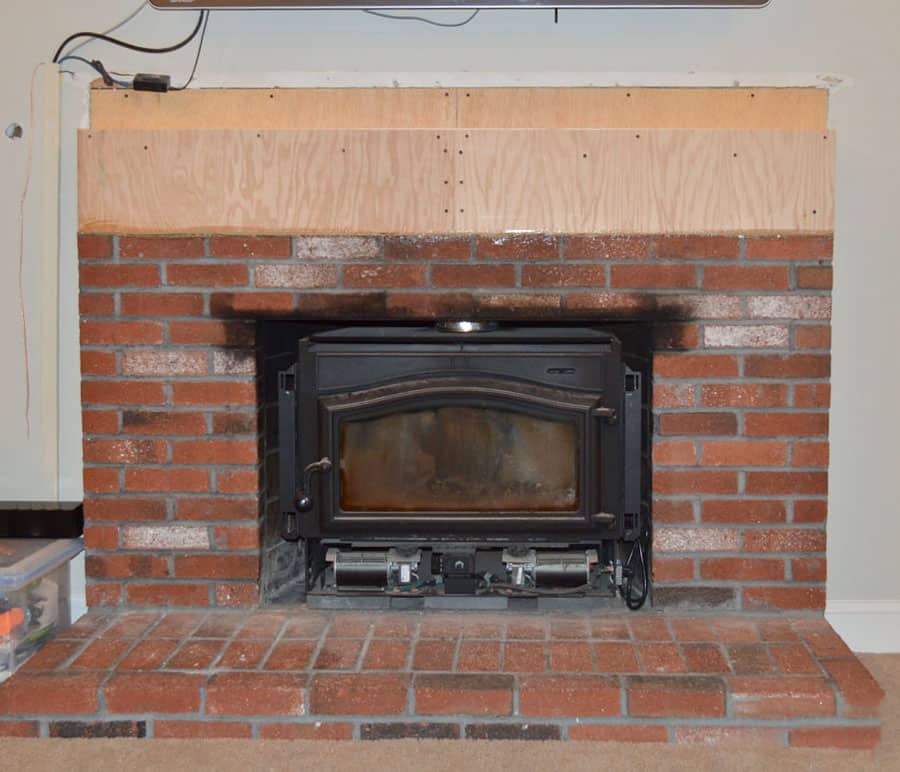
Mack built a box out of scrap plywood and attached it to the brick using construction adhesive. Now the fireplace was flush and ready for stone!
Installing Stone Over a Brick Fireplace
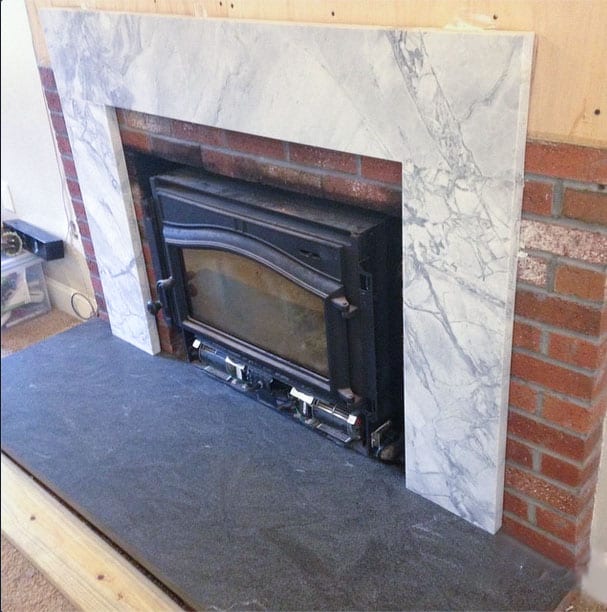
We bartered our old lawn tractor for Super White Quartzite and Jet Mist Granite slabs & installation. I was prepared to do tile, so it was a nice surprise to have something higher-end! Really, this is mimicking the Carrera and Soapstone I truly wished for. However, both stones are soft, so we instead opted for these more solid and durable choices.
How to Cover a Brick Fireplace with a Wood Surround
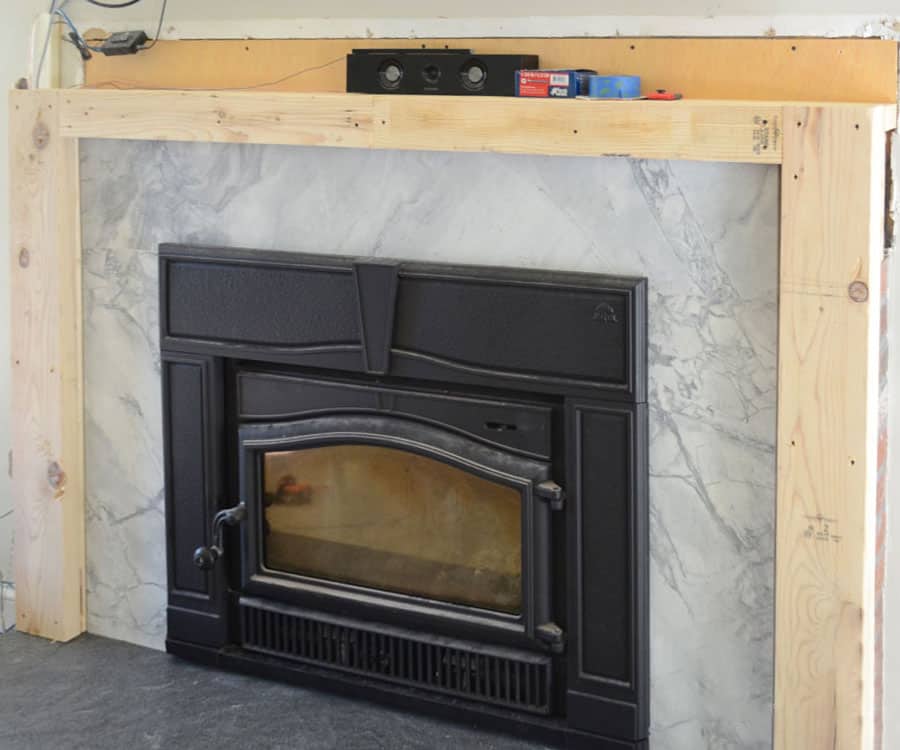
After the stone install, we used construction adhesive and masonry screws to adhere 2x6s to the two sides and a 2×4 to the top of the brick. This would act as a nailer for the trim boards.
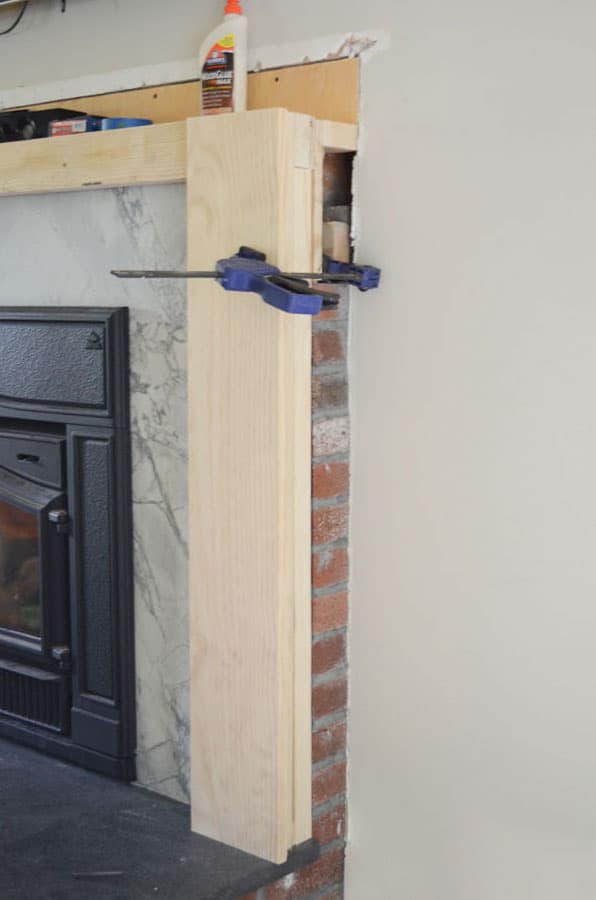
Because of our staggered brick and the resulting demo, we could capitalize off of the gap to use clamps. They gave an extra layer of stability to the glue and nails we used to attach the first trim boards to the 2x6s.
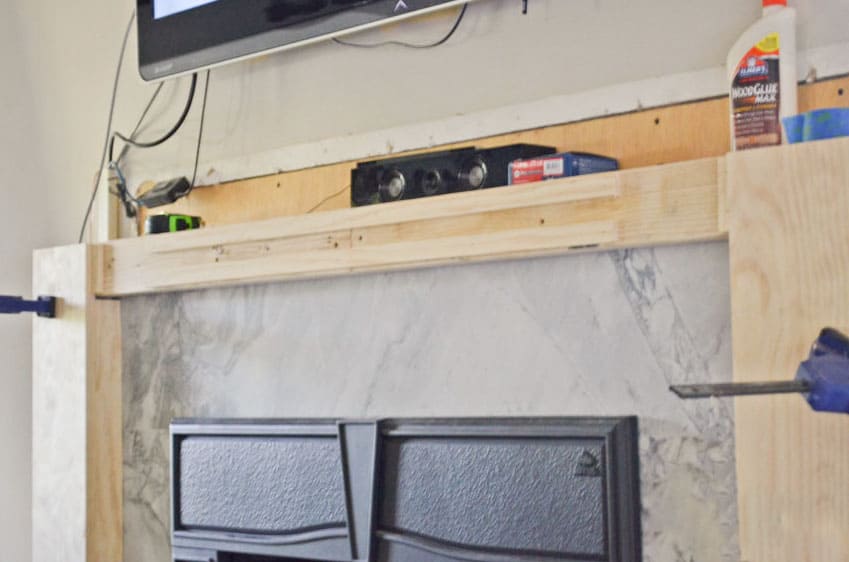
Because the top board wouldn’t have any detail, we used spacers behind the trim to ensure that the top board would be flush with the eventual detail boards.
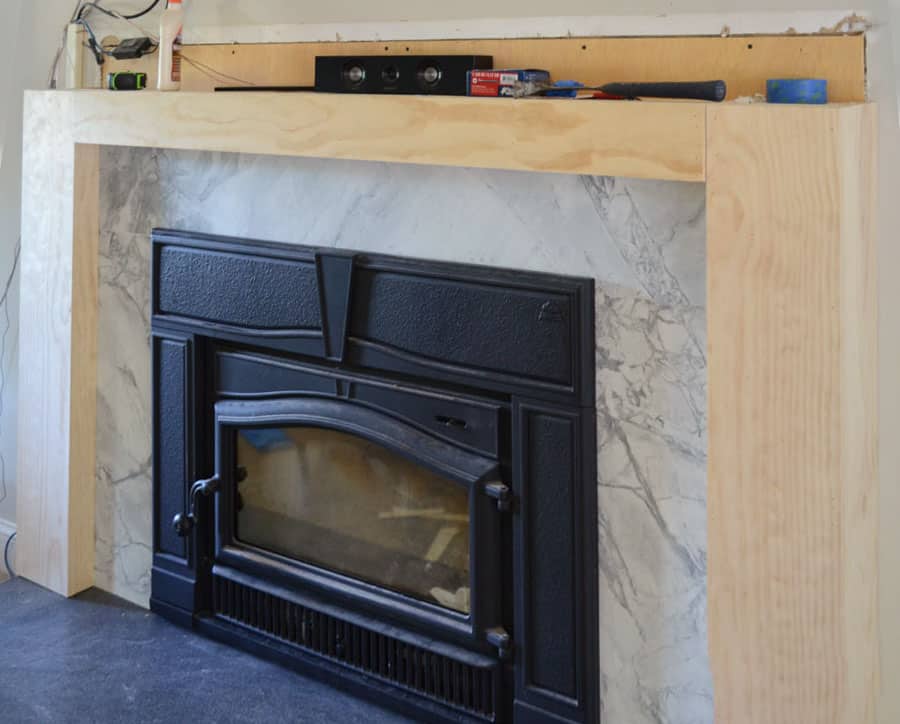
If you look closely at this photo, you can see how the top trim board comes out slightly further than the side boards.
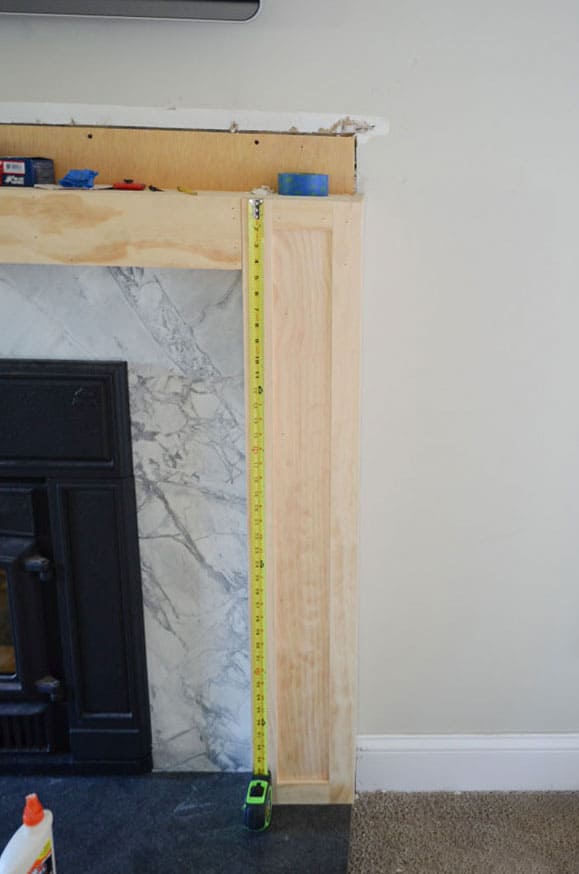
But after we added the trim boxes, the top board is flush with those new detail boards. We used extremely thin pieces of pine to create the trim detail boxes and adhered them using wood glue and small finish nails.
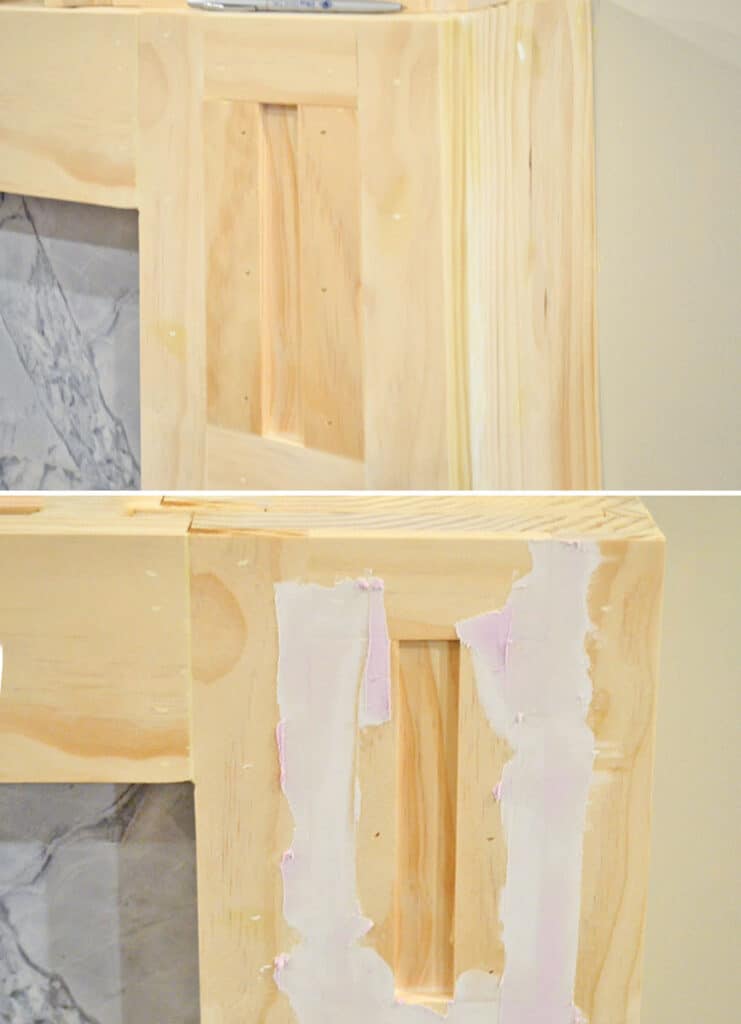
After, we filled in the top area to make a flat base for the corbels. Putty and sanding eliminated any cracks or gaps between the trim pieces so that we had a smooth base to attach the corbels.
Adding Corbels to a Fireplace
This post contains affiliate links for your convenience. Please see my disclosures here for more information.
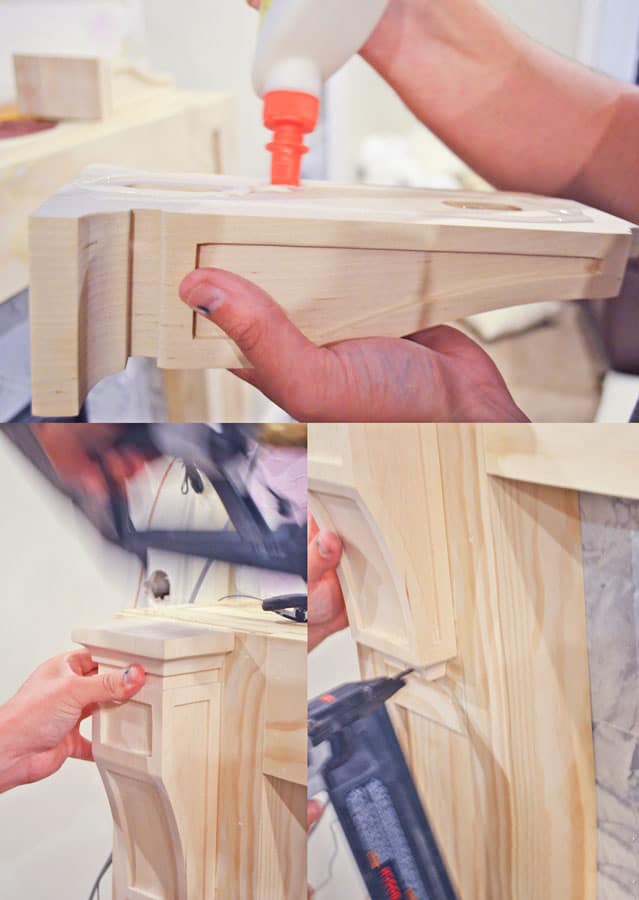
Next we attached the corbels with wood glue and finish nails. Although these specific corbels are no longer available, I sourced some here that are similar.
Painting a Fireplace Surround
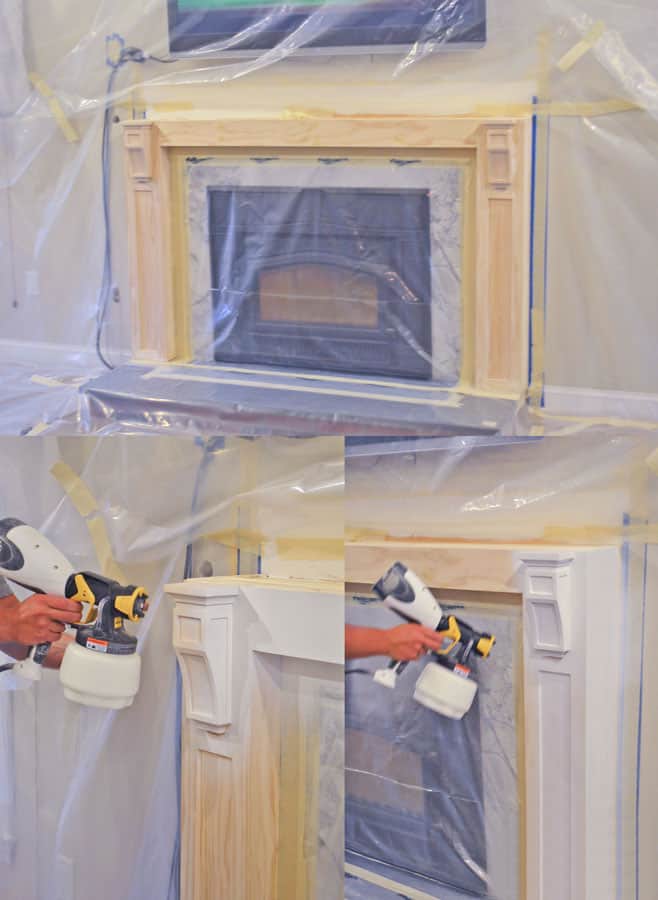
We used our paint sprayer to give the fireplace a nice smooth finish. I could have never gotten the results we did with a brush! You can read more about my paint spraying technique here.
You’ll notice that we were very careful to mask everything off — especially the TV — so there were no drips or over-spray. We used Benjamin Moore Aura Paint + Primer in Simply White Semi-Gloss.
Rustic Solid Pine Mantel
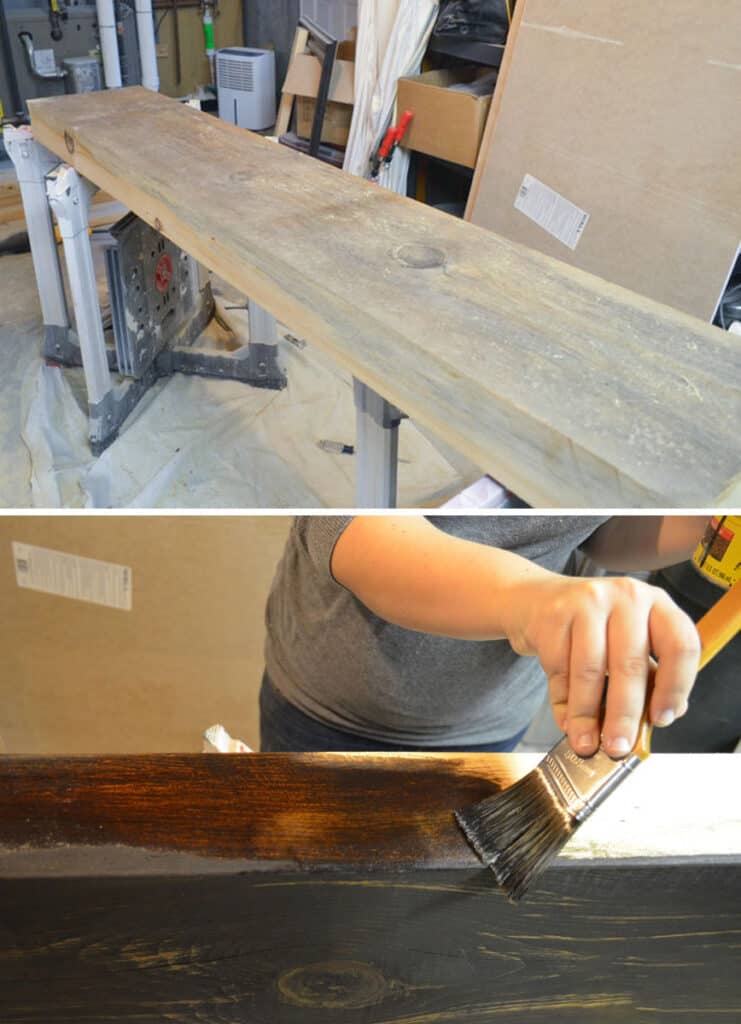
For the mantel, we used a solid piece of pine from a tree that my dad cut down. Our family friend Bernie milled it, and then we cut it down to size using a table saw and compound miter saw, sanded, and gave it a finish in Minwax Dark Walnut.
Mack anchored the mantel with two very long rustic screws, but didn’t permanently attach it since it will need to come down when we move on to Phase 2 — the surrounding built-ins and TV backdrop.
How to Hide TV Wires Above a Fireplace
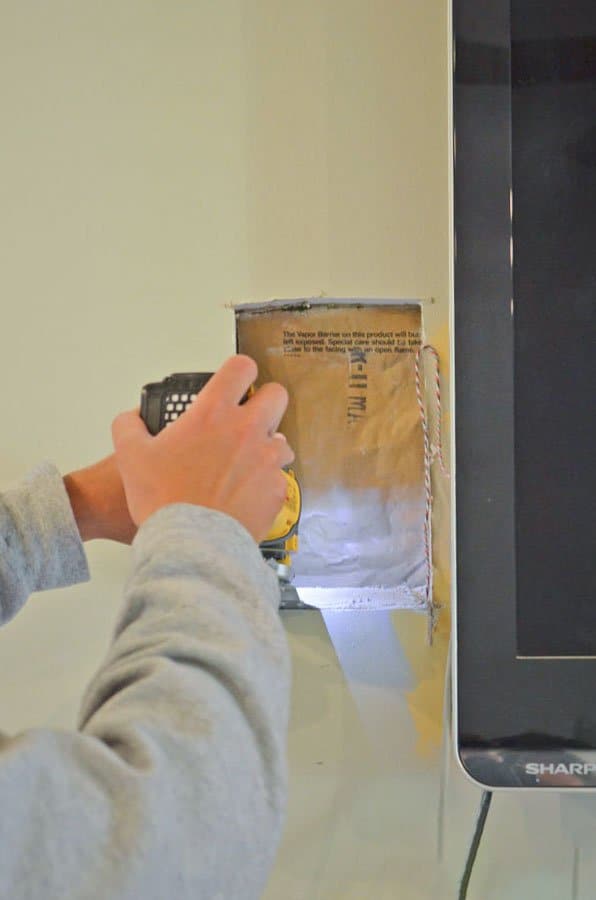
Since posting this originally we’ve had a lot of questions about what we did to hide the TV wires. Since it was a two-person job (and very frustrating) I wasn’t able to photograph the steps. But here’s an explanation of what we did.
I mentioned earlier that we took advantage of the hole in the wall from where we removed the top courses of brick. This exposed the studs, which we could then drill a hole through with a hole saw. We also cut a hole at the bottom of the wall beside the fireplace next to an existing outlet.
We ran a simple string through the studs and pulled it out of the hole at the bottom of the wall. This would allow a licensed electrician to more easily run the proper wires later on for an outlet and cable. After, we simply plugged the TV & cable into the outlets.
The End Result: A Covered Brick Fireplace with Wood & Stone

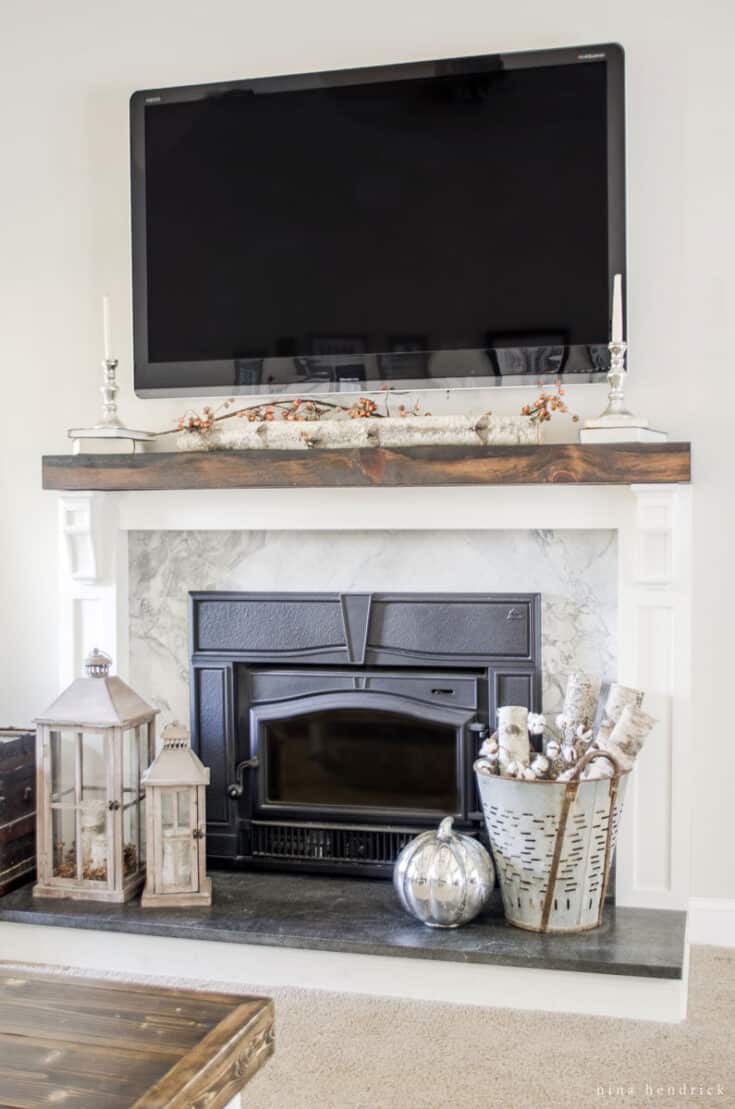
And here’s the result for how to cover a brick fireplace with wood. We’re so happy how this classic fireplace surround turned out and we can’t wait to complete the project with the surrounding built-ins in the future. For now, this is such an improvement!
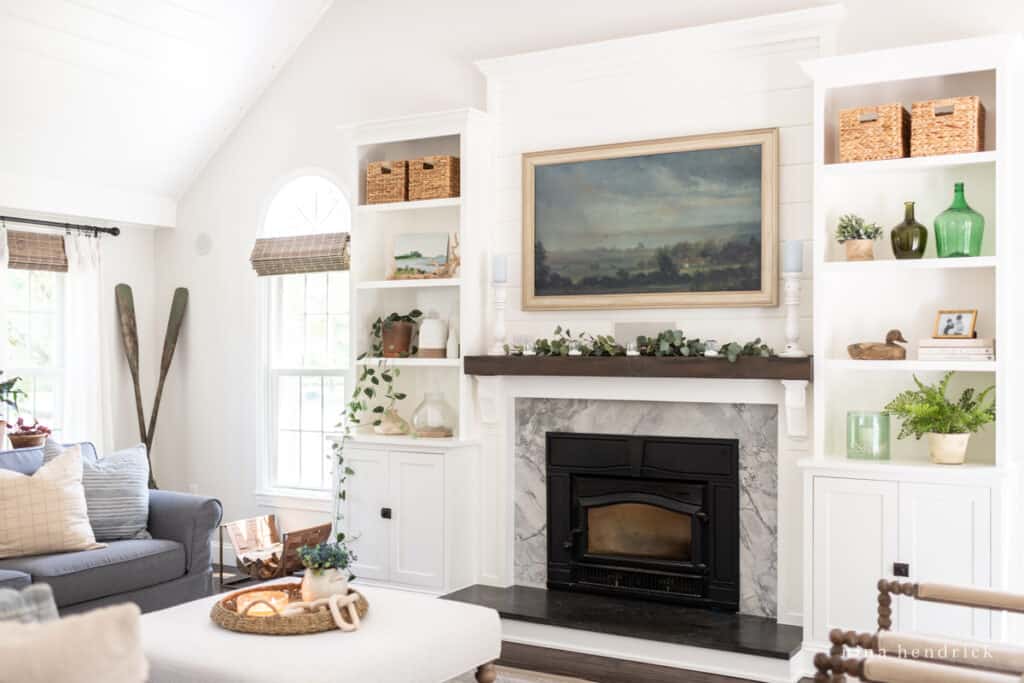
Update: See the final Family Room project here!
How To Cover a Brick Fireplace with Wood
Learn how to cover a brick fireplace with wood to transform it from dated to timeless style with stone, painted wood, and a solid rustic pine mantel.
Materials
- 2x6 pine
- construction adhesive
- screws
- plywood
- wood glue
Tools
- pry bar
- sledgehammer
- adhesive gun
- power screwdriver
- compound miter saw
Instructions
- Demolish and remove any brick that will impede your final project.

- Use plywood to create the fireplace box in any areas where you've removed brick.

- Add stone surrounding the areas near your fire source. Make sure to check local codes so that you're in compliance.

- Adhere 2x6s and anchor with masonry screws to frame out your wood base.

- Add trim boards and corbels in any design of your choosing.

Notes
Before completing the project, consider if you need to add wiring for an outlet above the fireplace.

Where did you find the black “trim” that you installed around the wood stove. It looks so nice! We’re doing our fireplace like yours!
Hi Vicky! It came as part of the wood stove insert, which was made by Jøtul.
Absolutely beautiful
Hi there, was wondering about the jet mist granite slab you used on the hearth. Was it jus set on top of the brick out was there an underlayment or adhesive? Is it honed granite? Have you had any issues with it since installation?
The slab was adhered to the top of the brick with adhesive, and they also shimmed it level, but there was no underlayment. It is honed. We haven’t had any issues, I absolutely love it!
It’s gorgeous! Curious though, how you did the bottom hearth. We have a old 1940’s home with a fireplace that has a gorgeous white mantle but a brick hearth. I’m planning on tiling the surround because the existing tile is dated. I would love to cover the bottom brick hearth as you have done. I didn’t see where you mentioned step by step how you did that though. I would love to know what you did.
Hi, Jen- it was done by a stone installer. It’s essentially the same as a granite countertop, they put it right over the brick. The bottom is wrapped in trim.
Love it. Our fireplace looks similar. Curious what the cost would be.
I just wanted to say “Thank You.” Your style is incredible. I just “stopped by” to look at this gorgeous fireplace make-over for 10 minutes. Well, an hour has drifted by as I looked through so many of your projects.
You are very talented! Thank you for sharing with all of us.
Thank you so much for your sweet words, Sheri! I really appreciate you stopping by! :) So glad you enjoyed my projects.
This looks amazing! Every detail looks so great and I love that you hid the wires! Beautiful.
The fireplace looks amazing!! Well done! And I love the autumn decor you’ve added too.
i do not think i ever heard of anyone that has enjoyed their fireplace makeover as much as you it does look awesome xx