- Bathroom
- DIY Tutorials
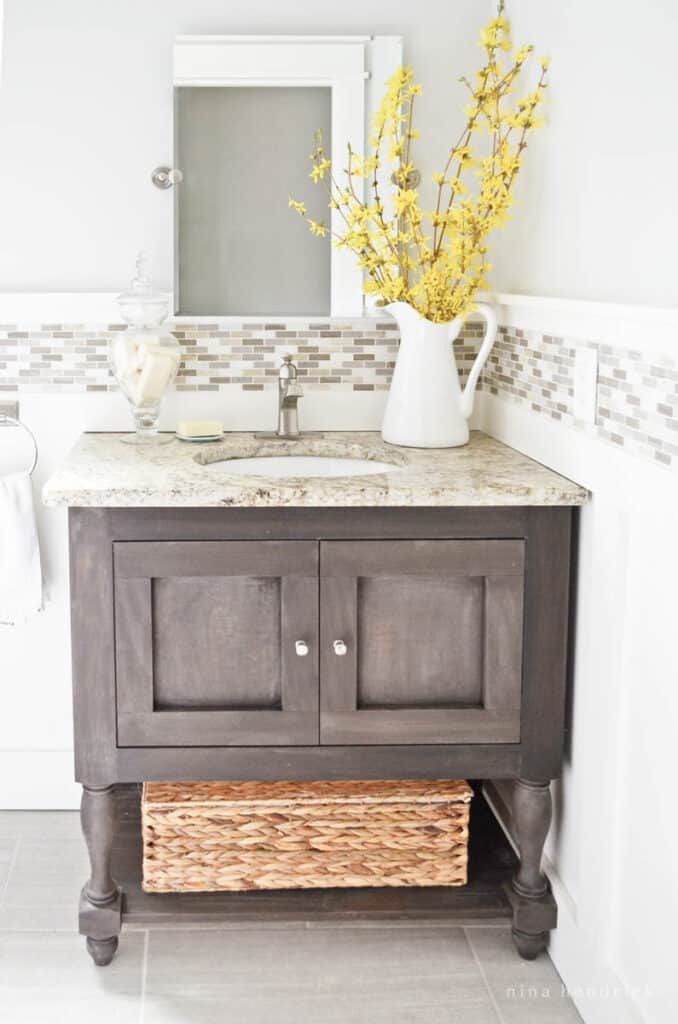
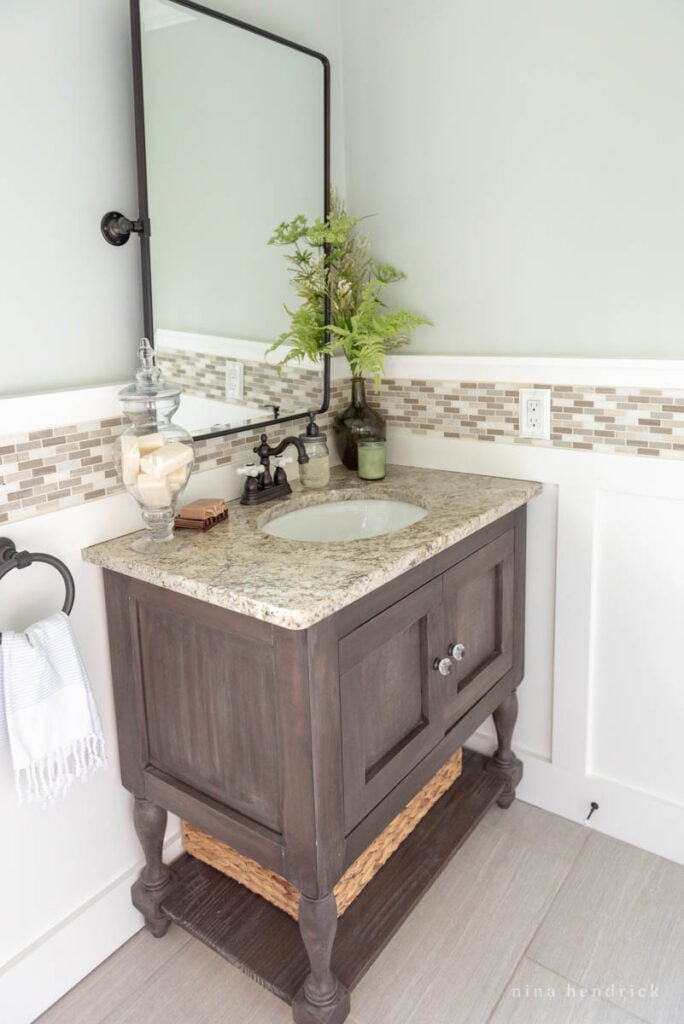
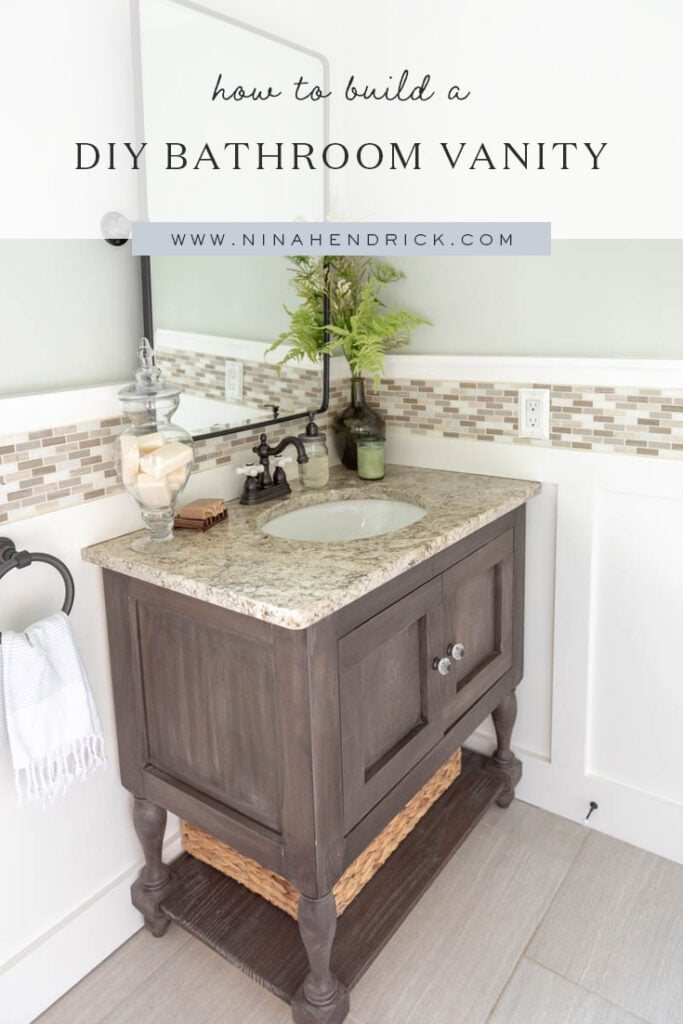
How to Build a DIY Bathroom Vanity
Learn how to build a custom DIY bathroom vanity inspired by an expensive sink console with this step-by-step building tutorial.
When the time came to makeover our powder room, I fell head over heels for the Pottery Barn Newport Sink Console. However, it was not in our budget — it actually was double the cost of the entire project budget for the Powder Room.
Originally published May 13, 2014
This post contains affiliate links, which means I may get a small commission (at no extra cost to you) if you shop my link. Please see my disclosure if you’d like more info!
Here are some other projects we had in our plans: a DIY beadboard ceiling, board-and-batten walls, and all of that pretty tile. We knew that in order to find room in the budget to complete those projects, we’d need to save on the vanity.
What’s the best way to save on project costs? To do it yourself, of course! Cue this DIY bathroom vanity. After our success in building our DIY Kitchen Island, I knew we had this. (Update: Pottery Barn discontinued the Newport Vanity, but here’s one that’s very similar if you’re more of a buyer than a DIYer!)
First, I went searching for information on how to approach our build. I came across this tutorial by Ana White. This is a great resource for detailed step-by-step plans with measurements for the vanity in a larger size. I also owe a shout out to this tutorial, which helped guide me in my build, even though I changed up the design.
Our dimensions are a little strange to fit the existing granite countertop, which I wanted to reuse to stay within budget, but I calculated these plans to fit standard dimensions for a 37″ vanity top.
We changed the design from the linked tutorials a bit to make it easier for us to build, and I’m about to share those modifications with you. I’ll also share how I achieved the dark weathered wood finish in a separate post.
How to Build a DIY Bathroom Vanity
Approximate time
4 hours
Dimensions
21-in x 36-in x 34 1/2-in
Materials
- 4 Marshall Island Legs in maple
- (2) 1-in x 3-in x 8-ft poplar
- 1-in x 2-in x 8-ft poplar
- 1/2″ Cabinet-Grade Plywood Panels
– look for pre-cut 2×2′ project panels for sides and a 2×4′ panel for the back.
– plywood panel for bottom (at least 24 x 36-in) - 1/8″ 2×2′ plywood project panels for the doors
- 1-in x 24-in x 4-ft Unfinished Spruce Pine Fir Board
- Euro hinges
- Kreg screws
- Wood glue
- 1 1/2-in wood screws
- 1/2-in brad nails
Tools
- Compound Miter Saw
- Table Saw
- Kreg K5 Pocket-Hole Jig
- Driver
- Drill
- drill bit for pilot holes
- Jigsaw
- Kreg Hinge Jig and Bit
- Brad Nailer
Cut List
- 2 plywood panels @ 15-in x 19 1/8-in.
- 4 poplar 1x4s @ 15-in
- 2 poplar 1x2s @ 18 1/2-in
- 1 plywood panel at 19 5/8-in x 30-in
- 2 poplar 1/4s @ 30-in
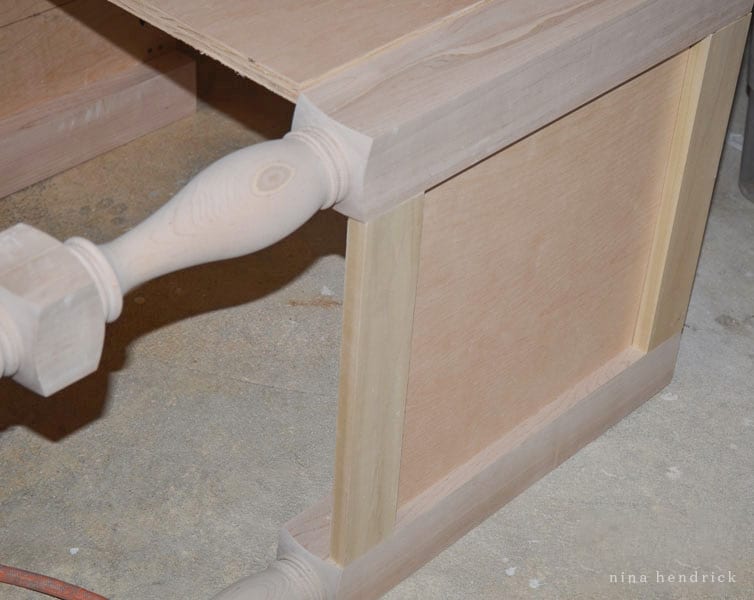
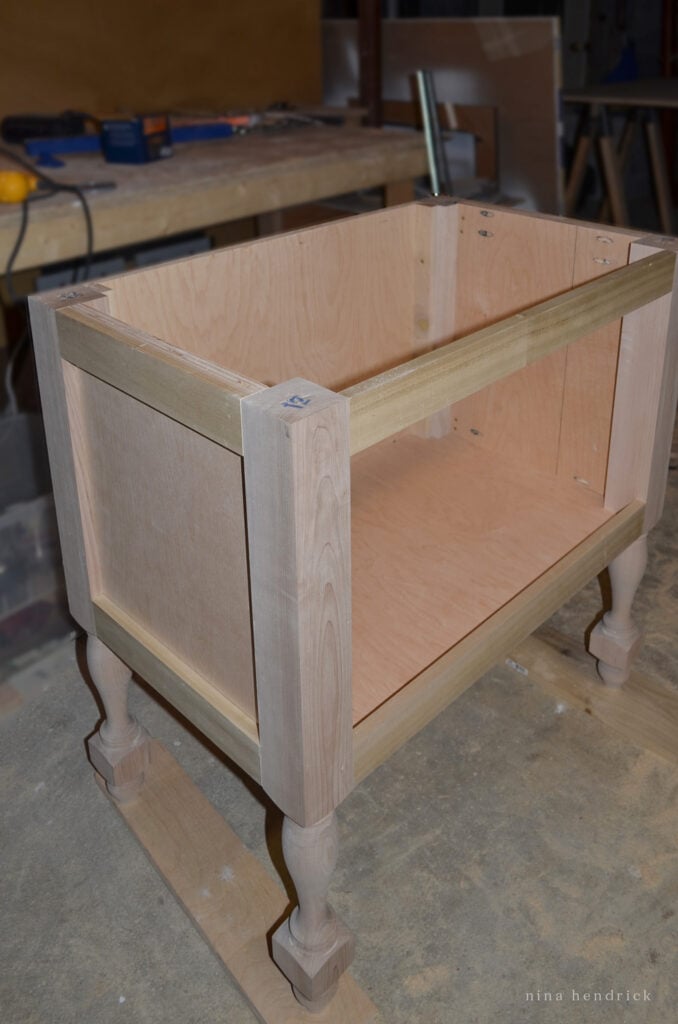
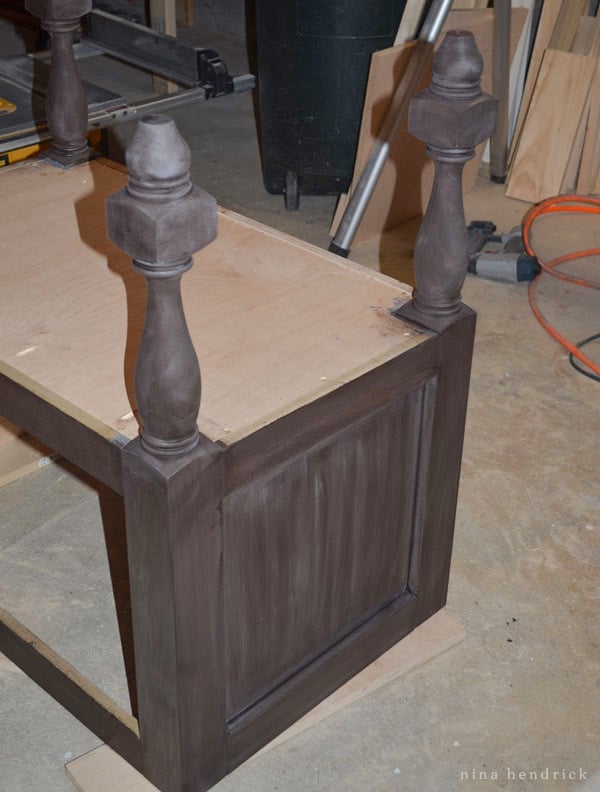
1. Construct the side panels
Cut two pieces of cabinet grade plywood down to the size with a table saw to create the side panels: 15-in x 19 1/8-in. Cut four 1x4s poplar pieces to 15-in with a compound miter saw.
Glue and finish-nail a piece of poplar trim to both the top and the bottom of the panel to create the rails. Offset the bottom rail past the bottom of the plywood side panel by 1/2-in to create a space to inset the plywood bottom panel later.
DIY Bathroom vanity Design tip
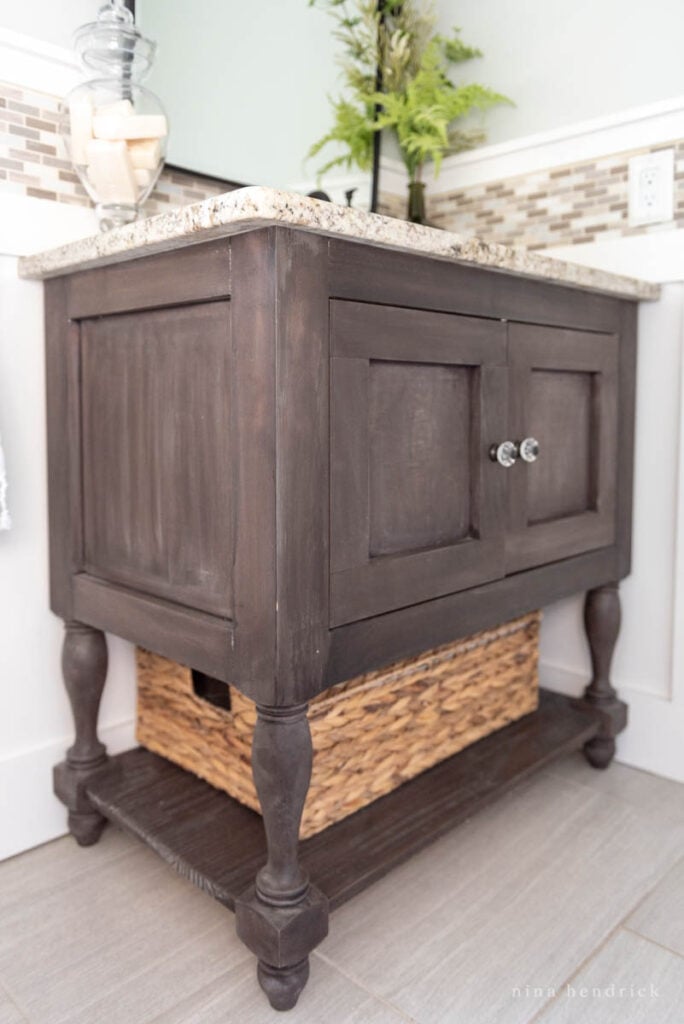
We made the trim at the top and bottom of the panel flush with the front of the legs because I felt it gave more cohesion to the design.
2. Secure the Side Panels to the Legs
Use a Kreg K5 Pocket-Hole Jig to make pocket holes in the back of the side panel. We did this behind the rails so that there was extra wood to hide the pocket holes. Secure the side panels flush to the front and top of the legs with wood glue and pocket hole screws.
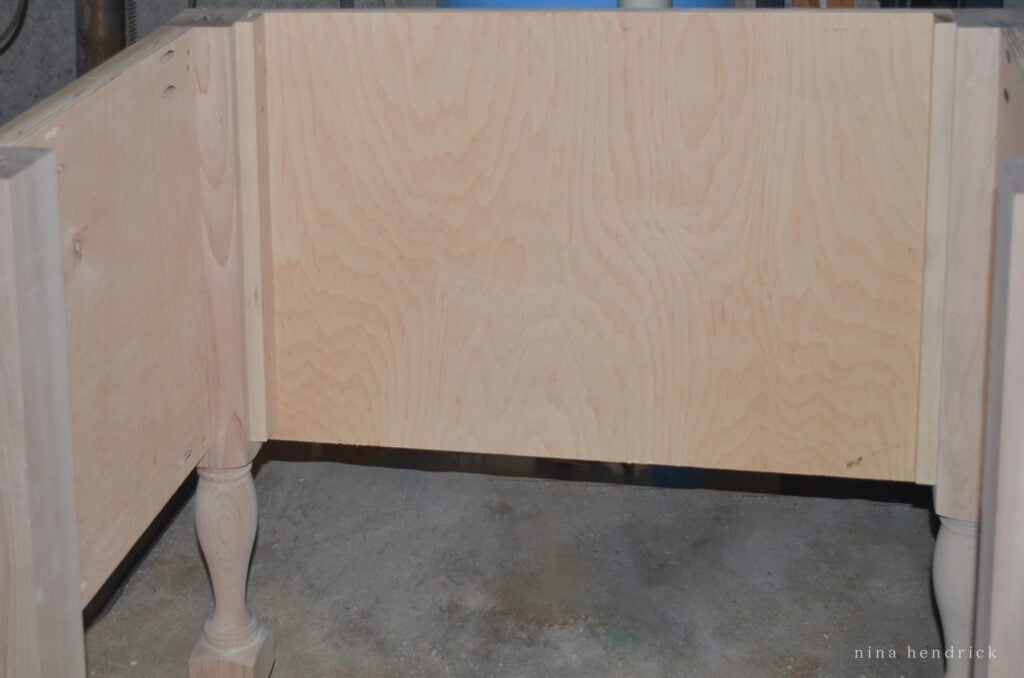
3. Cut and attach the nailers for the back panel
Cut two 1×2 nailer pieces with your compound miter saw at 18 1/2-in. It may help to use a scrap piece of 1/2 plywood to mock up where your nailer should attach. Arrange on each leg at the depth so that the plywood for the back panel sits flush with the back of the legs (1/2-in). Offset the nailer height-wise 1/2-in from the bottom so that the bottom plywood panel will inset in a later step. It doesn’t matter if the nailer sits flush with the top of the leg. Attach nailer with wood glue. Drill pilot holes through the nailer and into the leg with drill bit slightly smaller than the screw threads. Secure nailer to legs with screws.
Building tip
To find the correct sized bit for drilling a pilot hole, hold up your screw with the threads and point facing you. Arrange your drill bit directly lined up with the point of the screw. Hold up to your line of vision. If you have the correct sized bit, you’ll still be able to see the threads past the width of the drill bit.
4. Attach the back panel
Cut the plywood back panel with your table saw to 19 5/8-in x 30-in. Attach to the nailers with wood glue. Drill pilot holes at intervals and secure to the nailers with 1 1/2-in wood screws.
5. Cut and attach front supports
Cut two 1x4s at 30-in to create the front supports. Drill pocket holes in each end with the Kreg Jig. Arrange the top support to sit flush with the top and front of the vanity leg. Attach with wood glue and secure with Kreg screws.
Arrange the bottom support to sit flush with the front and bottom of the leg block. Attach with wood glue and secure with Kreg screws.
6. Measure & cut plywood bottom panel (and bottom shelf)
I won’t give you specific measurements for this step, since I really want you to measure and get this perfect. Measure the inside dimensions of the bottom of the vanity with the corners notched out for the legs. On the sides, you’ll use the inside of the poplar side rail as your dimension. Cut your plywood bottom panel and test fit. The plywood ledges you created earlier on the side panels will support the bottom panel during your test fit. The poplar side rails should neatly cover up the edge of the plywood bottom panel. Don’t miss the tip below during this step!
Building tip
Here’s a tip on this step that we wished we had followed: use the bottom plywood panel as a template for your bottom shelf (the stain-grade wood panel). It will have the same dimensions and will need the same notches cut in the corners, so making both together will save you some time later on! You’ll attach the bottom shelf in a later step.
7. Attach the bottom panel
Use your Kreg Jig to drill pocket holes in the front and back of the bottom panel. Apply wood glue to the bottom of your side panels on the inside ledge. Drop your bottom panel in. Attach to the front and back of the vanity with pocket screws. Drill pilot holes through the bottom panel and into the plywood ledge of the side panel. Secure with screws. Your DIY bathroom vanity is beginning to take shape!
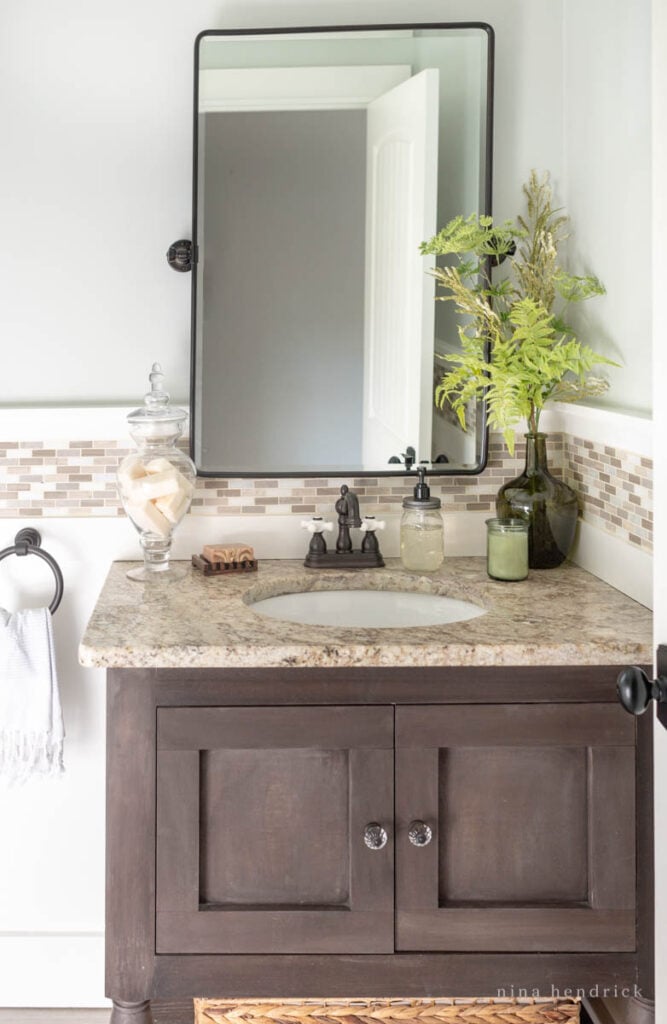
8. Build your doors
The doors for this DIY bathroom vanity are inset shaker style with a butt-jointed frame (not mitered). The pieces are shorter on the sides and butt up against the top and bottom pieces. We installed them with these hidden hinges. Disclaimer: I was not home when my husband built the doors, so I have to work backward from the finished product.
To create the doors, he created a frame of poplar trim 1x3s. He attached a thin piece of plywood to the back with wood glue and finish nails. This is an easy beginner way to create a shaker door. However, I recommend using a router to inset the panel into the frame evenly for a more professional finish. This is a great tutorial that walks you through that method!
Building tip
In this step I’m going to recommend you measure, measure, measure. Doors are pretty tricky, and your measurements may vary at this point. I recommend mocking up your two bottom rail boards and continuing to build the doors once you confirm those measurements!
If all went perfectly along the way, make the 1×3 shaker door frame from rails (bottom boards) that are 14 5/8-in and stiles (side boards) that are 5 3/8-in. That would leave an even 1/8-in reveal. However, you’ll want to double check this to ensure that those are the correct measurements for an even reveal.
The formula for the rails is: Total opening width (should be 30-in) divided by 2 (for the two doors) minus 3/8 (1/8-in reveal between and on each side)
Ex: 30 divided by two = 15 – 3/8 = 14 5/8-in
The formula for the stiles is: Total opening height (should be 12 5/8-in) minus 7 (the two rails, the actual width of a 1×4 is 3 1/2-in) minus 1/4 (1/8-in top and bottom reveal)
Ex: 12 5/8 – 7 = 5 5/8 – 1/4 = 5 3/8-in
After cutting your boards, create the frames by joining the boards using the Kreg Jig and wood glue. If following our method, attach your 7×8-in plywood panels to the back using wood glue and 1/2-in brad nails.
9. Install the doors
For a hidden hinge look, I recommend installing using this hinge jig and bit and these hinges. We centered the holes for our euro hinges on the top and bottom rails of the doors. Use the hinge jig and bit to drill for your euro hinge. Insert the round portion of the hinge in your door and test fit to make sure you’re attaching the other end of the hinge in the correct position to maintain your 1/8-in reveal. These hinges are adjustable, and I recommend following the instructions to get a perfect fit. After installing your doors, it may be easier to remove them temporarily for the next step.
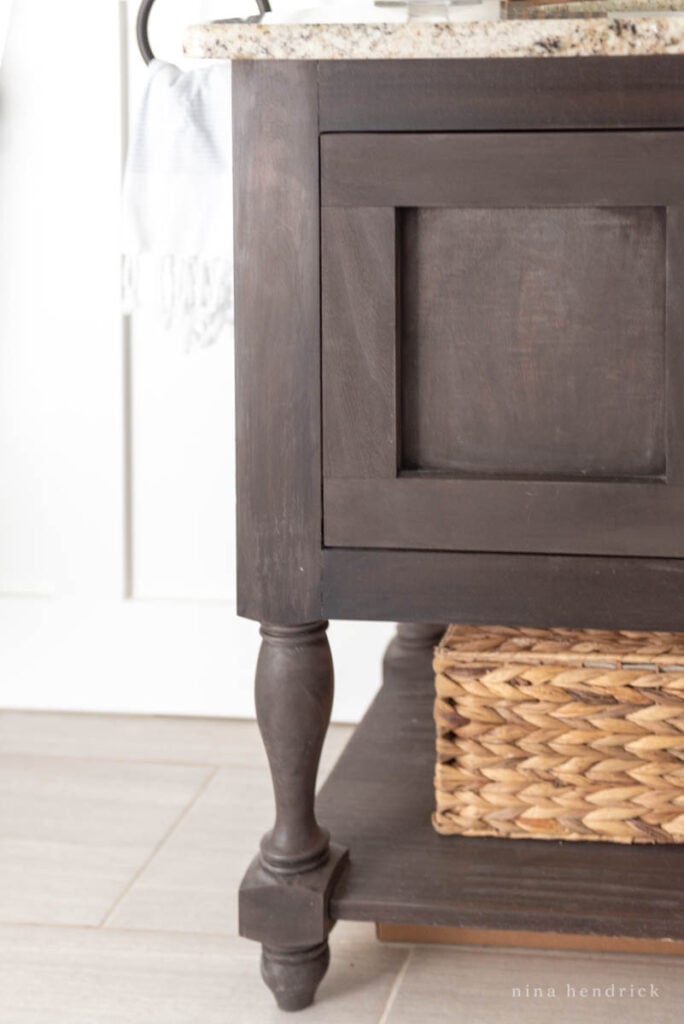
10. Apply your chosen finish
Whether you opt for the dark weathered finish I used on this vanity, a gray weathered look, a natural finish, or paint — it’s easier to apply the finish before you install the shelf and the vanity.
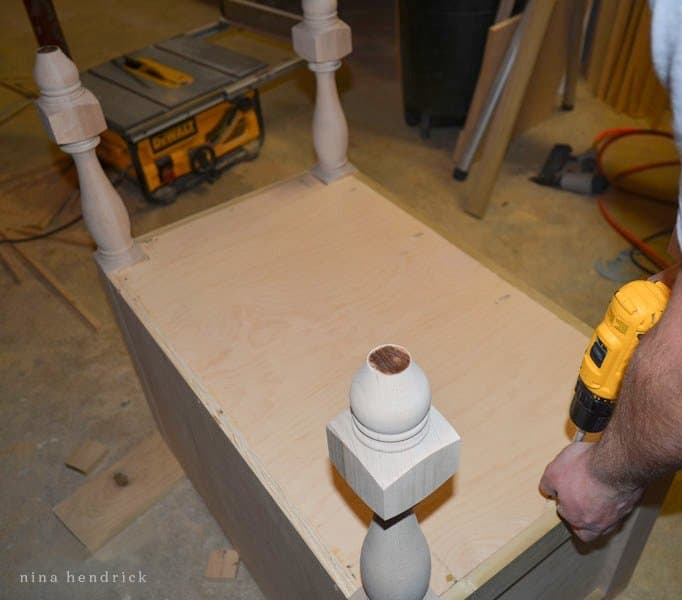
11. Install the bottom shelf
We opted to attach the bottom shelf just before install, since it would be easier to apply the stain before installation. Locate the shelf that you cut in step six. Drill pocket holes into the bottom of the shelf. Attach to the bottom block of the legs using pocket screws. We centered the shelf on the bottom block.
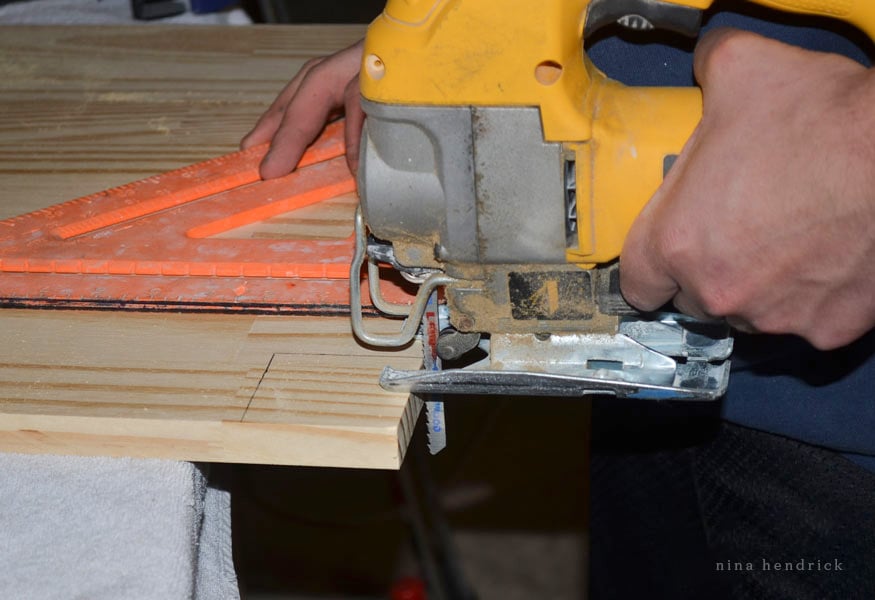
12. Install your DIY bathroom vanity in your space
This step will vary depending on the layout of your plumbing. Ours came in from the right side, so we cut a hole in the vanity’s side using the jigsaw. Otherwise, I would have wanted to install the vanity slightly further from the wall.
As I mentioned at the beginning, we planned to reuse the existing granite countertop and sink to save on our budget. If you’re starting from scratch, I designed the dimensions in this tutorial to fit most pre-made countertops at home improvement stores. This is a great affordable option!
And there you have it! This DIY bathroom vanity is another handmade piece in our home that I am very proud of. The best part is how much of our budget it freed up in this room. You can see more of our Powder Room here.
Powder Room source list
Upper Wall Color — Benjamin Moore Wickham Gray
White Paint Color — Benjamin Moore Simply White in Semi Gloss
Floor Tile — 12×24″ Silver
Wall Border Tile — here (color is much more neutral in person)
Window Shade — Driftwood
Ceiling Treatment — Beadboard Ceiling Tutorial
Ceiling Light Fixture — here
Vanity — DIY Tutorial, or similar here
Vanity Knobs — similar here
Faucet — oil rubbed bronze
Mirror — Matte Black
Hardware (towel holder, etc) — here
