- DIY Tutorials
- Renovating
DIY Shiplap Wall Plank Treatment Tutorial
Learn how to create a budget-friendly DIY shiplap wall using plywood for a fraction of the cost of pre-made shiplap. Create a beautiful, timeless look for your home with this affordable DIY project.
If you’re looking for a unique and stylish way to spruce up your living space, a DIY shiplap wall can be a great option. While shiplap walls became increasingly popular during the “Fixer Upper” craze because of their rustic charm, they’re a timeless staple in coastal decorating. Not only do they add an interesting visual element to any space, but they are also easy to customize and create with a few basic tools. In this blog post, I’ll show you how to create your own DIY shiplap wall with a few simple steps!
This post contains affiliate links, which means I may get a small commission (at no extra cost to you) if you shop my link. Please see my disclosure if you’d like more info!
What is Shiplap?
Shiplap is a type of wood paneling in which each board has a rabbet (groove) cut on the top and bottom. This allows the boards to overlap and form a tight seal. This was traditionally used in ship building, but people began applying the concept to homes due to its weather-resistant capabilities.
There are three plank wall variations that people typically call “shiplap”: the authentic/actual shiplap with overlapping planks, tongue-and-groove interlocking planks, and a simple plank wall, which is spaced plywood nailed to the wall.
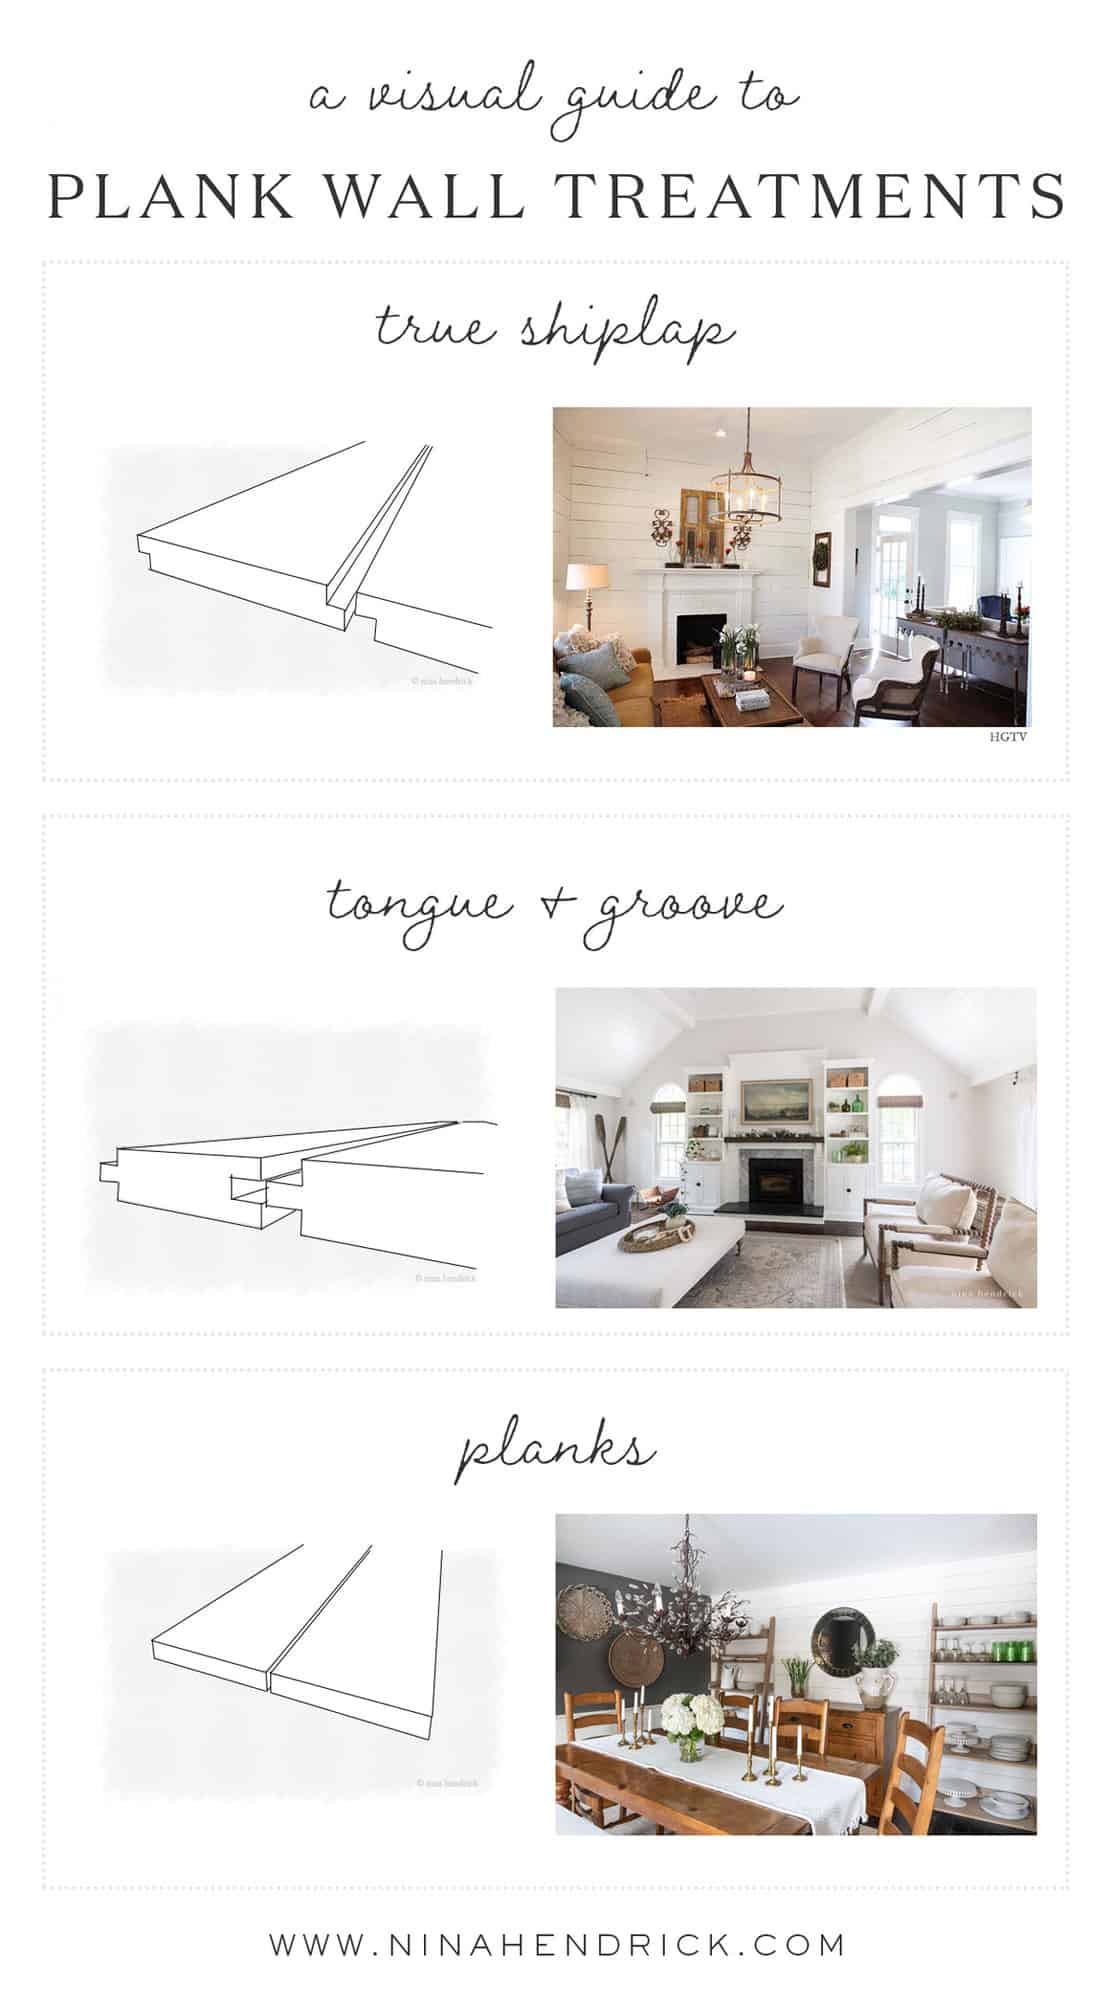
As the popularity of shiplap grew, the term began to be applied to any and all plank wall treatments. While the DIY wall tutorial I share in this post isn’t exactly shiplap, it’s a fabulous imposter that will give you the same effect!
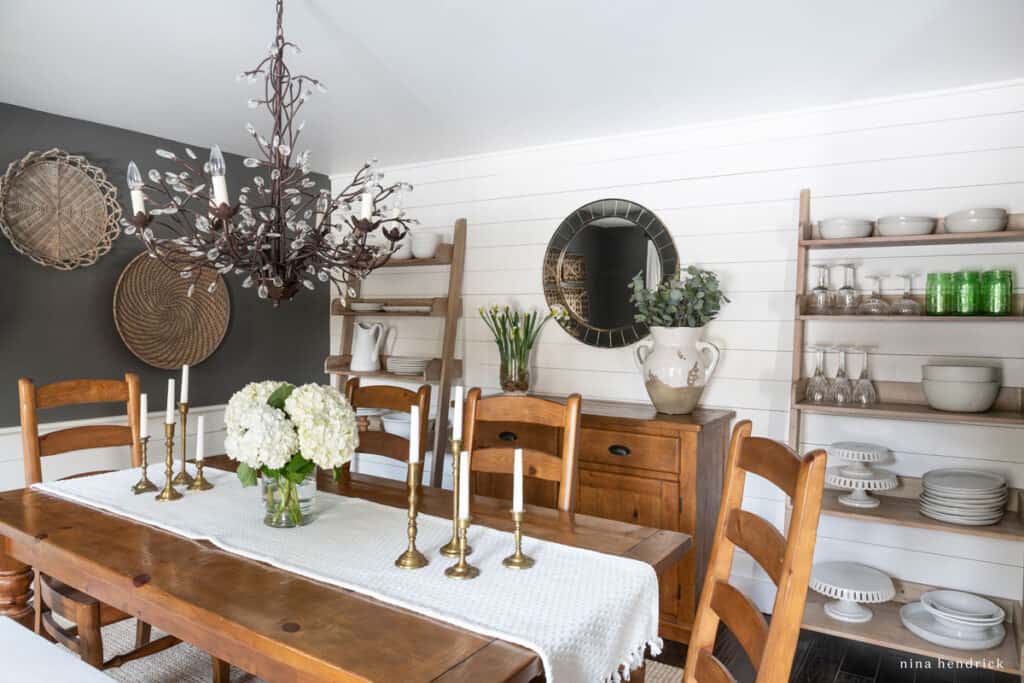
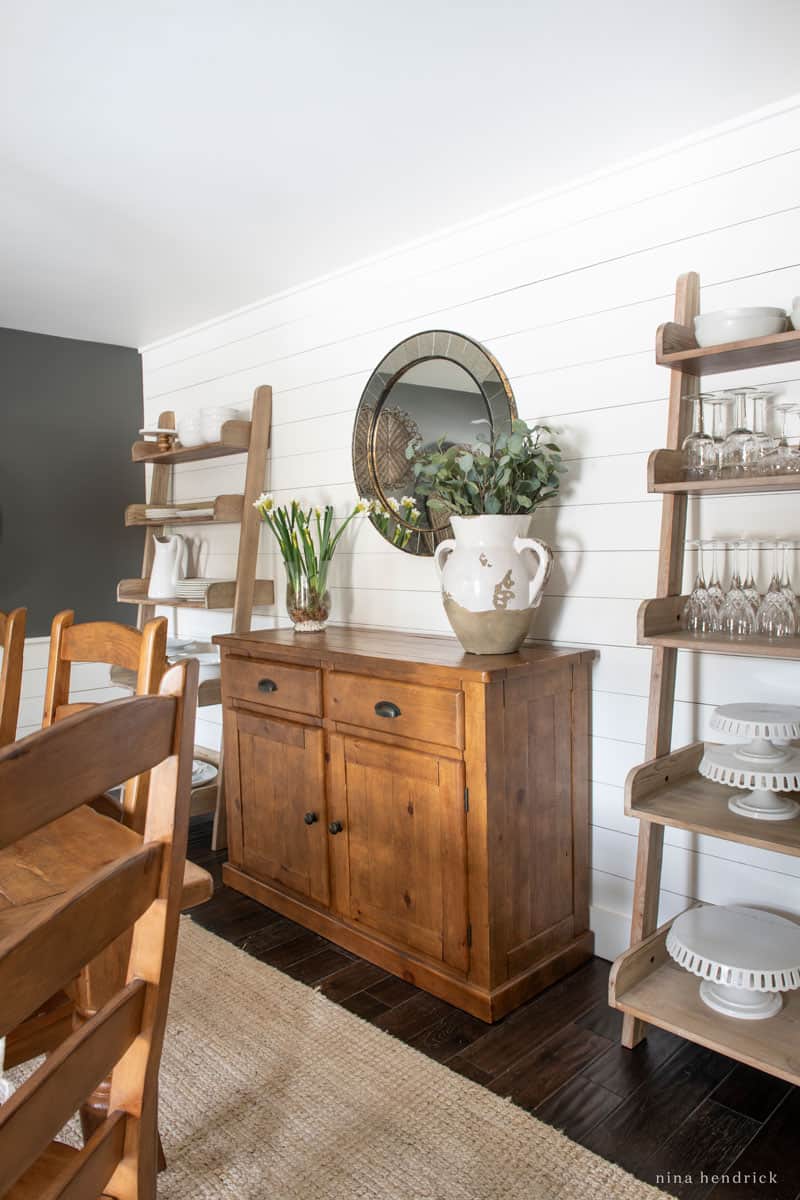
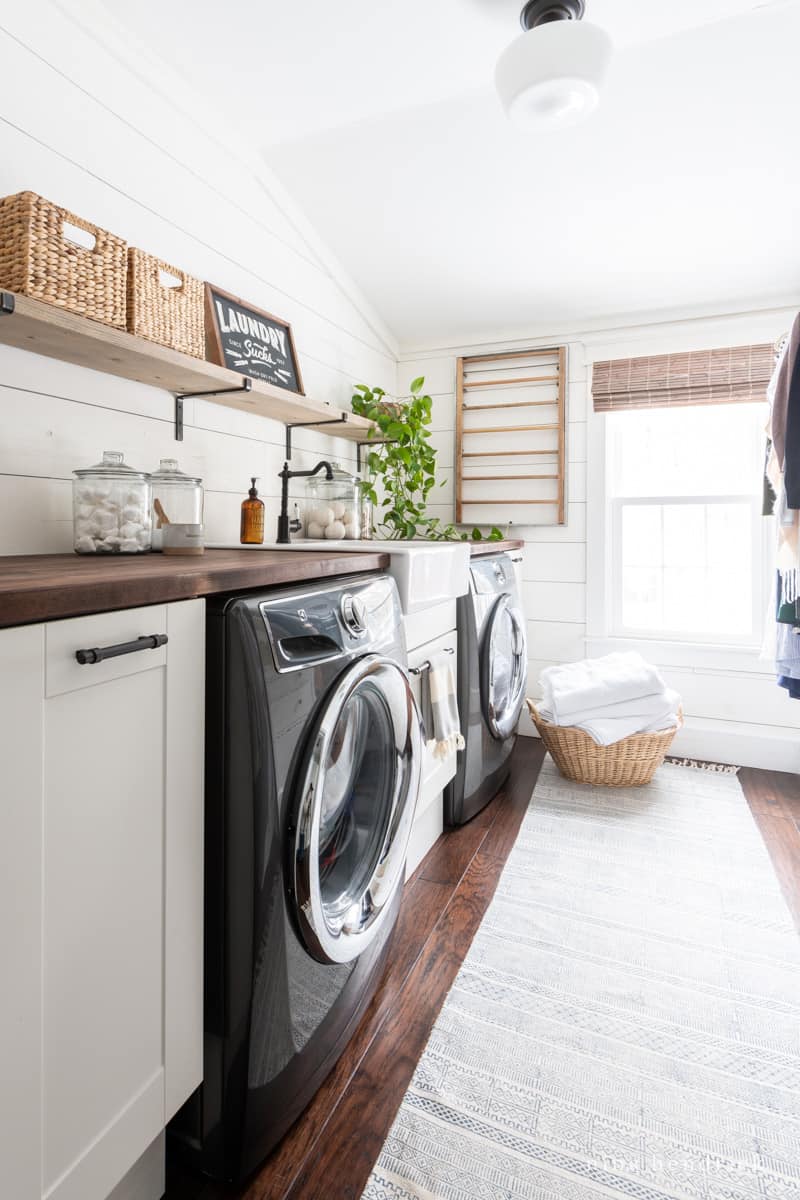
We gave this DIY Shiplap wall project a shot in our dining room and our laundry room, and I love the way it turned out! It’s an easy project that really pays off.
If you’re considering this for any space that might be damp or have moisture, I also have a tutorial for a DIY shiplap wall bathroom installation with PVC boards.
How to Create a DIY Shiplap Wall
This tutorial uses staggered plywood to create a shiplap effect. Plywood is lightweight so it doesn’t put too much stress on the wall.
Jump to the how to for the complete supply list and tutorial.
What kind of wood is used for the “shiplap”?
For the planks, we used thin plywood cut down into strips. We originally did this project many years ago, and we were on a tight budget, so this was the easiest way. Now, there are pre-cut shiplap boards widely available at home improvement stores!
We found the plywood with the subflooring in the lumber section. It was a step up from the really rough-looking subfloor pine.
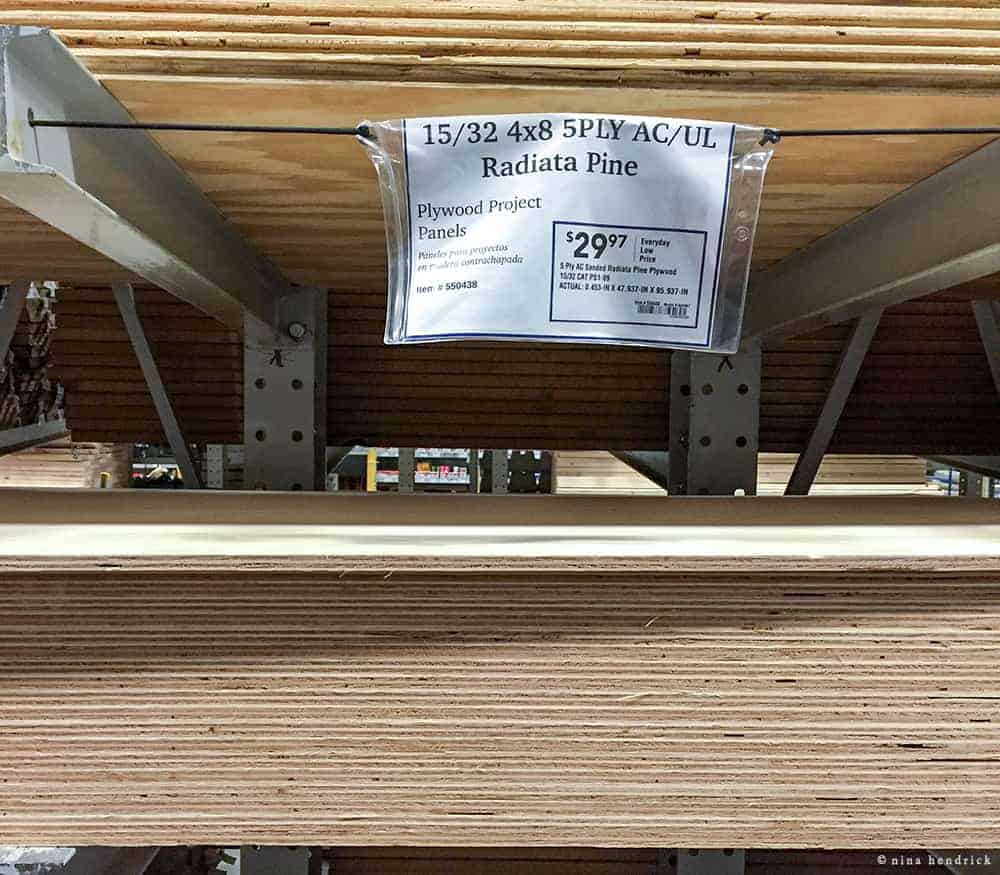
We checked each piece to make sure it wasn’t too rough. For our room, we needed 7-8 of these for our project (one full wall that is 13.5 x 7.5′ and then 1/3 of the other walls at the same dimensions, plus a bit leftover).
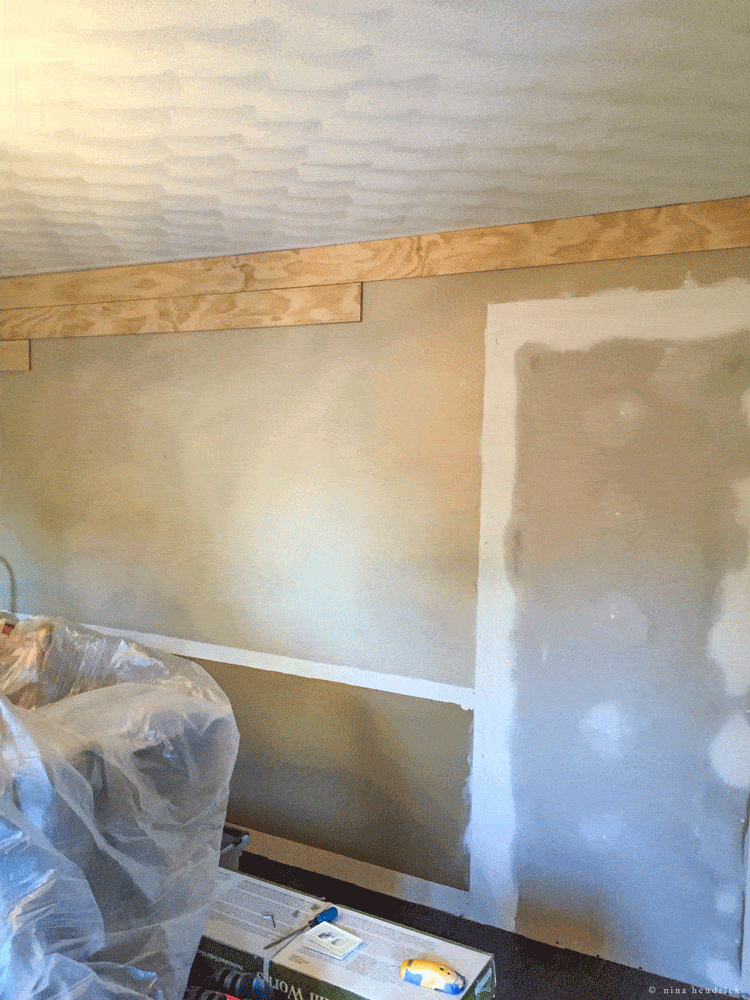
Step 1: Prep Your Wall(s)
If you’d like larger gaps between your planks, I highly recommend prepping and painting your walls whatever color you’ll be painting the final wall treatment. It’s much easier to do ahead of time than paint the gaps after the planks are installed!
Step 2: Measure Your Space
Decide whether you are installing the planks around the entire room or just as an accent wall.
Using a tape measure, measure the length and width of the wall(s) in inches. Make sure you have these measurements in hand, plus a little extra, before purchasing or sawing.
Step 3: Cut the Plywood to Size
After we purchased the plywood, we cut them down using a panel saw.
Cutting down the plywood would make them easier to maneuver and run through our table and compound miter saws at home as we begin to install the planks.

Usually, any big box home improvement store will do this for you, but they may not be as precise as doing it yourself.
We cut down the panels to 5¼” wide using a table saw. This measurement is almost the exact measurement of traditional shiplap to further mimic the look.
We also cut the boards in various lengths to provide some contrast along the wall. More about that down below.
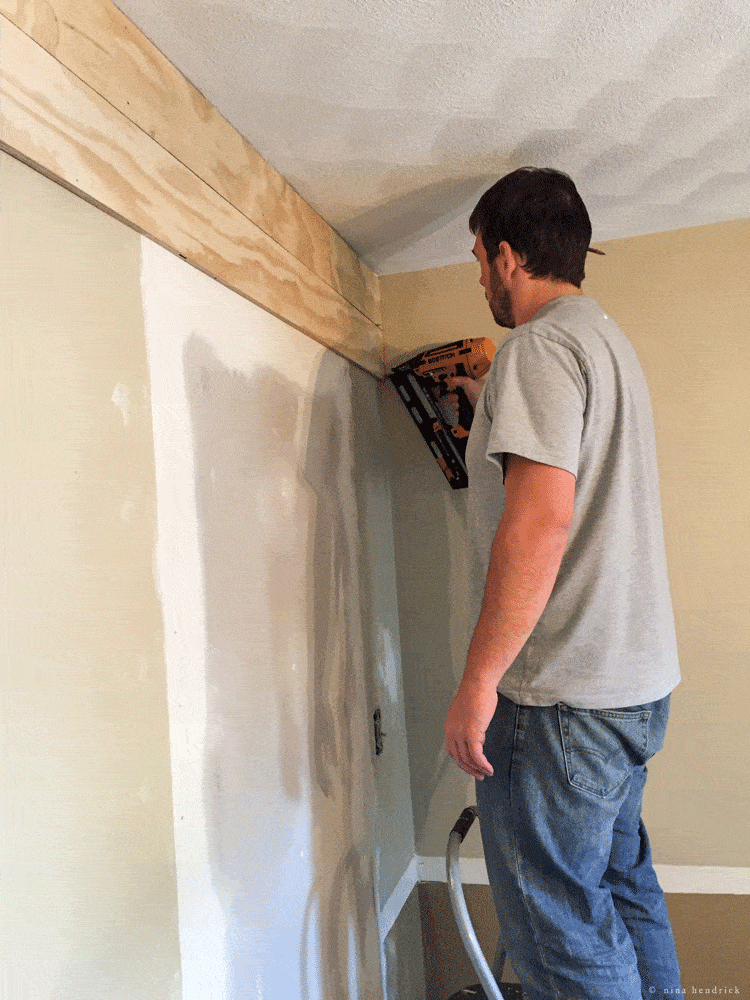
Step 4: Find and Mark the Studs
First, use a stud finder to locate the studs. These are the spots where you will want to secure the planks.

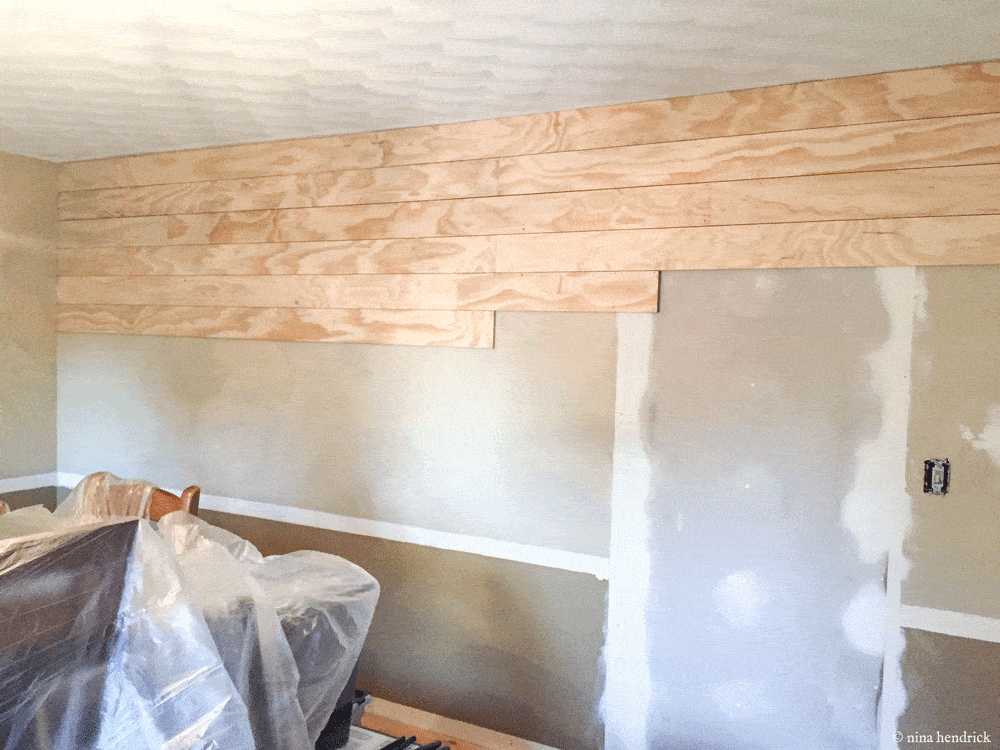
Step 5: Install the Planks
Beginning at the top of the wall, use a nail gun to secure the plank to the wall. Make sure you also use a level to keep the boards straight.
Leave a slight gap at the top of the wall for a piece of trim to cover the raw edges.
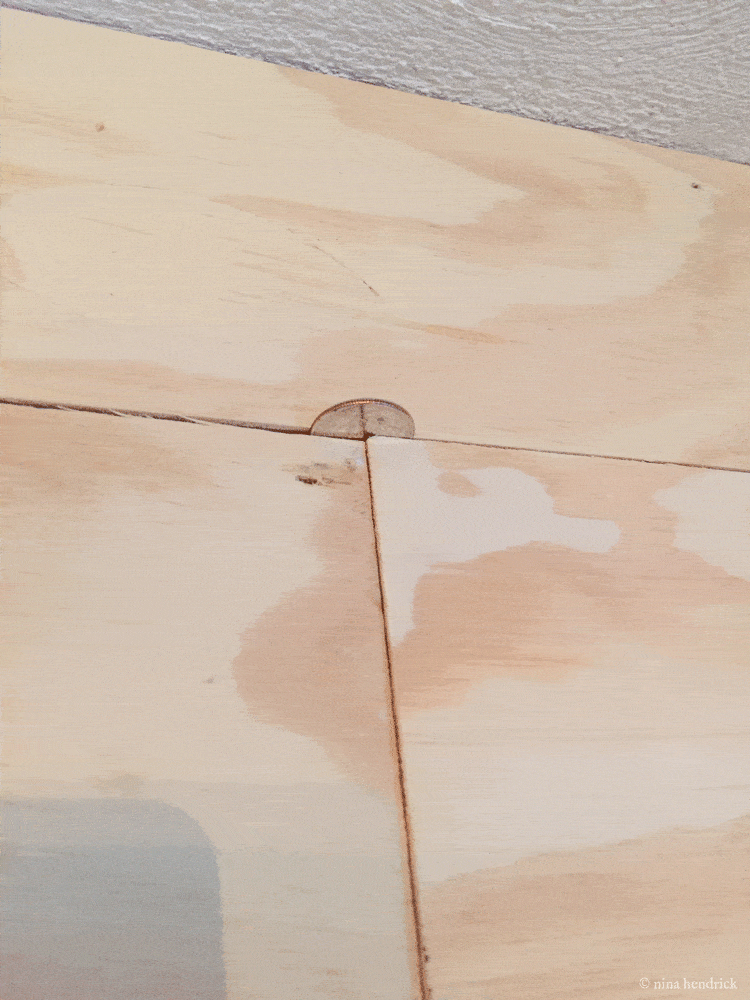
We used a quarter as a spacer. We wanted to leave only a very tiny gap because we weren’t taking the time to prime the wall. If you have a nice white wall behind your planks and want a larger gap, you can use tile spacers.
Here is how we staggered the seams so we didn’t have too much symmetry running up the walls. We definitely wanted contrast.
This project was basically a lot of repetition. We made the cuts to length with the table saw on the ends and used the leftover pieces to start the next row. It helped to add variation to the seams.
Step 6: Prep the Walls for Paint
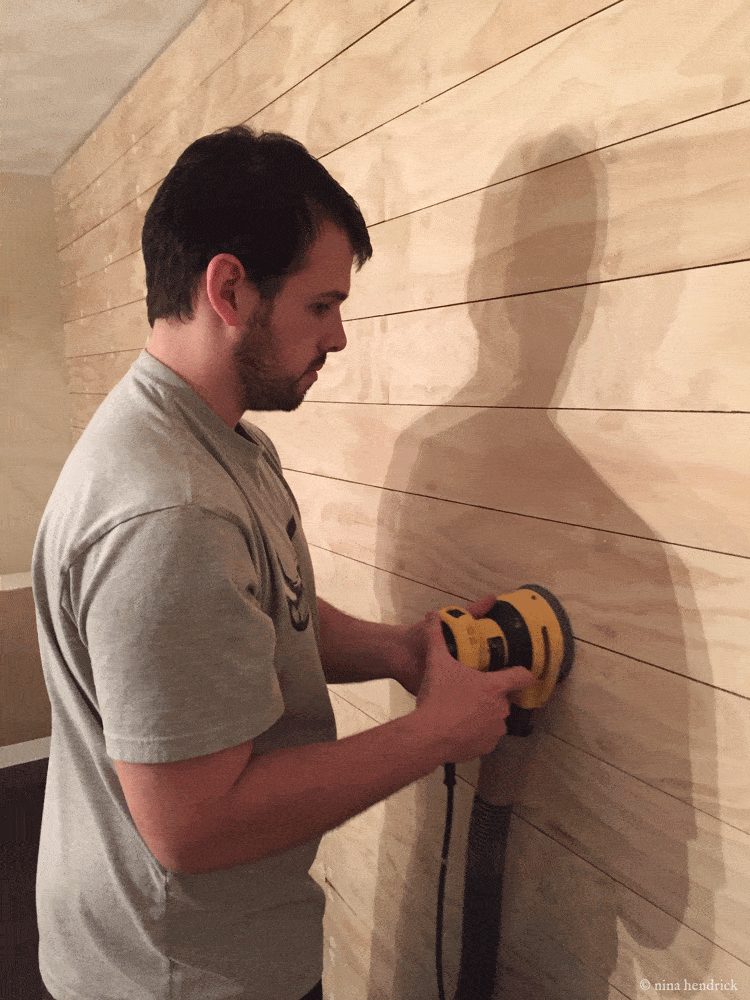
Then came a lot of nail hole filling. We used wood filler to fill in the nail holes. This gives it a blemish-free look after painting.
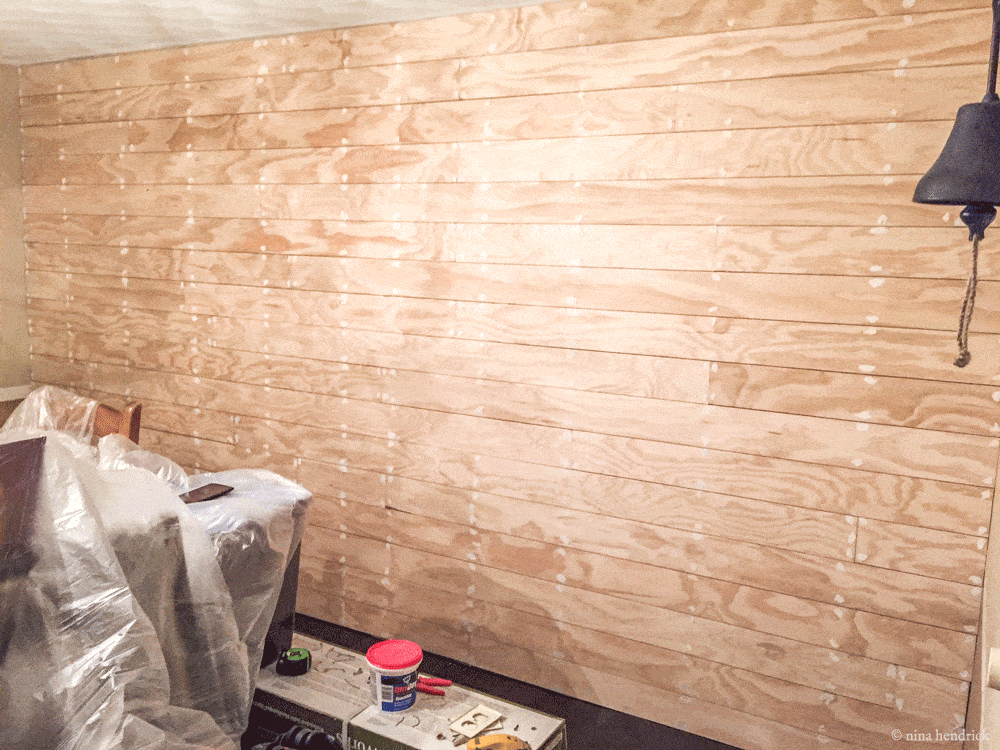
Next, we sanded down the filler and planks before painting to smooth out any rough patches.
Step 7: Paint the Walls
We used a latex-based primer before painting. I was okay with wood knots showing through for a more natural look, but if you aren’t, I would recommend BIN oil-based primer.

Note from Nina: If you’re looking for a smooth finish on a DIY shiplap wall, the easiest and fastest way to achieve this is with a paint sprayer!
Here’s a shopping list of all of my favorite room painting essentials and my tutorial for how to paint a wall like a pro.
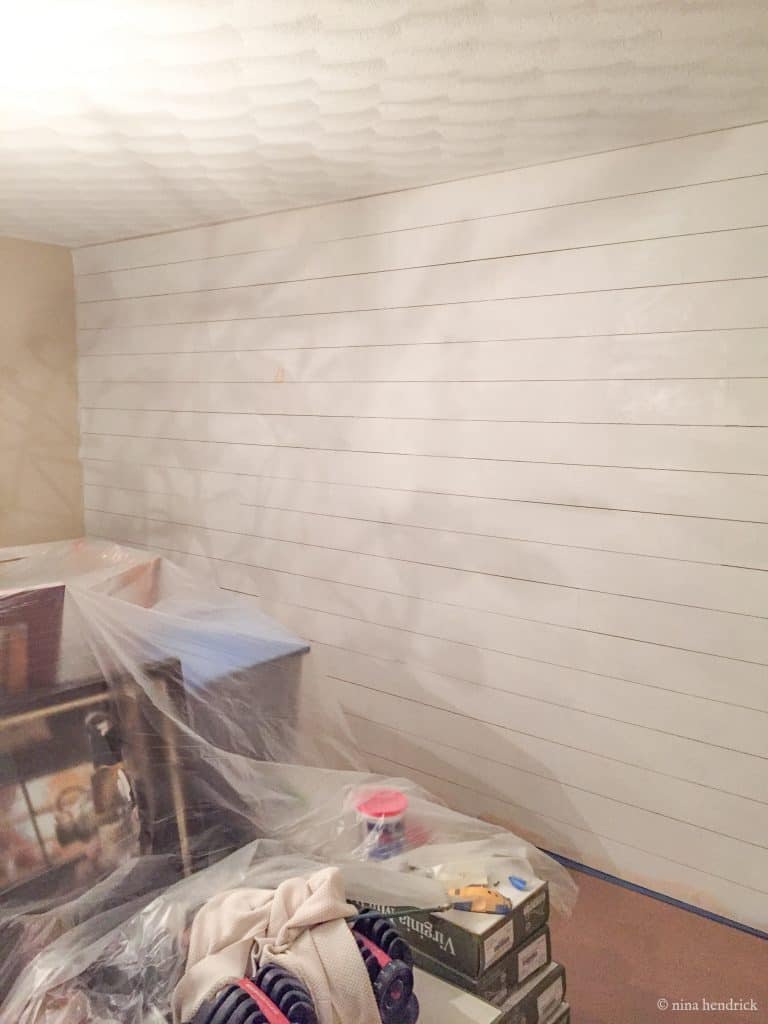
The color is Benjamin Moore Simply White. For paint sheen, I chose an eggshell finish. I didn’t want any kind of reflection, so semi-gloss or even satin didn’t seem to be the right fit.
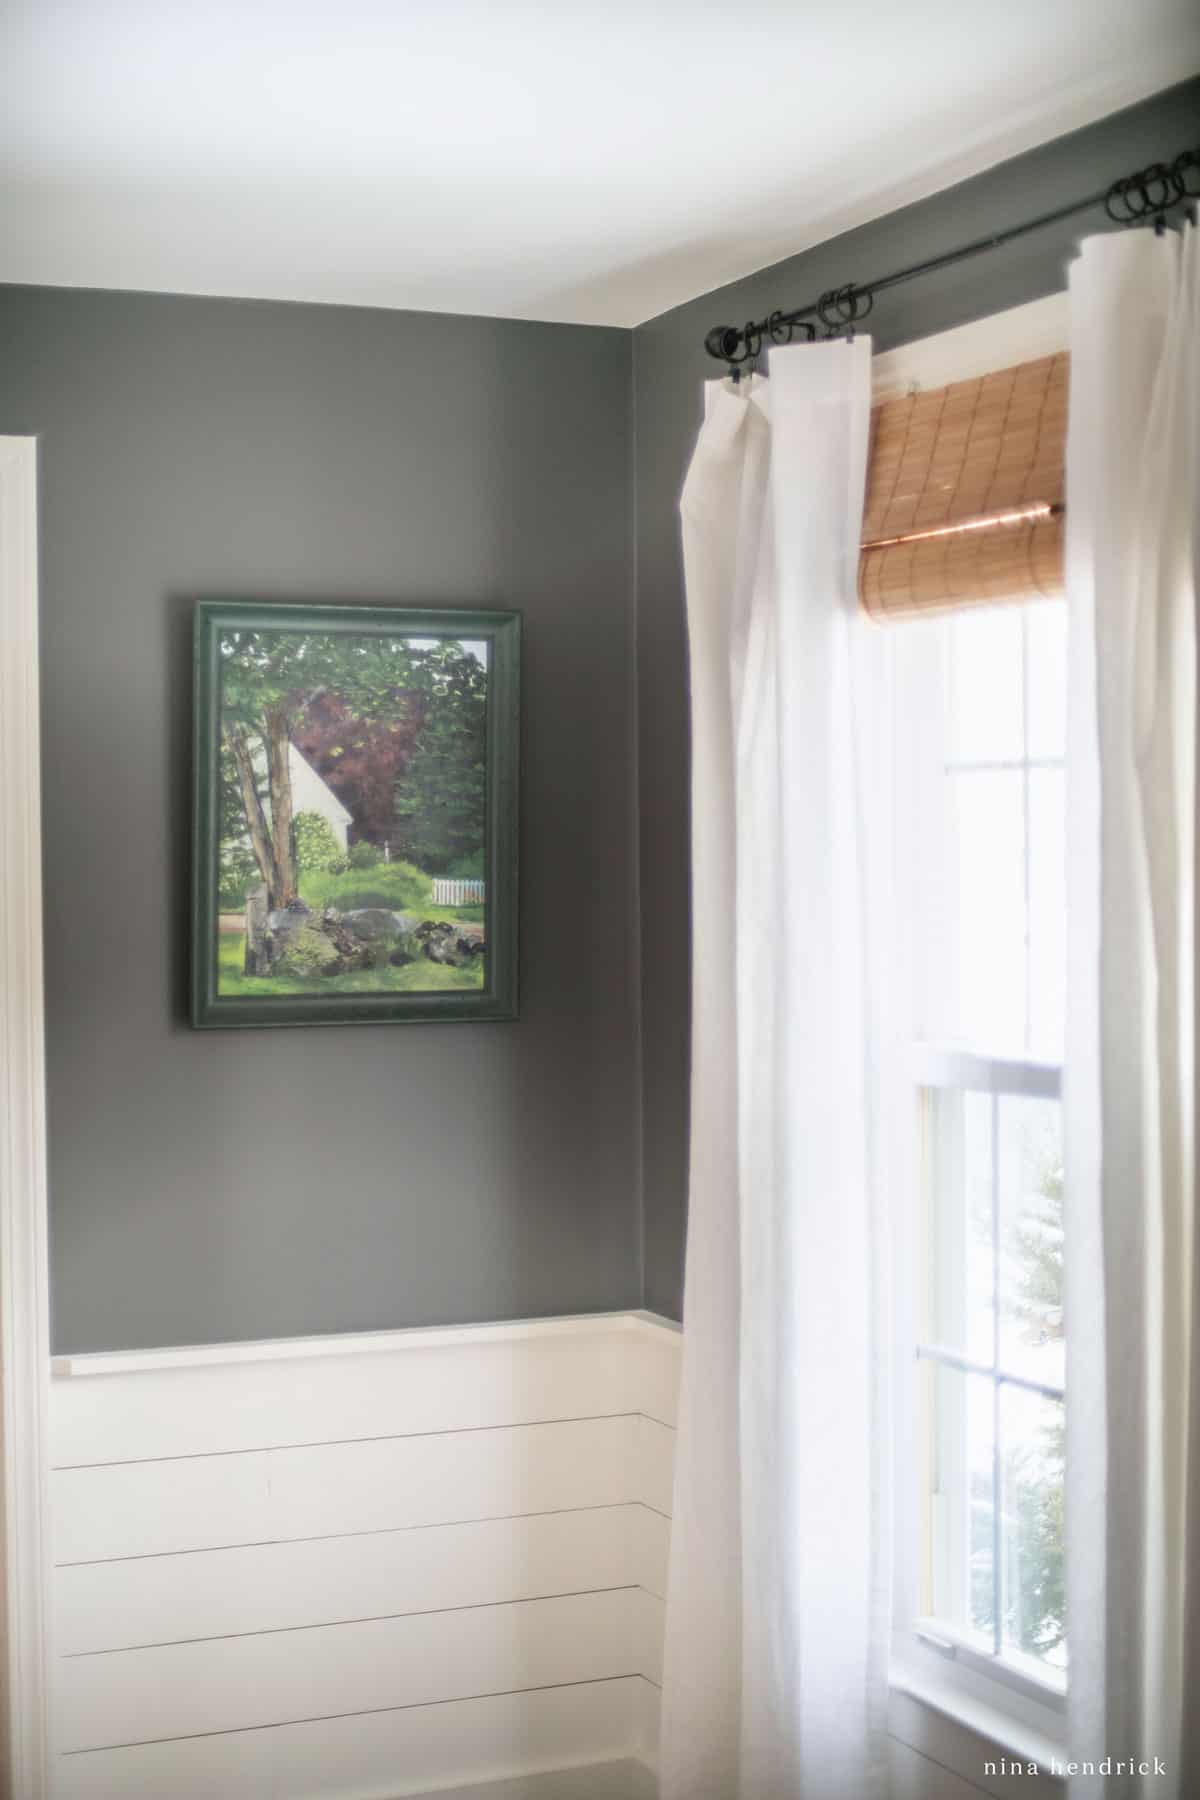
How to Create a DIY Shiplap Half Wall
Rather than making every wall in the room shiplap, we opted to create one accent wall and do a half-wall treatment with a chair rail for the rest of the room. This kept the style from being overwhelming and allowed us to later paint the upper-half of the walls a contrasting color (Benjamin Moore Kendall Charcoal) for a more modern look.
Essentially, creating a half-wall was the same process as a complete DIY shiplap wall. Here are a few tips:
- We started from the top again, so that we could line the planks up in the corners, and went as close as we could get to the standard 32 inches for chair rail height.
- For the top rail, we used 1×2″ pine boards, and mitered them at 45 degrees at the windows and doorway. The baseboards are 1x6s. We also hid the gap at the top of the planked wall with a 1×2″ board.
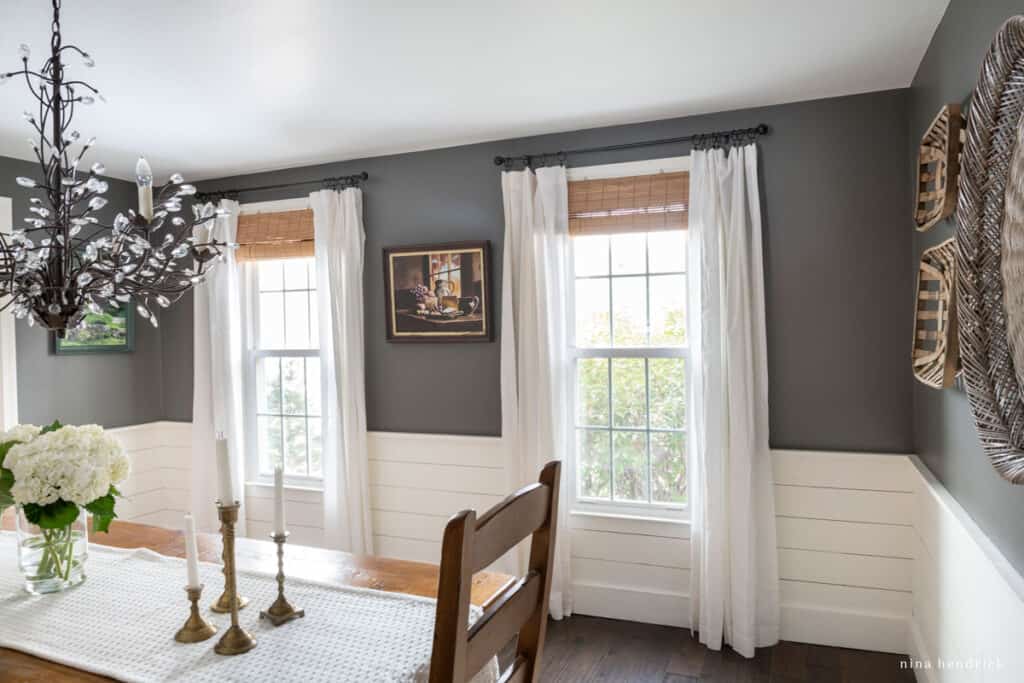
I love the look of the one large planked wall, along with the three chair rail walls. It gives it the perfect balance of coastal cottage and traditional style to fit the rest of our home.
Tips for Updating Shiplap
If you’re looking to modernize your shiplap wall design, here are some ideas to help freshen up the look. Instead of going for the usual “2010s Farmhouse” look, try something unique and up to date! From color choices to unique install patterns, there are plenty of ways to make shiplap look modern and new.
Think Outside of the (White) Box
If you’re looking to add a pop of color to your shiplap, Benjamin Moore Onyx is a great choice. BM Kendall Charcoal, such as the shade seen on the top of these walls, is another good option. You could also go bold with a navy such as Benjamin Moore Hale Navy, or opt for something more subtle like Benjamin Moore Pale Oak.
Change Up the Pattern
Consider installing your DIY Shiplap wall vertically, diagonally, or even in a diamond pattern for a unique look.
Install Shiplap in Part of a Room
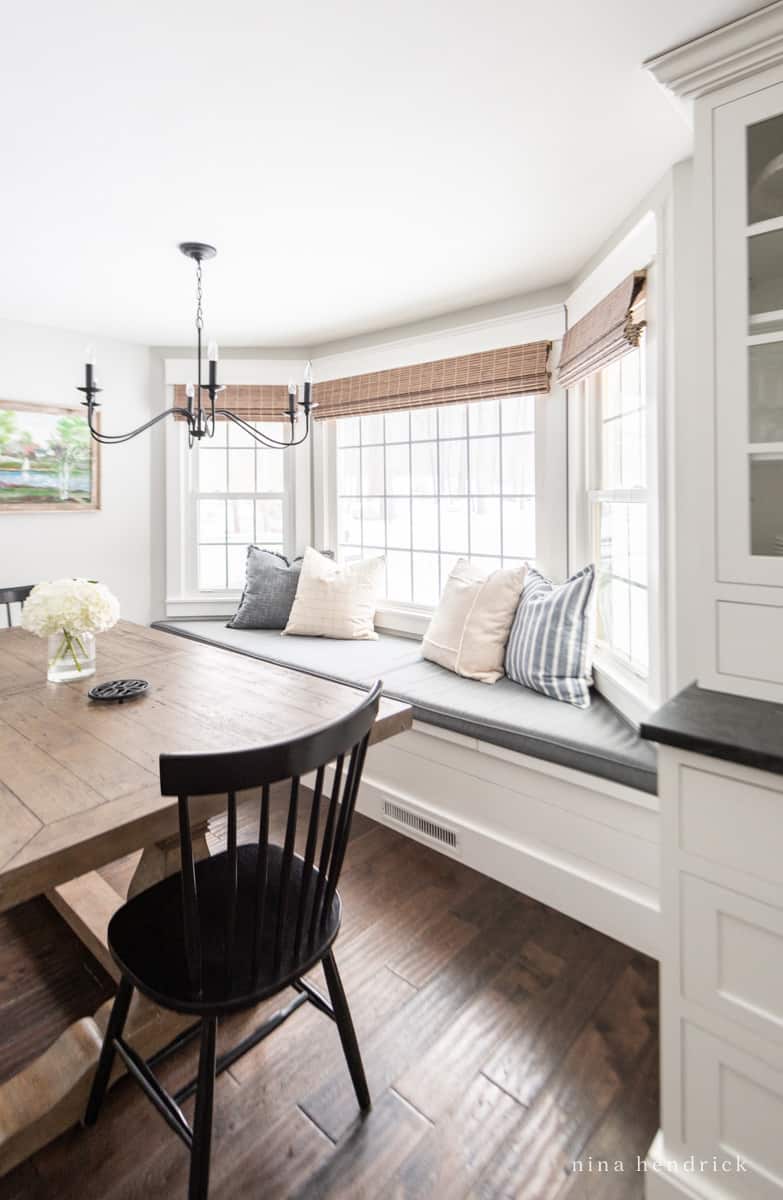
Floor-to-ceiling shiplap can be pretty overwhelming, but it gives a great coastal cottage touch in small doses. Consider installing shiplap on just a portion of a room, like we did here on the front of our built-in bench, or an accent behind a TV.
Creating a shiplap wall provides a beautiful architectural detail to any room. It is a relatively simple project that can be completed in a relatively short period of time. All you need are the proper tools, materials, and a bit of planning and preparation. Whether you choose to go with a modern or classic look, a DIY shiplap wall will undoubtedly add charm and style to your home!
