- Bathroom
- Renovating
Mixing Tiles in a Bathroom in 3 Simple Steps
Learn about mixing tiles in a bathroom to create a stunning look that fits your style. Get tips on how to choose the right types of tile, and how to pick patterns that add value to your home.
When it comes to designing bathrooms, one of the biggest challenges is choosing your bathroom tile combinations. When selecting coordinating tiles, the goal is to pick 2-3 different types of tile that go well together, but aren’t too matchy-matchy. The different types need to be cohesive, but still have enough variation that they’re interesting to look at.
The first time I picked out coordinating tiles for one of our bathrooms, I thought it seemed like a decision that could be done in a day. Ha! Only in my HGTV dreams! I figured out the hard way, that’s not the case, but I came away learning a lot that I can share with you.

Welcome—I’m so glad you’re here!
I’m Nina, and I write about home, memory, and the stories that shape both. If you enjoy thoughtful inspiration with a literary touch, you’ll love my Substack newsletter, By Nina Hendrick. I share seasonal rituals, reflections, and behind-the-scenes peeks at both real and fictional homes.
Want to follow along day-to-day? You can also find me on Instagram @byninahendrick.
During this project I learned what worked and what didn’t work, and in hindsight, I now have a clear path to nailing this design decision. There’s a super easy formula that simplifies this process into just 3 easy steps, so you can avoid getting trapped in a dizzying, tile-scrolling void.
Mixing Tiles in a Bathroom Like a Pro
This post contains affiliate links, which means I may get a small commission (at no extra cost to you) if you shop my link. Please see my disclosure if you’d like more info!

This blog completely breaks down the process, and takes mixing tiles in a bathroom from a pull-your-hair-out challenge to an exciting creative project that expresses your unique design style. It may even become your favorite part of the whole bathroom design process!
Let’s start out by answering a couple of FAQ’s and then get going with my 3 easy steps to coordinating bathroom tiles!
FAQS about Mixing and Matching Tiles in a Bathroom
Can You Really Mix Different Tiles in a Bathroom?
Absolutely! Having variety is what keeps your design visually interesting, but there’s an art to picking out styles that cleanly coordinate. It’s very common to see one type of tile inside the shower, and a different type of tile on the bathroom floor. They can be different sizes, shapes, colors, or finishes, but they’ll need an element that ties them together, which we’ll go over in the 3 steps below.
How Many Different Tiles Should You Use in a Bathroom?
You should use 2-3 different types of tiles in a bathroom. Using only 1 type of tile can make it harder to create the visual appeal that you want. And using more than 3 different types of tile is venturing into chaotic territory. An overload of patterns and styles will take the space from a spa-like atmosphere to an over-stimulating nook of the house to avoid. Sticking to no more than 3 types of tile, allows for one style on the floor, one style on the shower walls, and another style for the shower floor.
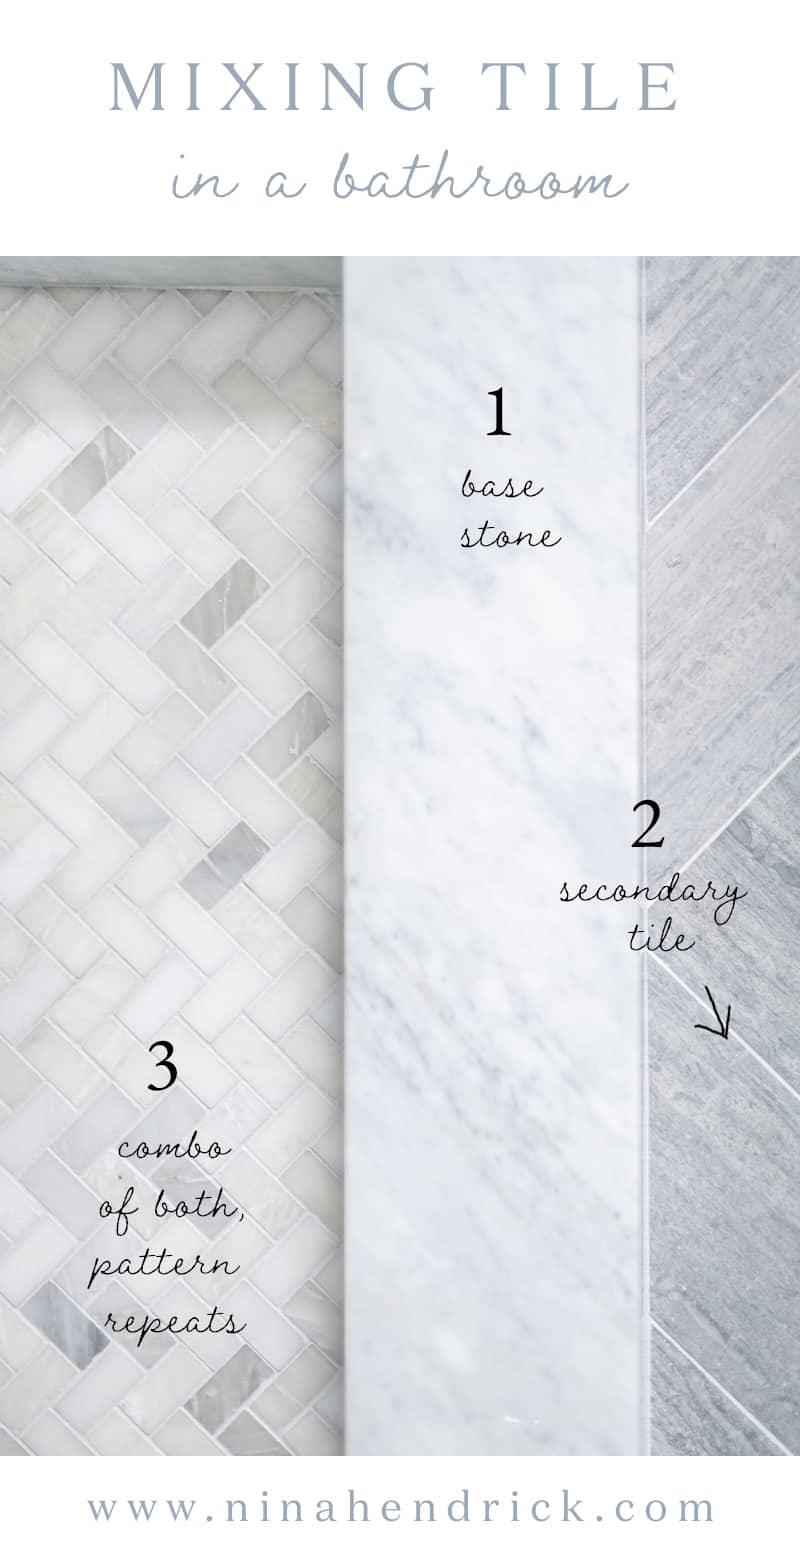
How to Choose Bathroom Tile Combinations in 3 Easy Steps
a three-step formula to bring your bathroom tile ideas to life for a look that is captivating, cohesive, and clean.
I had been dreaming about the tile I wanted in my bathroom for close to a decade.
I wanted classic, timeless, and luxe. Something that would capture attention while making a quiet, yet elegant, statement. Something I would never grow tired of, that would keep me feeling content and inspired. And there’s only one choice that fit the bill for me – Carrara marble!
I know it’s not necessarily the most original choice, but there simply wasn’t another option I liked more. I knew its appeal would never fizzle out, and its cool neutrality would survive many a decor redesign. So Carrara marble it was, and I have zero regrets about it!
There’s a reason Carrara stays so popular, and there’s a good chance it’ll end up being your choice too. So it’s also the perfect example to showcase my steps for choosing your coordinating bathroom tile combinations.
Step #1 – Choose a base stone to be the theme for your tile
You’ll want to start out by deciding on one stone that will serve as the base theme for your tile color palette. This is your jumping off point. Make sure it’s a stone that you’re totally in love with, because your coordinating tiles will be based upon its coloring.
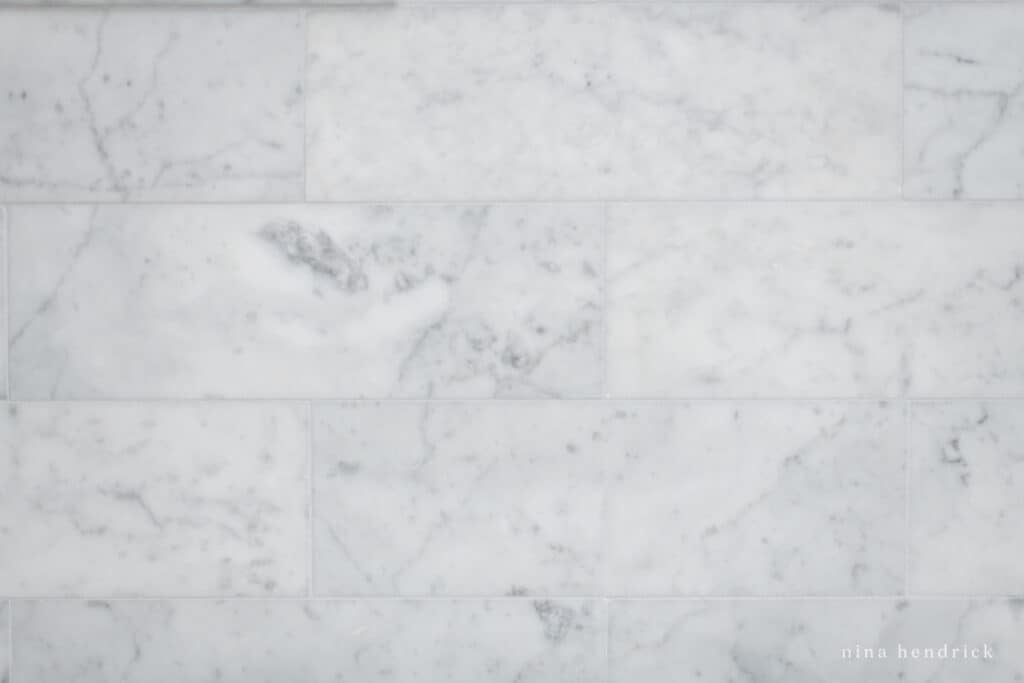
My base stone: Carrara marble
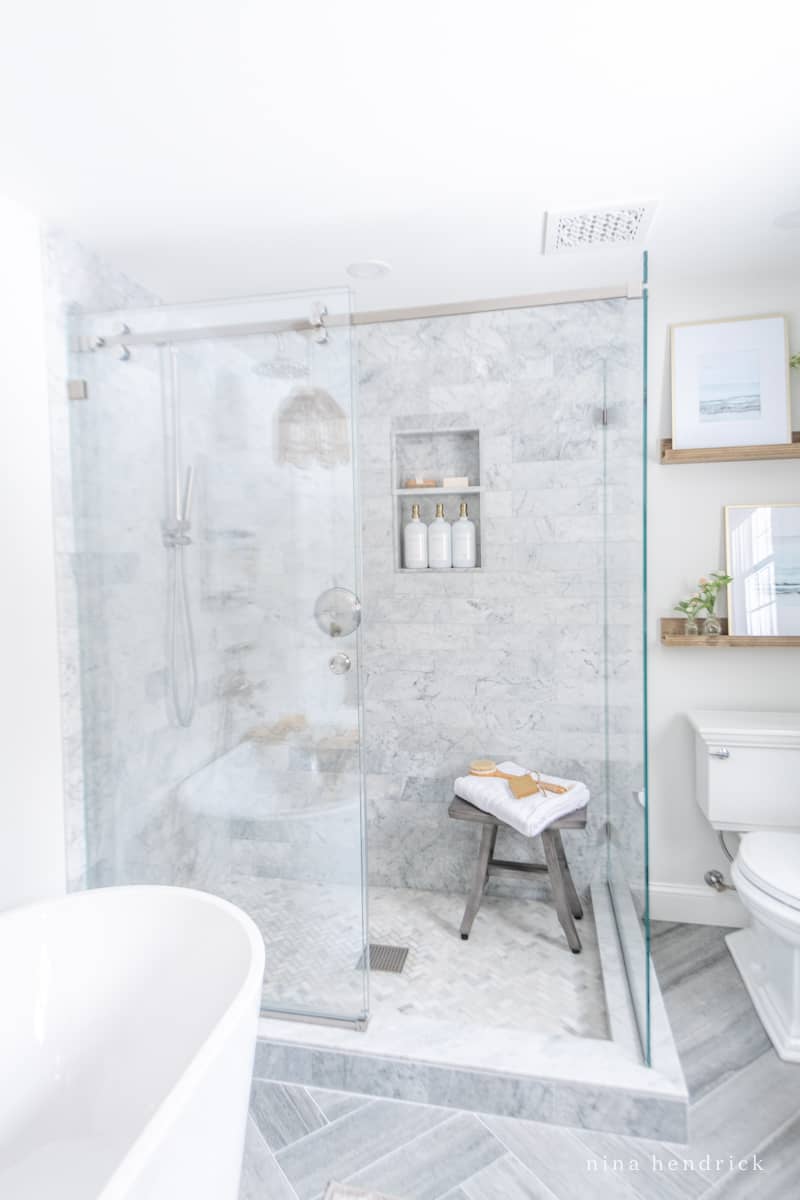
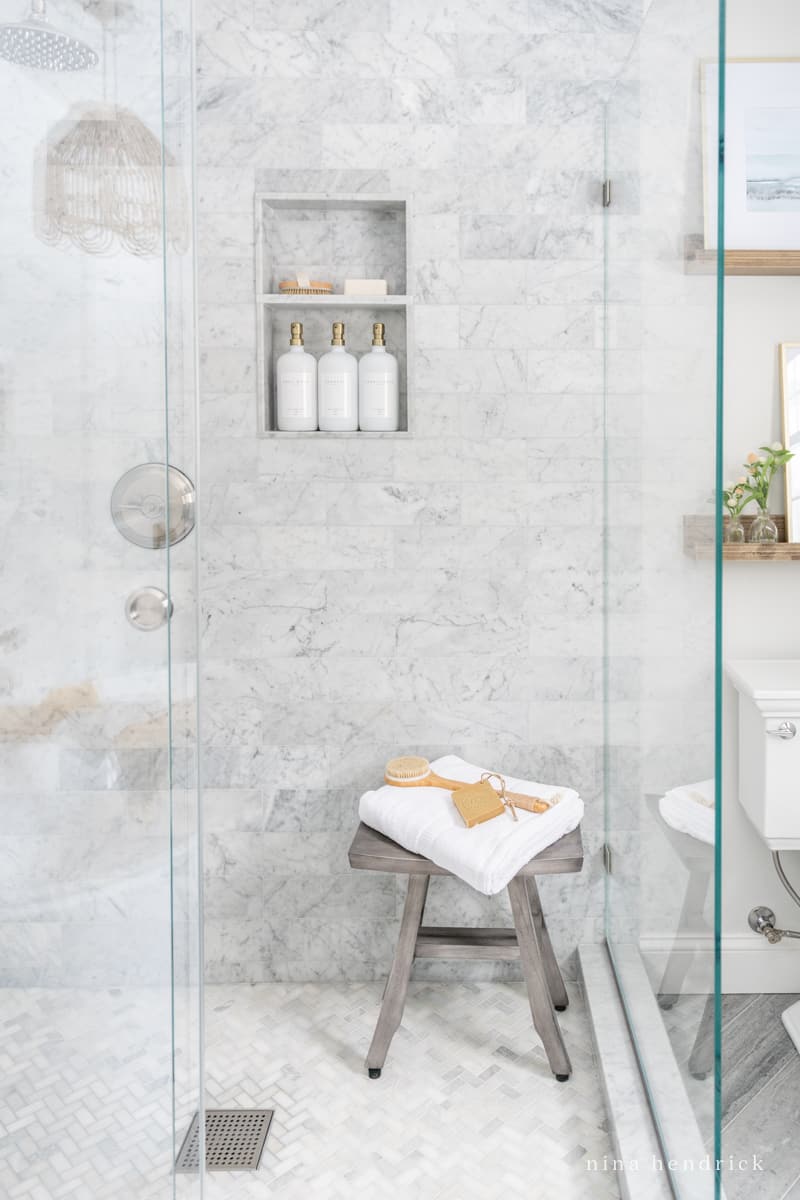
I began with the same 4 x 12” honed Carrara subway tile that we used for our kitchen backsplash. I love the timeless and traditional look of our kitchen, and I wanted to carry that same aesthetic into our primary bathroom. I decided these tiles would line our shower walls, and that all solid surfaces would also be mostly white Carrara marble. So the thresholds, shelves for the shower niche, and vanity countertop were all outfitted in this beautiful marble as well.
Step #2 – Pick a secondary tile color from your base stone
Of all the bathroom floor tile ideas, my first instinct was to stick with the Carrara marble. But then I ended up going in a totally different direction!
You see, my husband Mack usually doesn’t draw any hard lines in the sand regarding design. He’s pretty go-with-the-flow, and enjoys watching me do my thing. But this time he felt strongly about not doing a white marble floor. So in an effort to pick out flooring we would both enjoy, I began to search for an alternative type of tile. I needed it to be a color that would tie in with the Carrara marble since it would be on all the other surfaces of the bathroom.
I achieved this color coordination by pulling a color from my base stone. This would serve as my inspiration, as I would be matching my second tile pick to this color. Luckily, marble provides lots of different options for coordinating colors through its veining! I could’ve gone with the dominant color of white, but I wanted something different. I decided to pull one of the medium grays present in the veining.
My secondary tile: a medium-gray, concrete-style porcelain tile
If you’ve had the opportunity to pick out tile previously, I recommend taking cues from that experience if you can. Make note of the things you love and would like to carry over into your current design project, as well as the things you don’t think will work for the space you’re currently designing. Since I had the recent experience of picking out tiles for a few other rooms of our home, I was able to use them as a guideline.
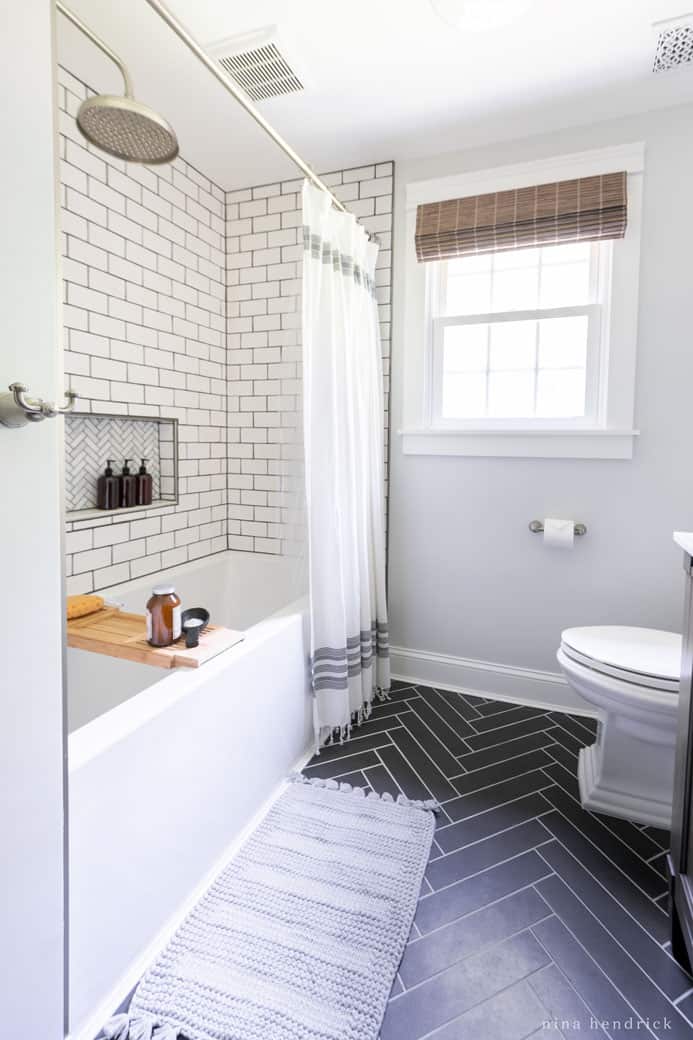
The Kids’ Bathroom Floor Tiles
I love the tile we used in the kids’ bathroom, but knew that its gray color would be too dark. However, I loved its modern concrete look.
You can see the full makeover of the kids’ classic-meets-modern bathroom, here!
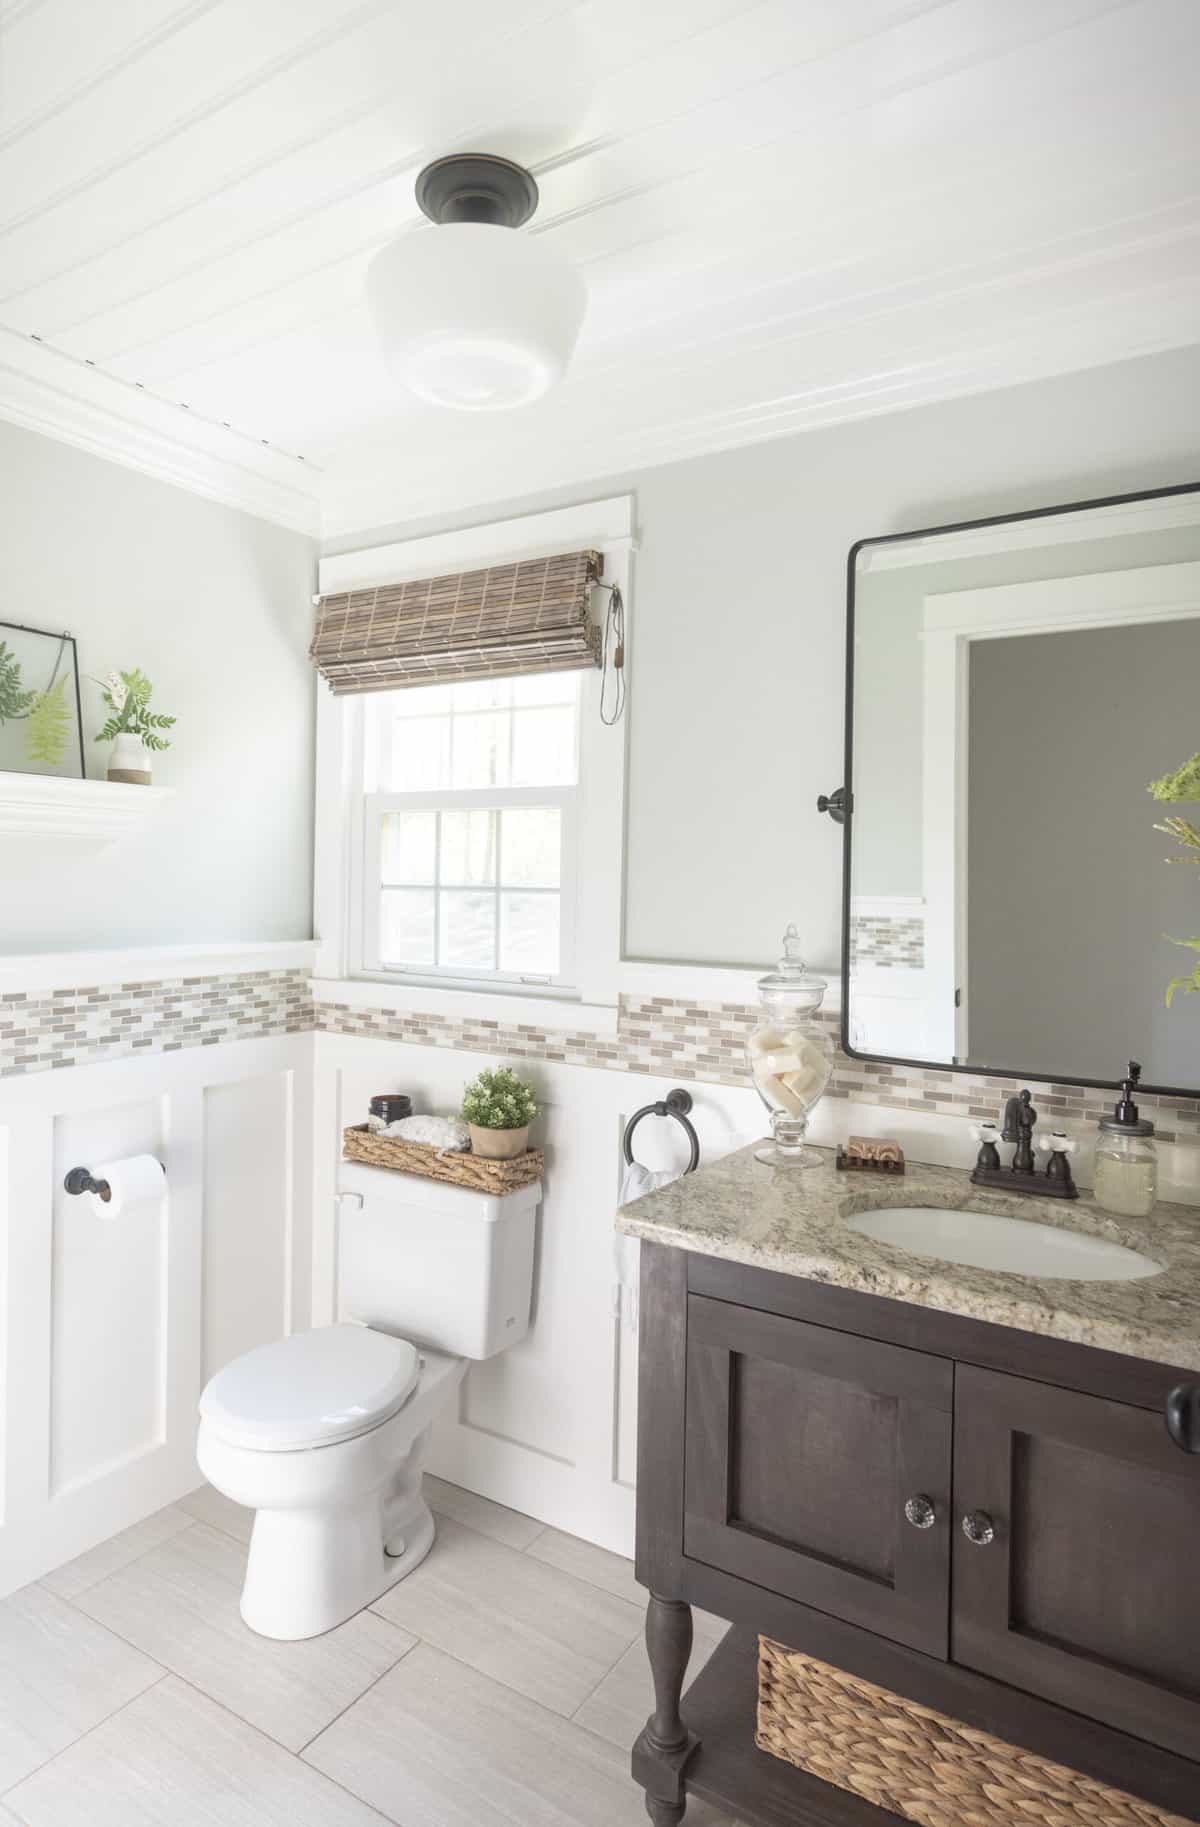
The Mudroom & Powder Room Floor Tiles
I love the lighter colored, silvery-gray tiles we used for our mudroom and powder room downstairs. Their light gray serves as the most beautiful neutral for those spaces. But they are 12 x 24” tiles, and larger than what I needed for the primary bathroom.
The Best of Both Floor Tiles
I wanted a tile that was a perfect hybrid of the two.
And in the end, what I found was just that – not too big, not too dark. Just call me Goldilocks, because it was just right. :)
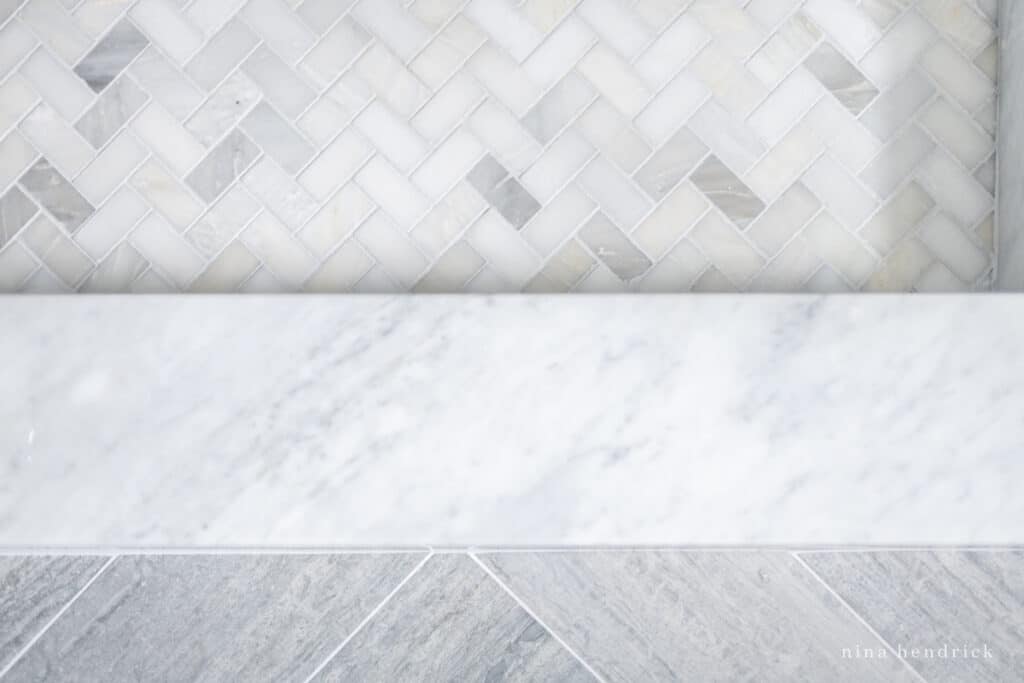
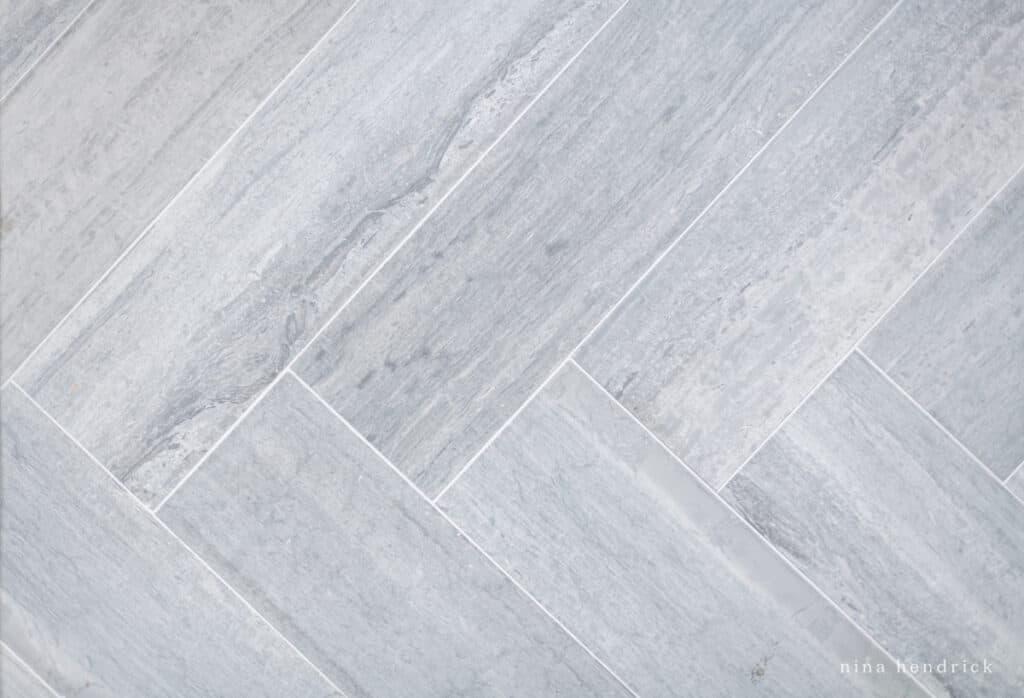
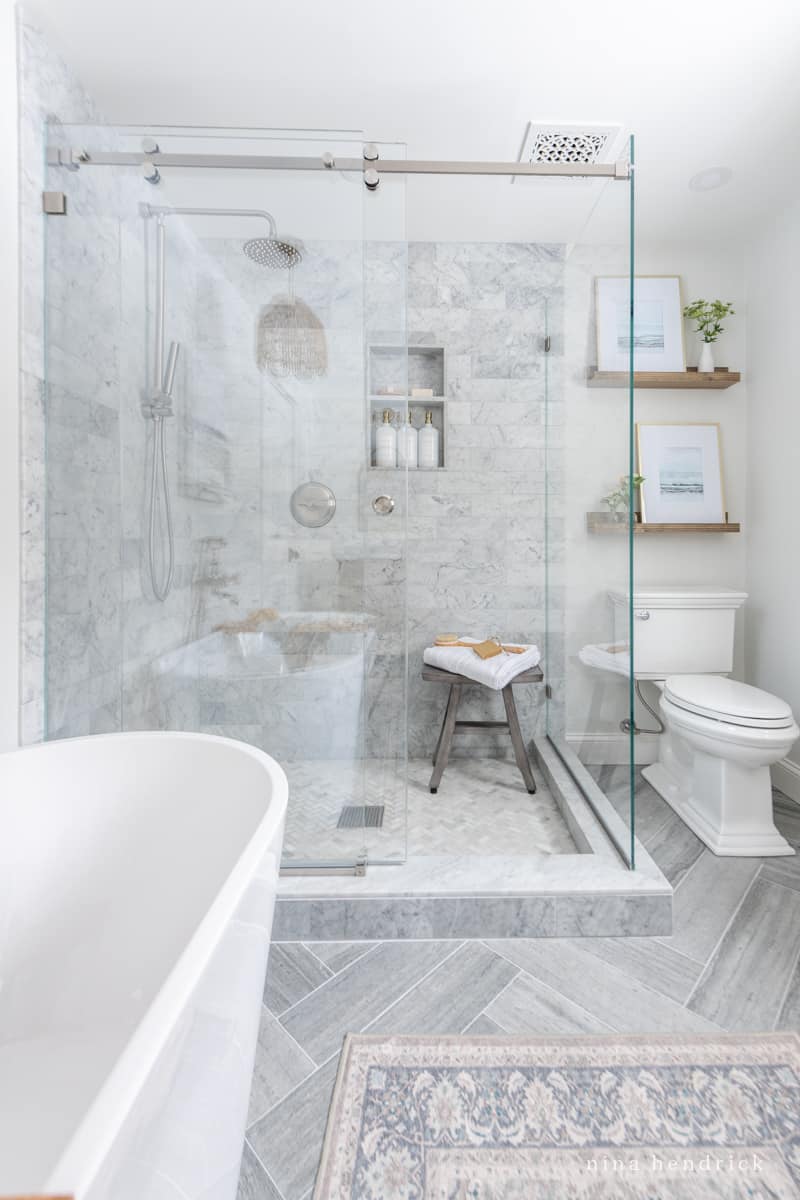
This floor tile has the concrete look I love, with the medium gray color I wanted for this space. It’s cut into medium-sized tiles that look beautiful in our bathroom.
Step #3 – Choose a pattern that repeats throughout your home
After you pick out your base stone and secondary tile, it’s time to figure out how to lay them out. If this isn’t a DIY project for you, a professional installer will know the technical details of this process, but you still need to decide what look you’re going for aesthetically.
My best advice for tile patterns is to look at what you already have inside your home! Look in the kitchen, other bathrooms, powder rooms, mud room, or anywhere that has tile. If one of those rooms has a tile pattern that works well, use it as the blueprint for your current bathroom design. This helps ensure that your whole home design stays cohesive.
A mistake that I see a lot of homeowners make when remodeling their bathroom, is picking a tile pattern that is totally random for their home. I get it – they’re wanting to add interest and fun! But having multiple different tile patterns sporadically throughout the house, can actually bring down the value of your home. So it’s best to stick with a cohesive pattern that repeats throughout the house.
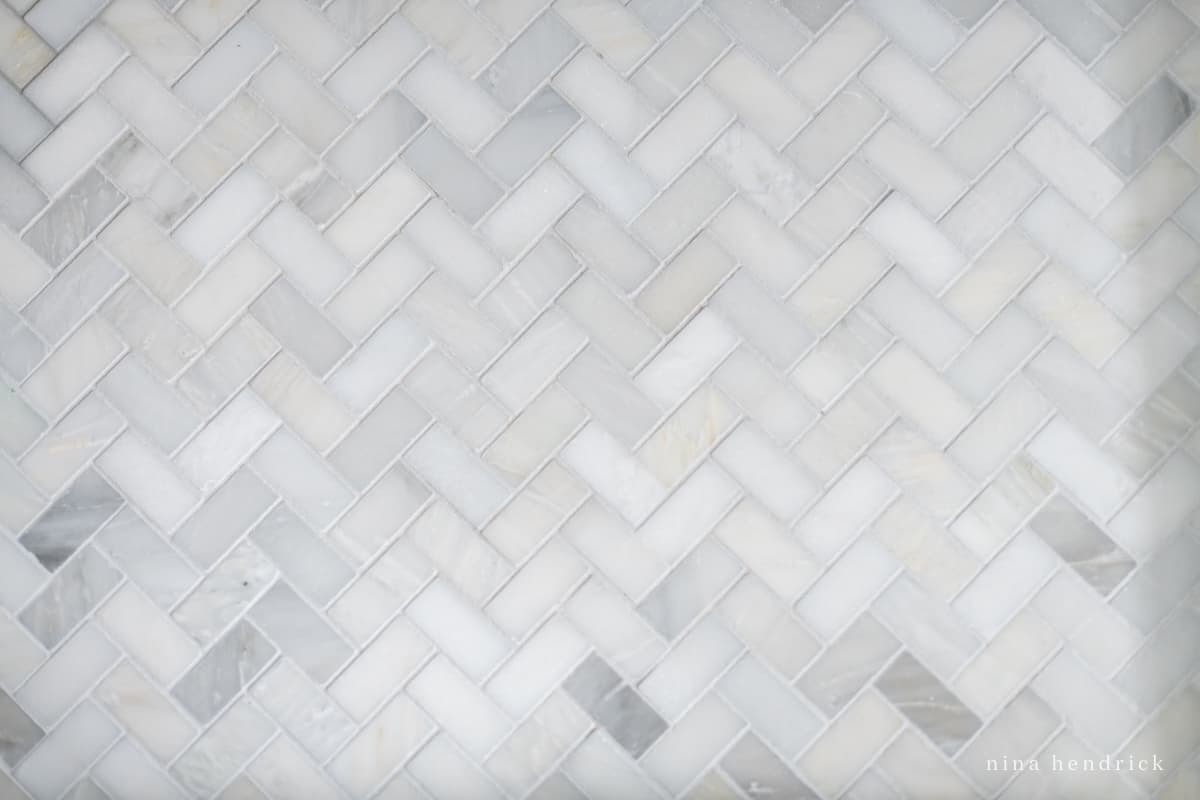
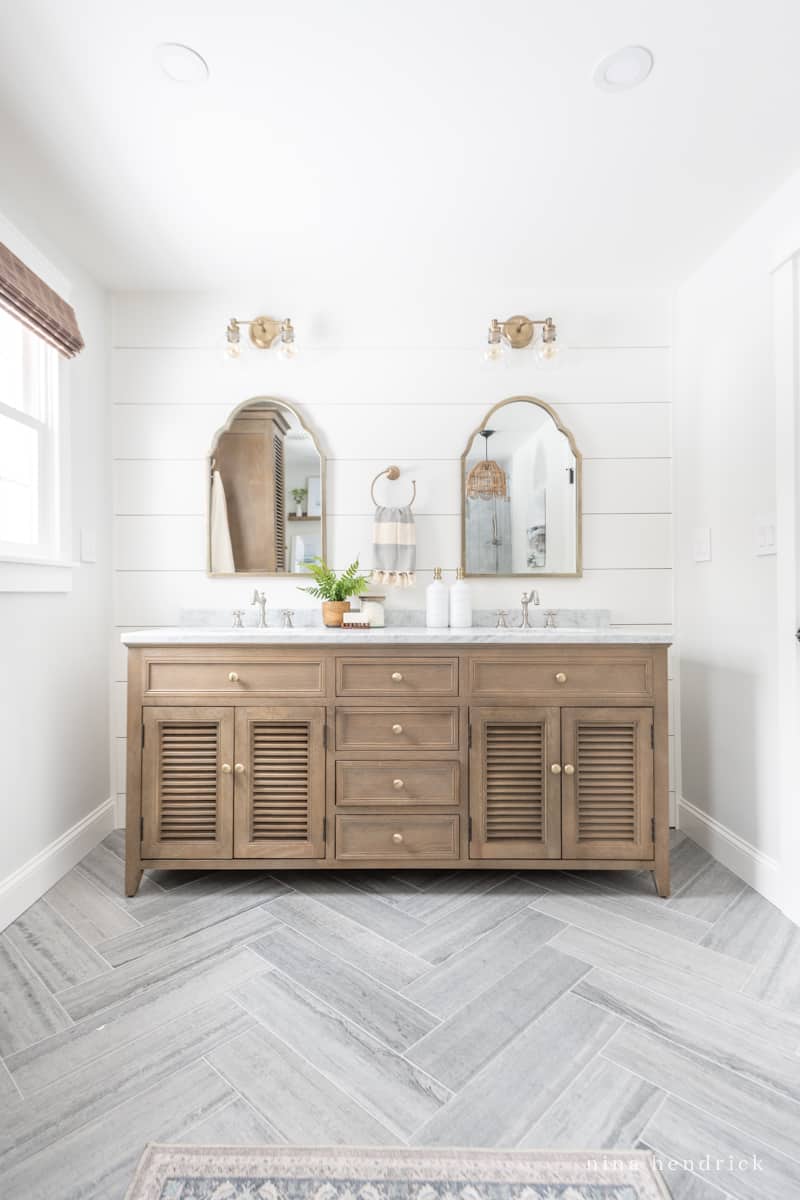
My tile pattern: herringbone
I decided to go with a herringbone pattern because it’s a key theme repeated in various places throughout our home. It couldn’t have worked out better because out of all the bathroom shower tile ideas, it’s the pattern that catches my eye the most. So we used it for both our shower floor and bathroom floor, and their varying tiles transition from one to the other flawlessly.
I knew that repeating herringbone in our bathroom, the last room we remodeled, would be the perfect final touch to tie the whole house together. I LOVE IT! :)
Bathroom Tiling – Plan For Things to Go Off Plan
Now, it wouldn’t be a proper renovation without something not going according to plan, and the big drama with this project was running out of our floor tiles!
I thought I had planned well by accounting for extra, but herringbone patterns create a ton of waste, and even my overage wasn’t enough. So you can imagine the small panic attack I had when I called to order more, and was told our tile, (that was already ¾s of the way installed), was no longer being sold. 😳
Luckily, when I called our local showroom, they were able to save the day by tracking down a couple of boxes of our tile and expediting them to me. Shout out to Matt for truly coming in clutch!

Tip from Nina: When purchasing tiles, you always need to order extras to have on hand. When doing a herringbone pattern, DOUBLE your extra, because this pattern uses more tile than others!
Also, we had a miscommunication with our tile installers. The shower walls are marble subway tiles, but I wanted the small herringbone marble tiles that are on the shower floor to repeat inside my shower niche. (A shower niche is the cubbyhole within your shower wall where you can set shampoo bottles and soap.) But this detail somehow got missed, and they instead extended the subway tiles into the niche. It still looks good, but repeating the herringbone there would’ve created a really satisfying continuity.
All in all, I’m so happy with the outcome of our primary bathroom renovation. The Carrara marble and medium-gray faux concrete floor tiles really shine in their starring roles!
I hope my 3-step formula helps the design task of mixing tiles in a bathroom feel less intimidating, and that you gleaned some helpful tips to make the process smoother.
I can’t wait for you to create a mixed bathroom tile design that makes you smile` every time you lay eyes on it. :)
pin it for later