- Dining
- DIY Tutorials
DIY Cottage Dining Table Tutorial
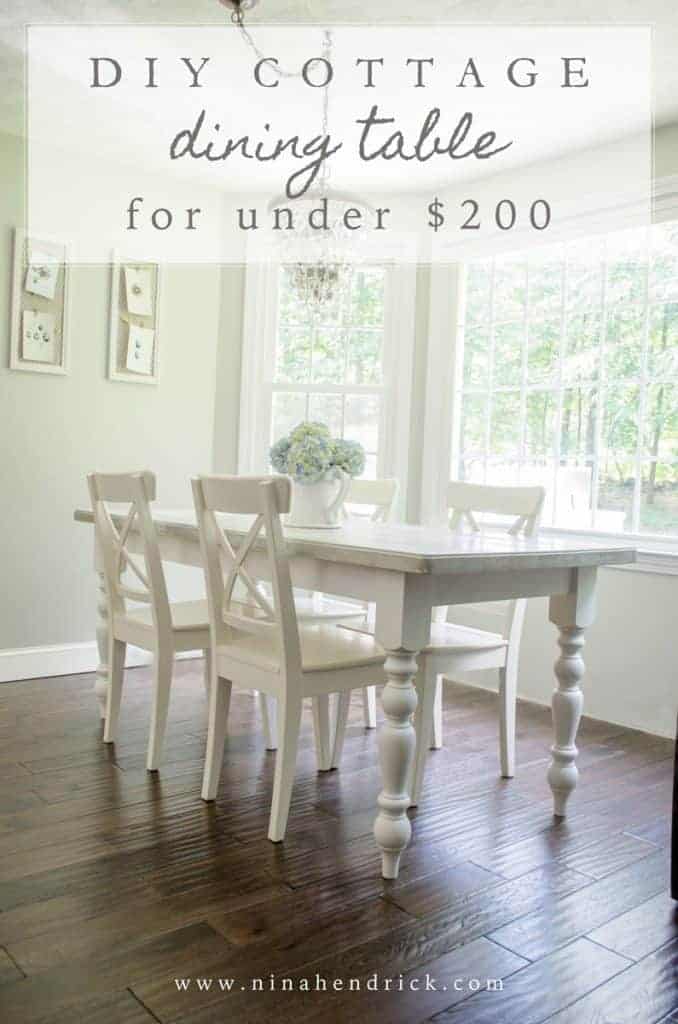 It feels like forever since I’ve shared a tutorial! Today’s post is a fun one. To say I’m in love with this table is an understatement. It’s yet another piece that looks incredibly high end but we paid pennies for it. We happened to have a lot of the materials on hand- but even if you went out and bought the materials it’s a steal (I’ll break down the cost later in the post).
Osborne Wood Products provided me with the table legs for this project, but all opinions on the high quality of their products are my own. This tutorial also features affiliate links for your convenience. Please see my disclosures for more information.
Some of my favorite things about this table? Definitely the finish, the routed edges, and the Old English Country Dining Table Legs from Osborne Wood Products.
Can you believe this table started as a picnic table?
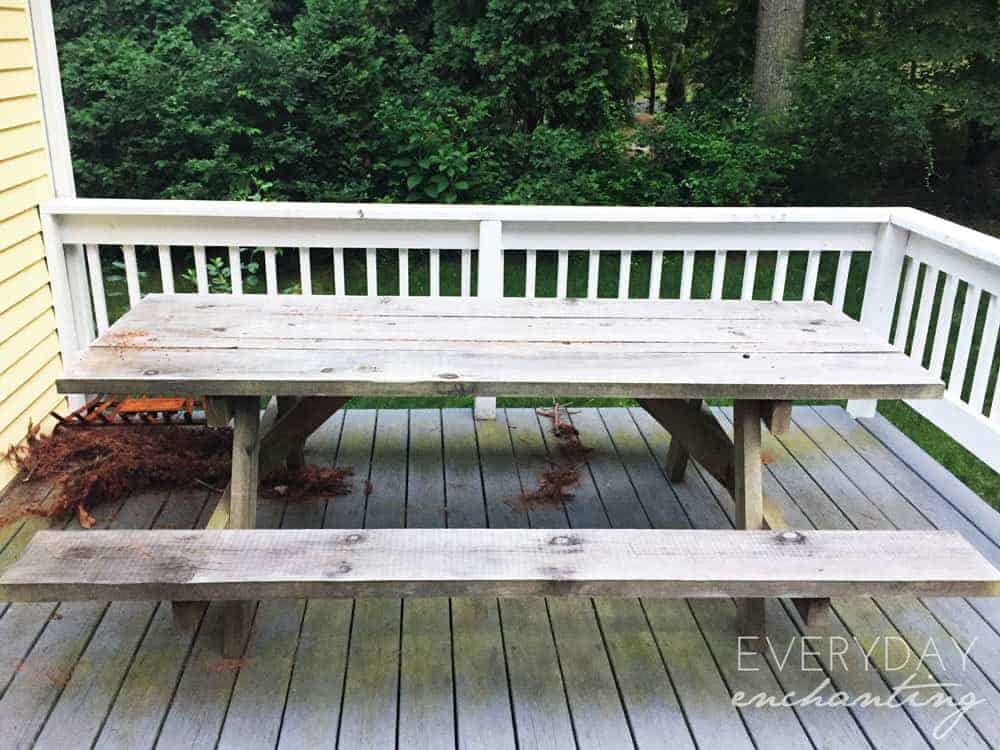
Yup. There it is (As you can see, our deck will be in need of some improvement in the future). This picnic table was made out of lovely weathered rough cut pine. If you’ve been around this blog for any length of time then you know that I have a bit of an obsession with rough cut pine (see here and here and here). We have the same picnic table at camp, and it had been recently attacked by carpenter ants. We decided that we wanted to spare the beautiful wood of this table from the same fate, so we disassembled it and brought it indoors. Here’s how we transformed it from a picnic table to a cottage dining table- and how you can do the same for under $200!
DIY Cottage Dining Table Tutorial
Materials:
- (4) 2x10X8 Pine Boards (check the pile for the straightest, nicest ones!) @$10 ea. – $40
- (3) 1X4X8 @ $2 ea.- $6
- (4) Osborne Wood Products Old English Country Dining Table Legs in Soft Maple @ $37.98 ea. – $151.92
Total: $197.92*
*This total assumes you already have the power tools outlined below.
Our first step was to plane the boards. We brought them to Mack’s Dad’s workshop where he has a planer. This thing is seriously neat and is definitely on my wish list for our own workshop! I didn’t really get to watch because Lyla’s little ears wouldn’t have been able to stand the noise, but I did run in to snap a photo in a pause between Mack planing boards.
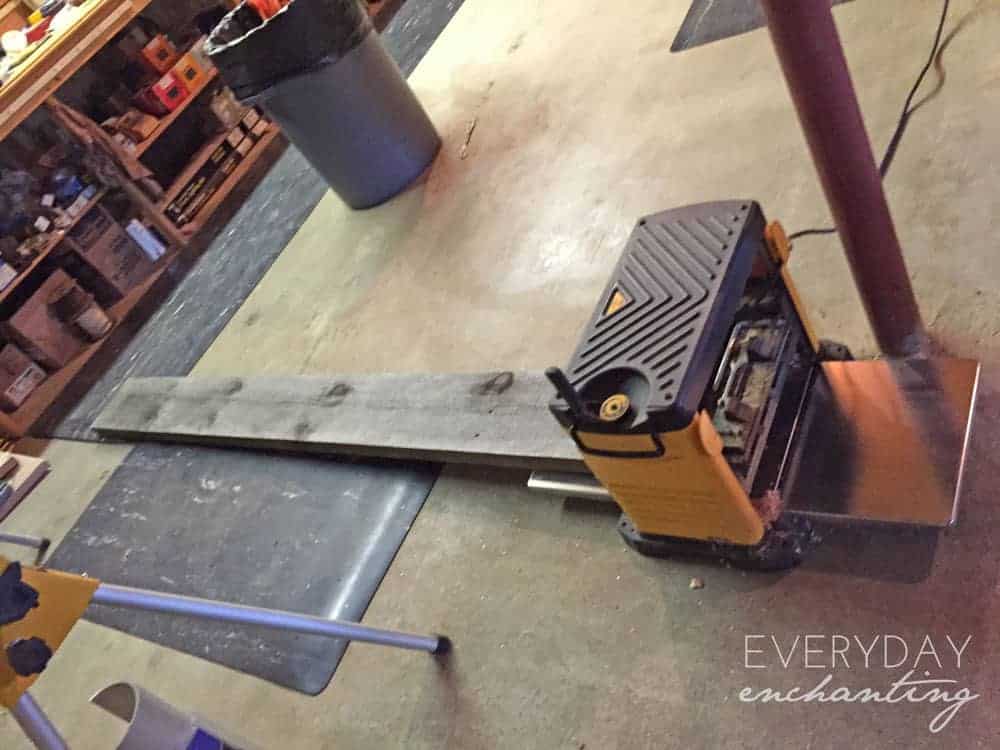
Mack planed the boards down from 2″ to about 1 1/2″. They were lovely and thick, but a little too much so for what we had in mind. When you purchase 2x10x8s at the lumber yard (which is what we suggest when you’re building this yourself, unless you have access to milled pine) they are actually approximately 1 1/2″ thick.
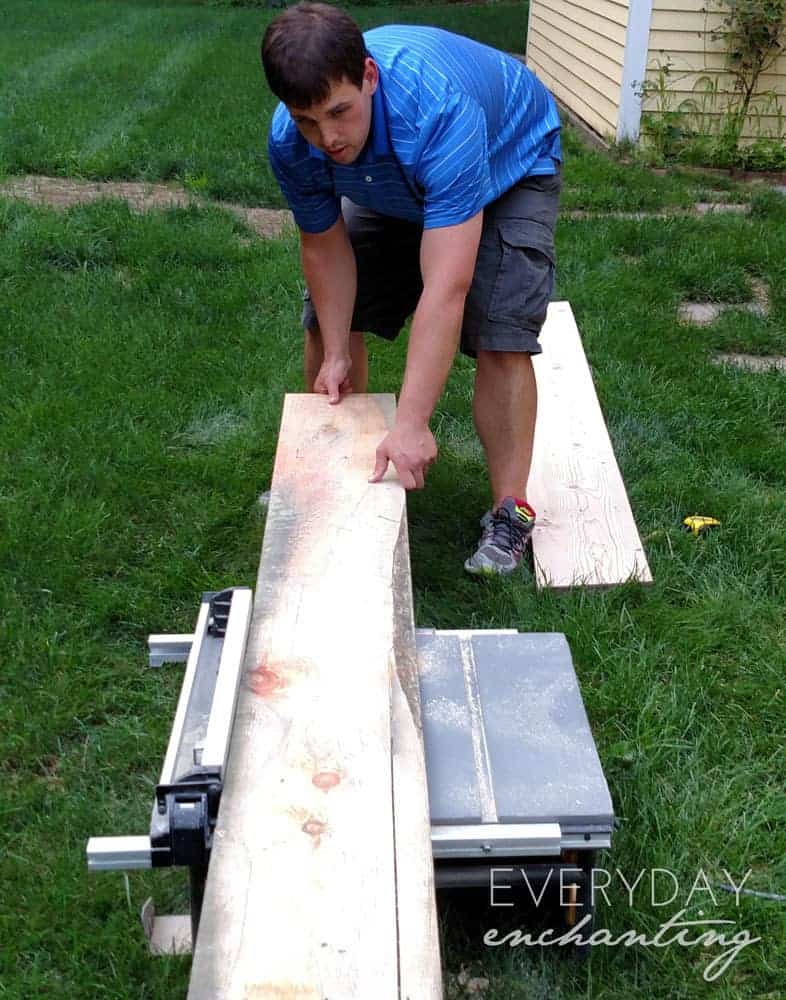
Next, we used the table saw to trim the boards on the edge a bit to ensure that they are square. We also recommend doing this with the 2x10s to trim off the rounded edge. As you can see from the photo- we trimmed quite a bit off of some of the boards for uniformity.
Now here’s where the new toy comes in- the biscuit joiner. I’ve always been a bit intimidated by the concept of a biscuit joiner, but it was actually pretty easy to use (and also fun)!
(When we built my parents’ Farmhouse Dining Table we received a lot of concerned commentary from professional woodworkers who said we should have used a biscuit joiner. My parents’ table did experience some contraction- which they blame on their woodstove- during the winter, but it has expanded back out again and there has been no extreme splitting.)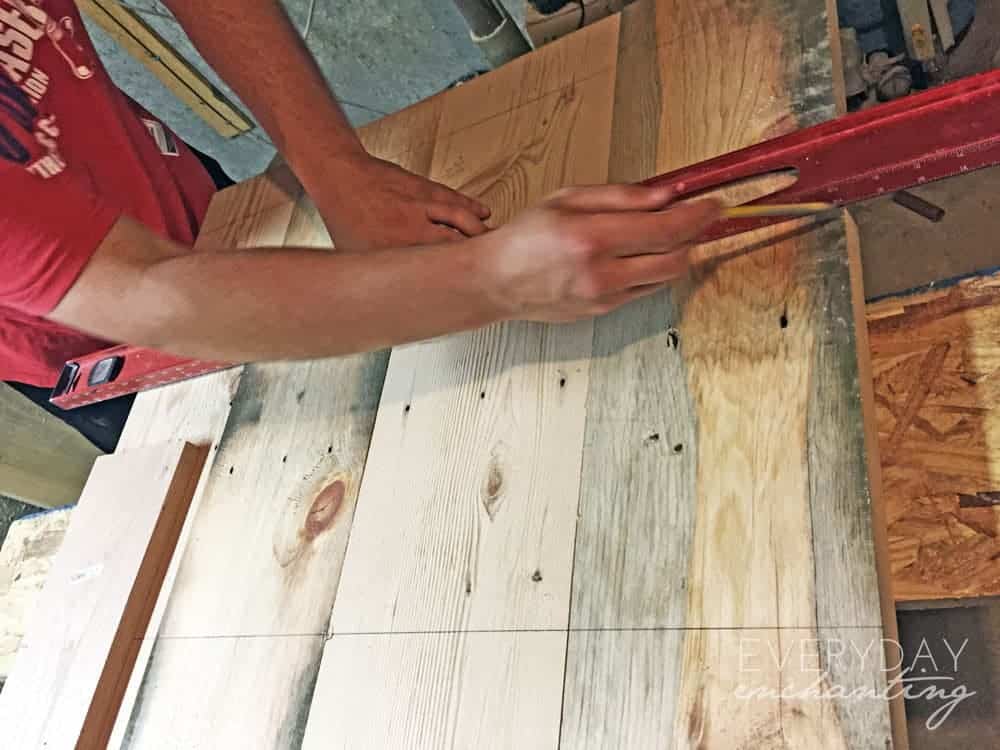
We measured for equal intervals in between the planks.
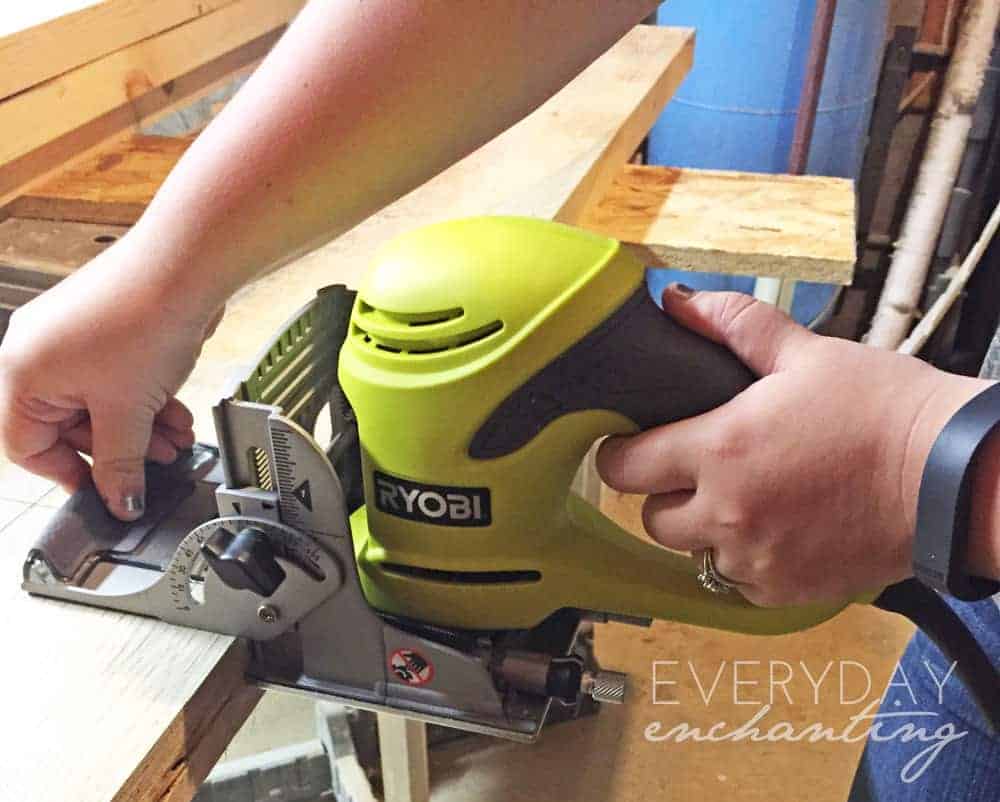
Then we used the biscuit joiner on the planks.
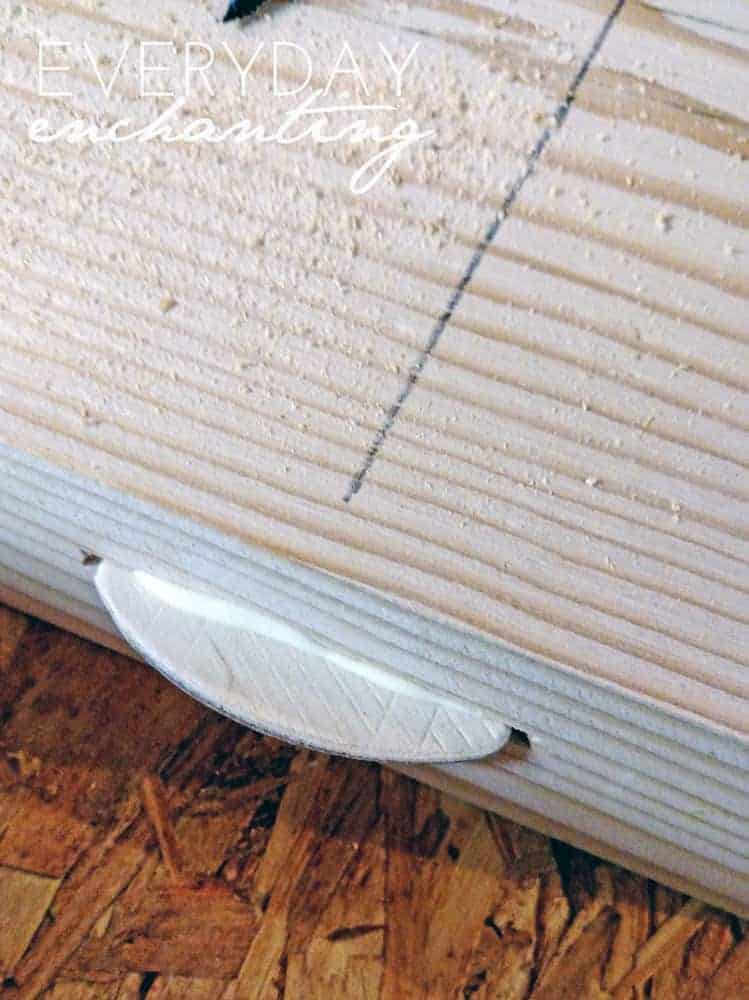
Then we glued and placed the biscuit, and clamped the planks together to dry.
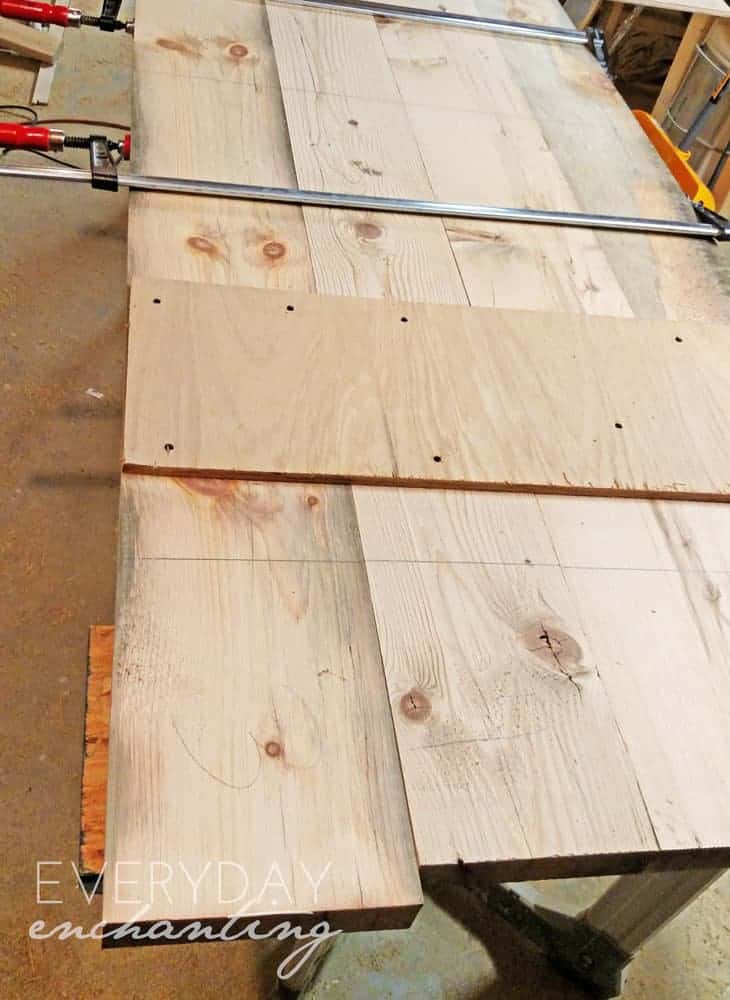
After they were dry, we sanded the table smooth and trimmed it to the 72″ in length with a circular saw.
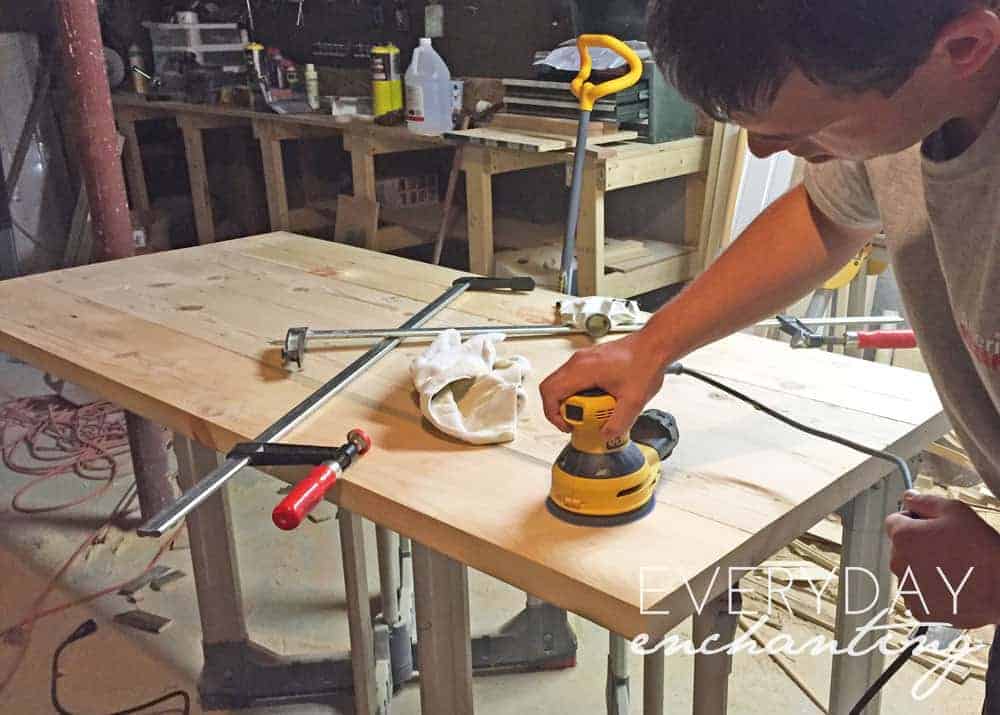
There was A LOT of sanding to get it to the smoothness I wanted. I wasn’t looking for perfection, but I wanted to be able to set down a wine glass without it wobbling.
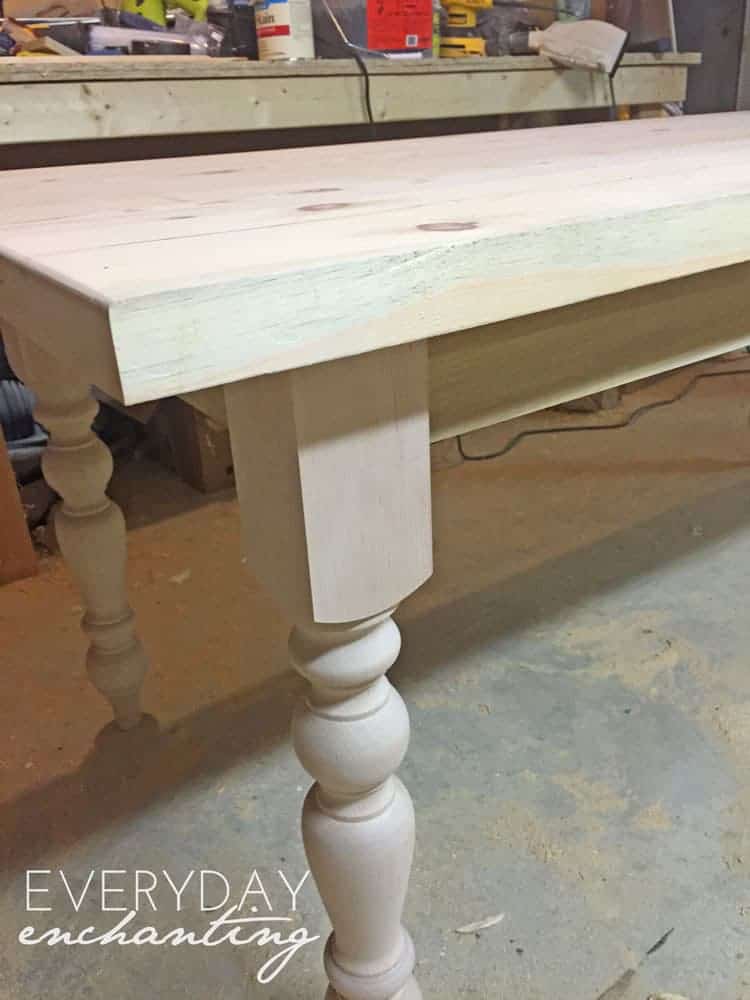
Then we flipped the table top and began working on the legs and apron.
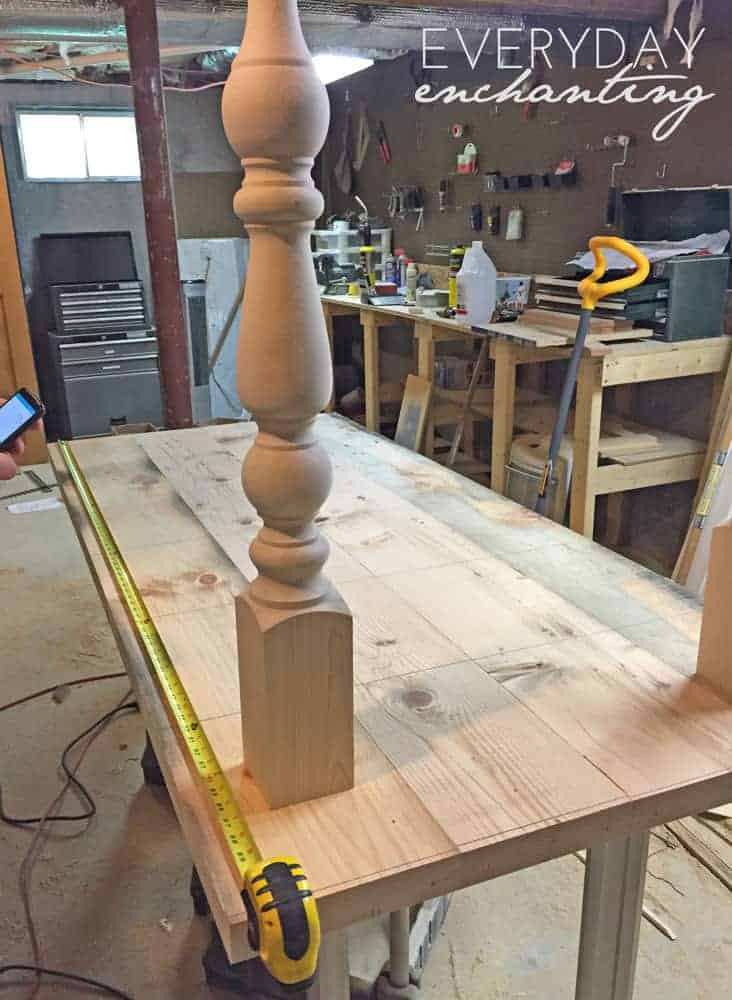
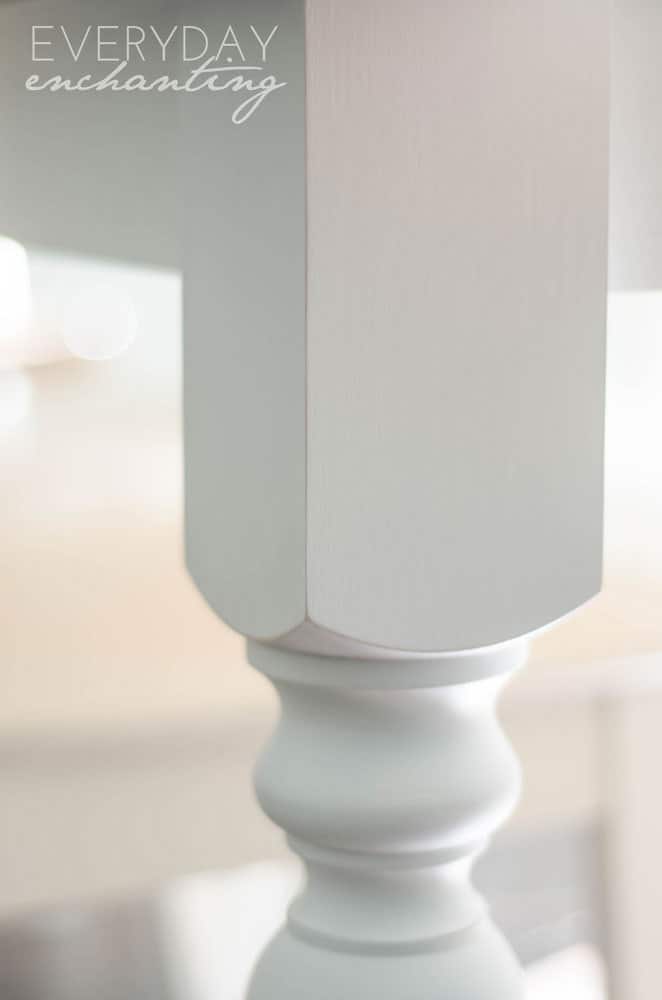
For the legs we measured 4″ in on each end and 1 1/2″ in on the sides. Then we inset the apron another 3/4″.
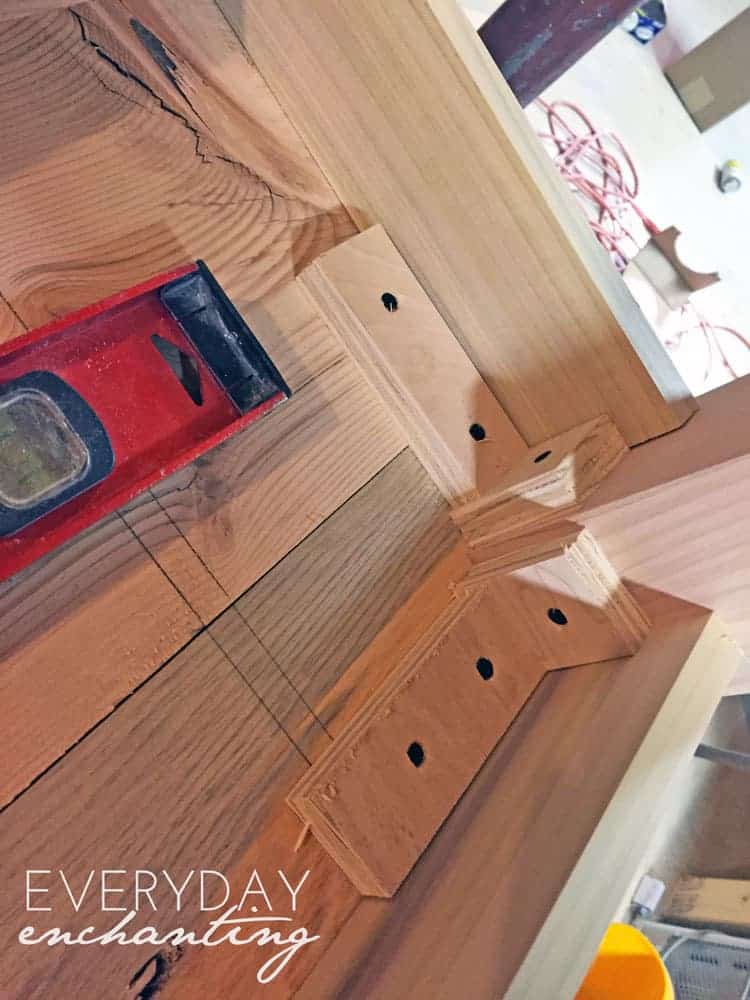
Mack created cleats to attach the legs and apron to the tabletop. We also reinforced with wood glue.
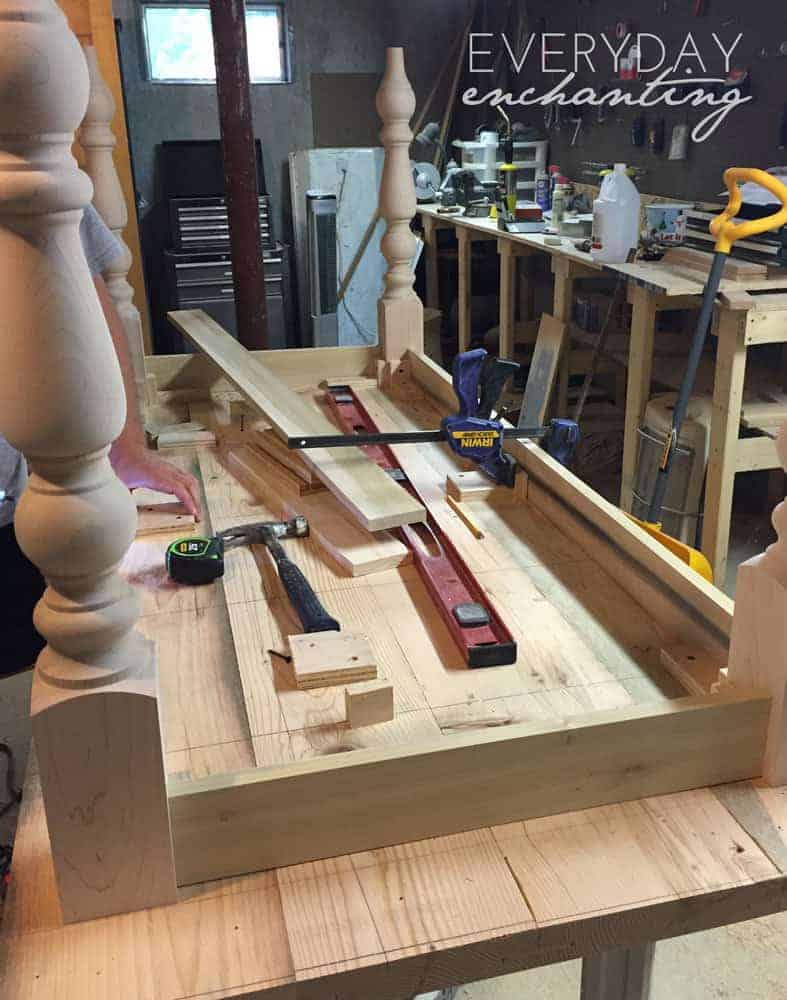
We clamped the apron so that the sides wouldn’t bow out. After the glue was dry we flipped over the table.
The Finish Work
After I sanded it again, I felt like it was missing something. We began playing around with the router, and I really liked the way the ogee bit looked. It gave it a little extra something. We also rounded off the edges since we’re about to have another little one toddling around in a few short months.
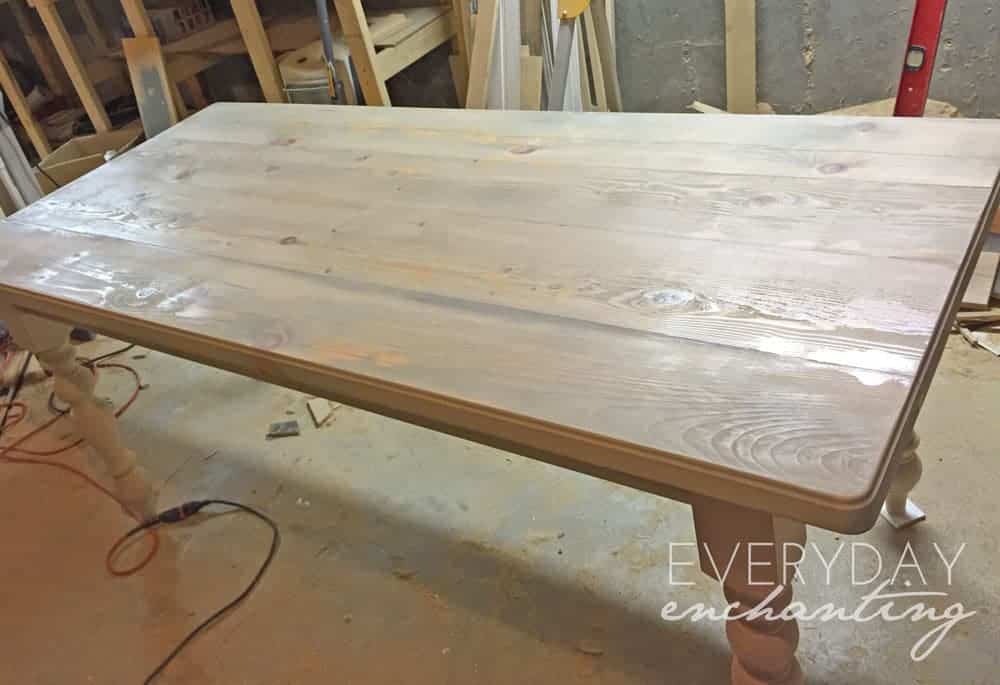
I had also put Minwax Pre-Stain Conditioner on the tabletop before this photo.
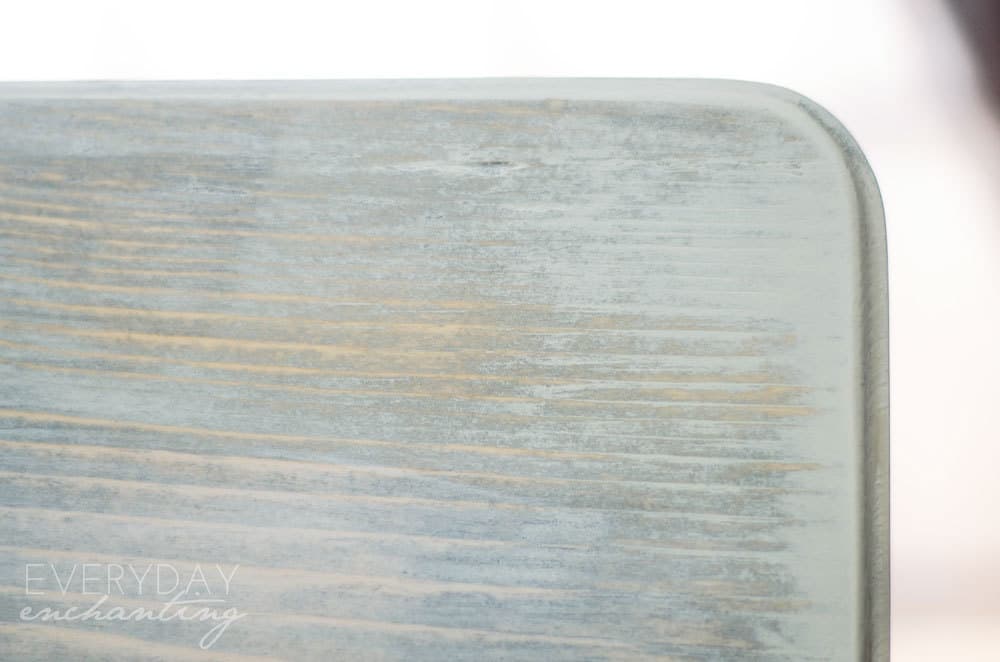
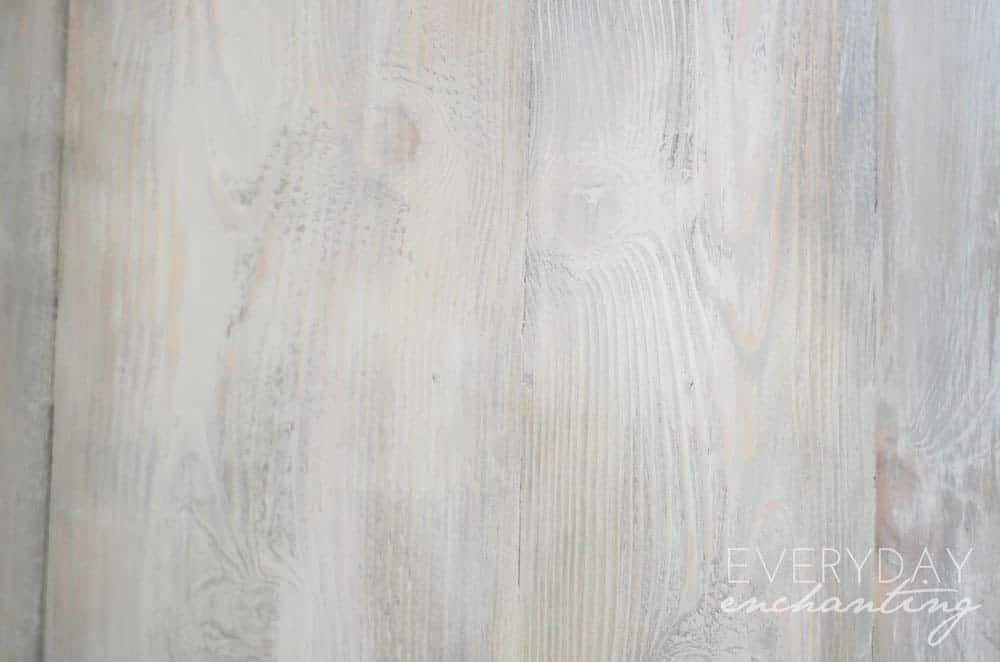
Next, I stained the tabletop with two coats of Rustoleum Weathered Gray (this shows it after just one coat). I sanded between coats with 220 sandpaper. The instructions will say to only leave the stain on for a minute or two. I disagree with this- it’s not enough time to soak in. You have to find the fine line between the stain absorbing sufficiently and it drying.
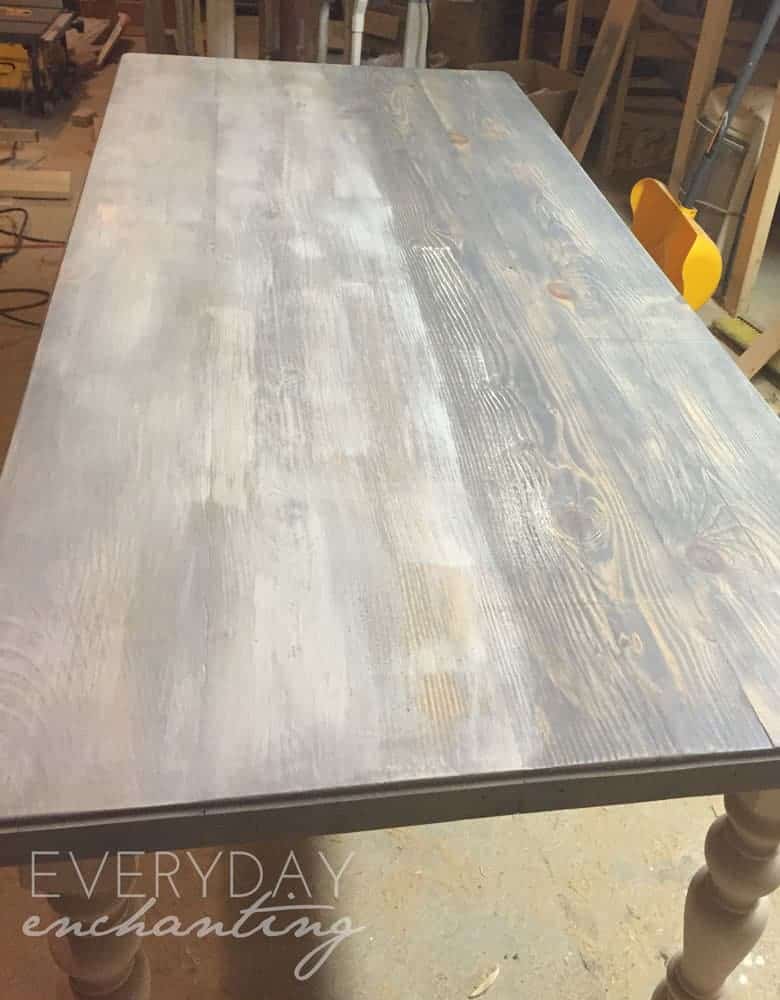
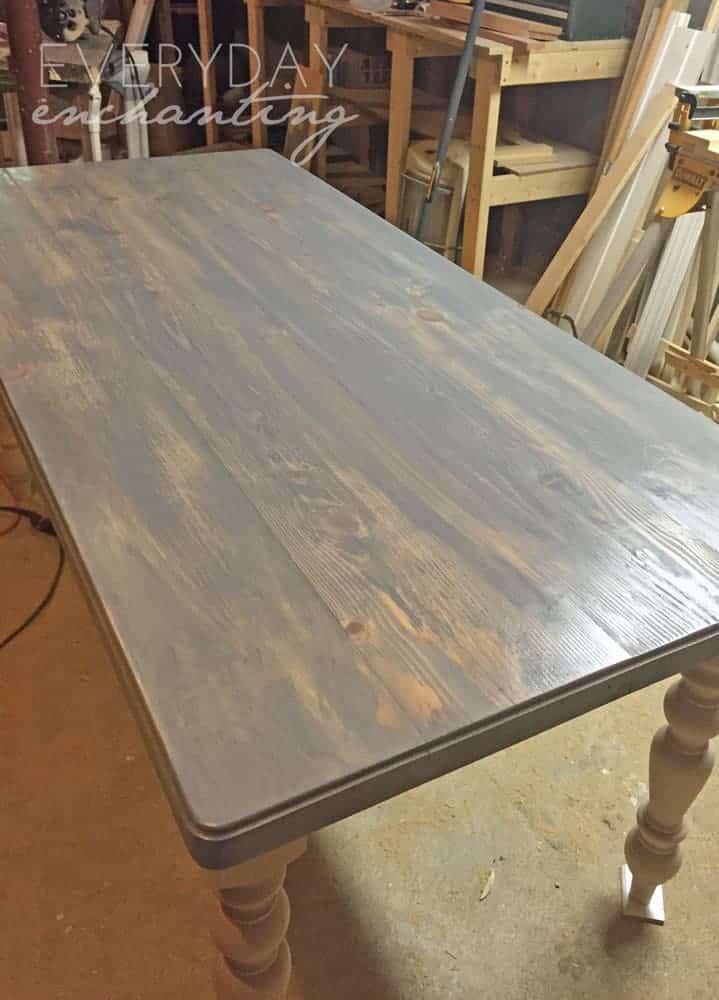
After the stain I began whitewashing. Any white satin paint will work (I used chalk paint I had kicking around)! You just make sure there’s a very small amount on your brush and begin working it in. There’s no such thing as overworking with a whitewash. The more you drybrush it before it cures, the better it looks.
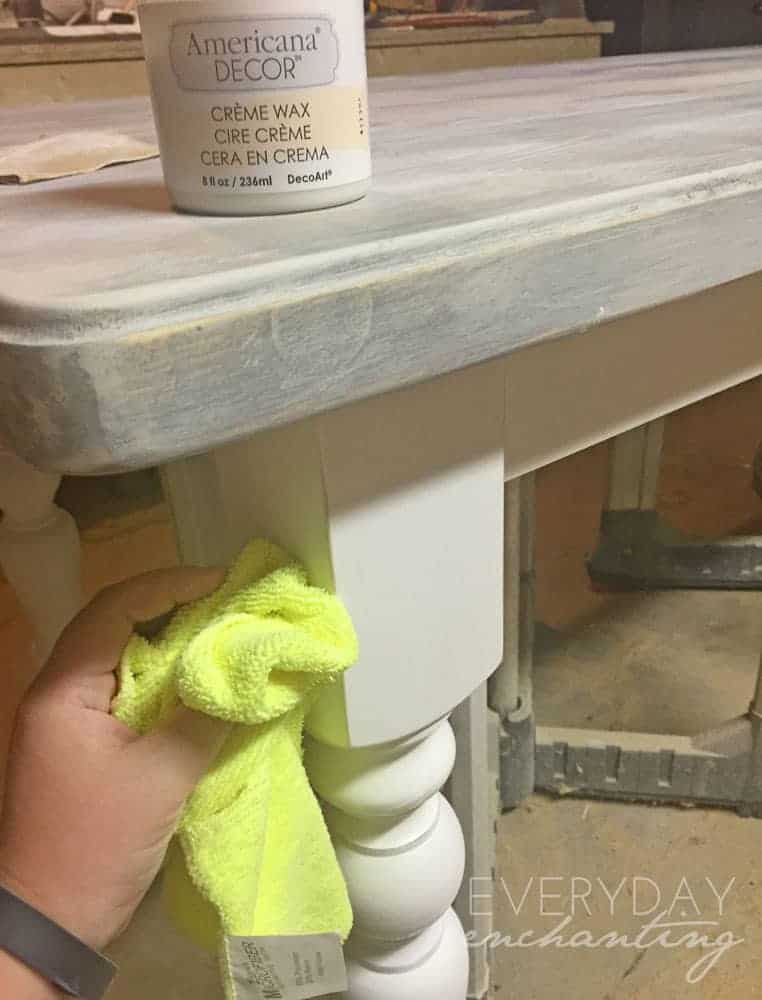
I painted the legs with two coats of Folk Art Chalk Paint in White Adirondack. I loved the coverage! A note about chalk paint- I know the big tagline is “no sanding needed” etc etc, but I feel like the finish is incredible when you actually do sand. I used 220 to sand in between coats and there were no brush strokes, and it was perfectly smooth. I distressed the edges of the legs a bit and finished it all off with a coat of Deco Art Americana Clear Creme Wax.
The tabletop was finished off with two coats of Minwax Satin Polycrylic. I sanded with the 220 between coats, and also finished it off with a sanding. I loved the dull, matte finish- but it’s also very durable.
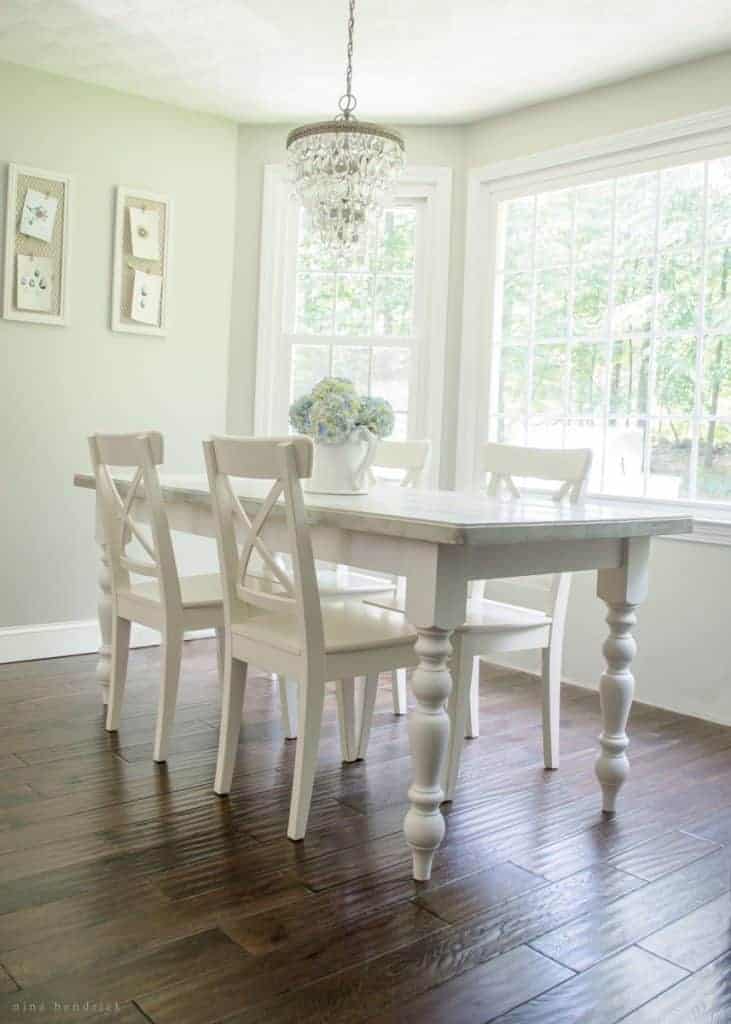
I’ll admit, I was hesitant about the finish of the tabletop at first, but it’s grown on me. It’s a very close match to our DIY Kitchen Island which is in the same room, so it works out.
I absolutely love the routed edge.
The wax finish perfectly highlights the distressing on the legs, and also gives them a soft texture.
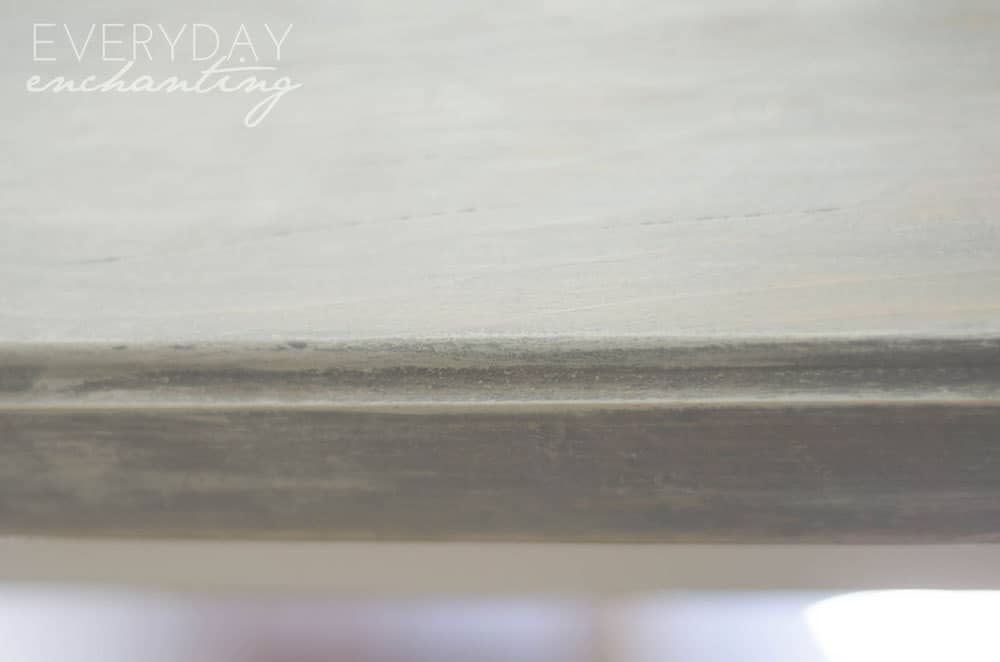
The paint and stain held inconsistently in the routed part, which gave it the appearance of patina.
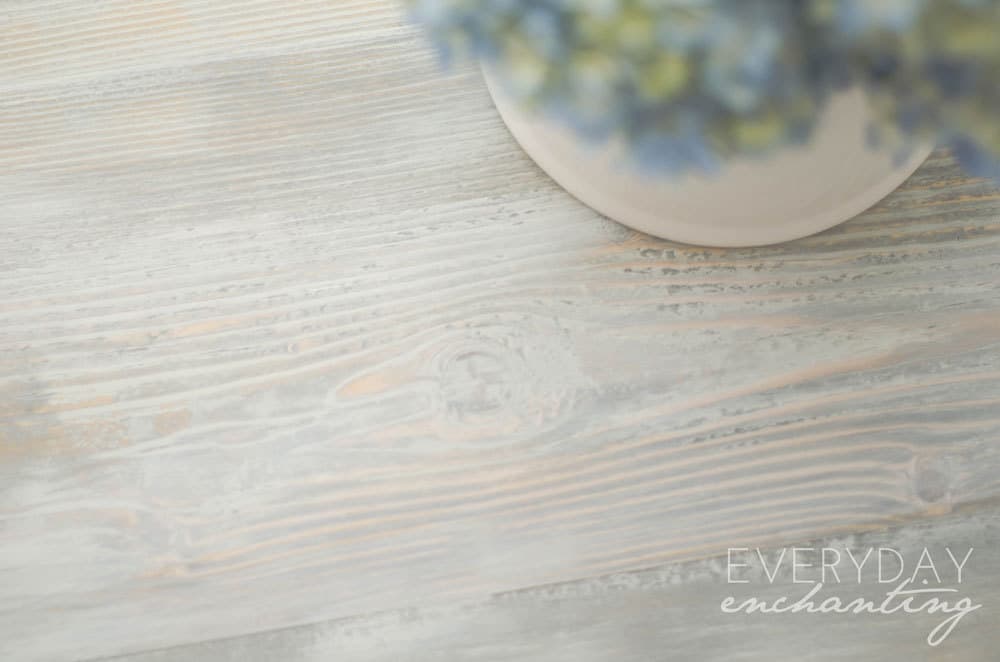
I love that wood grain.
and that the whitewash always gives it that finished look.
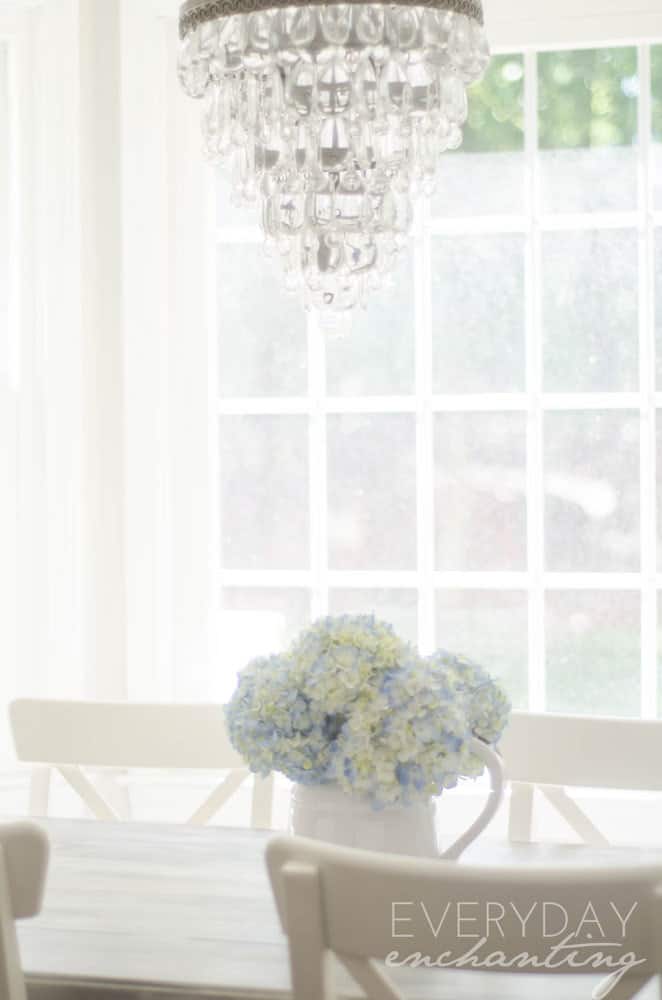
I couldn’t resist these hydrangeas at Trader Joe’s this week. They are the same blue as our wedding flowers six years ago. The ones in my yard tend to be a deeper blue.

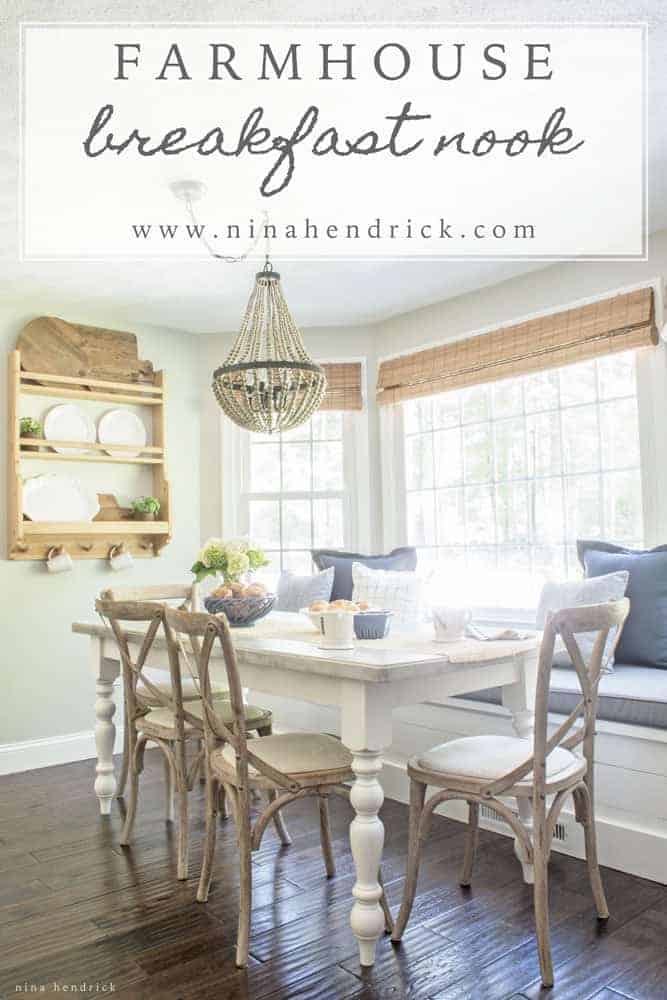
The breakfast nook is really taking shape in my mind now. We have a tentative plan in place for the bay window bench. I would still love to do some planking/shiplap… but we’ll see. Overall it’s such a beautiful and bright space!
I have a few more updates about the space to share… but I think I’ve bombarded you with enough photos for today :)
![]()
You May Also Like:
Farmhouse Breakfast Nook Reveal
![]()