Want to tackle a family room project? Make sure you have a plan in place first! Learn about our steps and missteps to finish our family room.
Have you ever started a project without a plan? That was how our family room project began — on an impulse. One day I was sick of the yellow walls and yellow ceiling, and I just started painting. Never mind the fact that I was going to need to get up on a super tall ladder that I couldn’t carry into the house by myself. I may have been pregnant with my daughter — I can’t remember the exact timeline. Just know that it was not good timing. And I had no actual thoughts about where this space was going, but I simply had an urge to begin. And so I did.
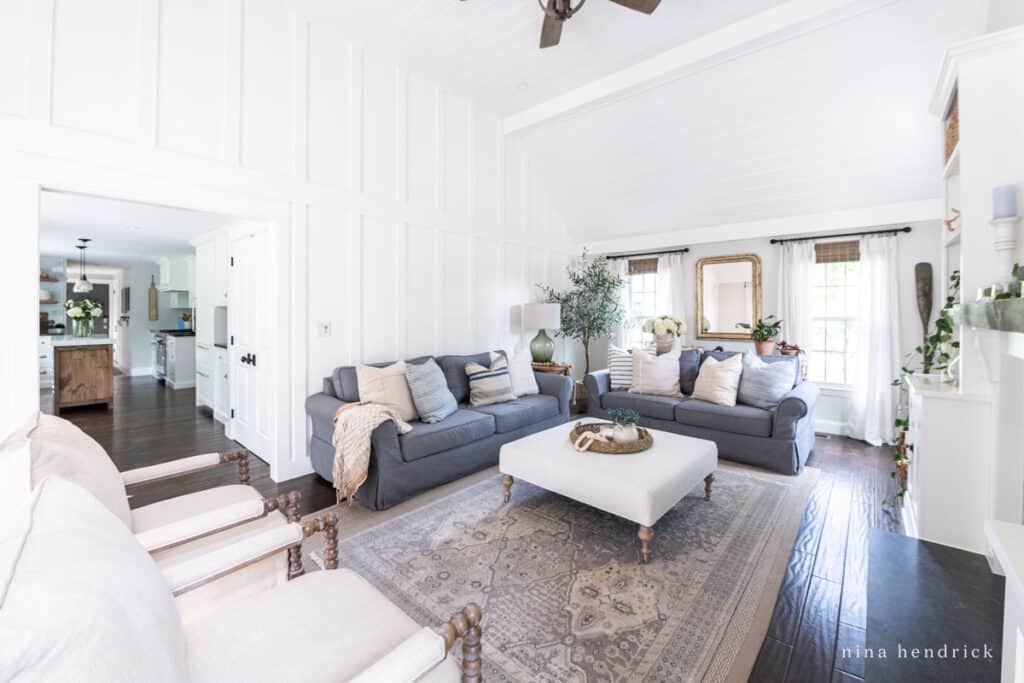
Now, I don’t recommend this method. In fact, I go to great lengths to teach people how to tackle projects correctly. In this post, I’m going to tell you why this room has taken us so long. Spoiler Alert: it has something to do with not having a plan. Now that we have one, we’ve finally completed the family room project after several years of hard work.
Family Room Project Plans (Or Non-Plans?)
explore by room
Like I mentioned, the only thing I knew when I began was that I couldn’t stand the yellow walls and the yellow ceiling in our family room for one second longer. We had moved into an almost entirely yellow home a couple of years earlier.
Fun fact: yellow is my second least favorite color (only orange is worse to me — which is what color the rest of the house was). And yes, even the ceiling was yellow. They painted it a slightly paler shade of yellow, which I’m told was a common practice in the 80s and 90s. All I knew was that it needed to change. I don’t even have a true before photo with the yellow walls because I disliked them so strongly.
Family Room Project Before
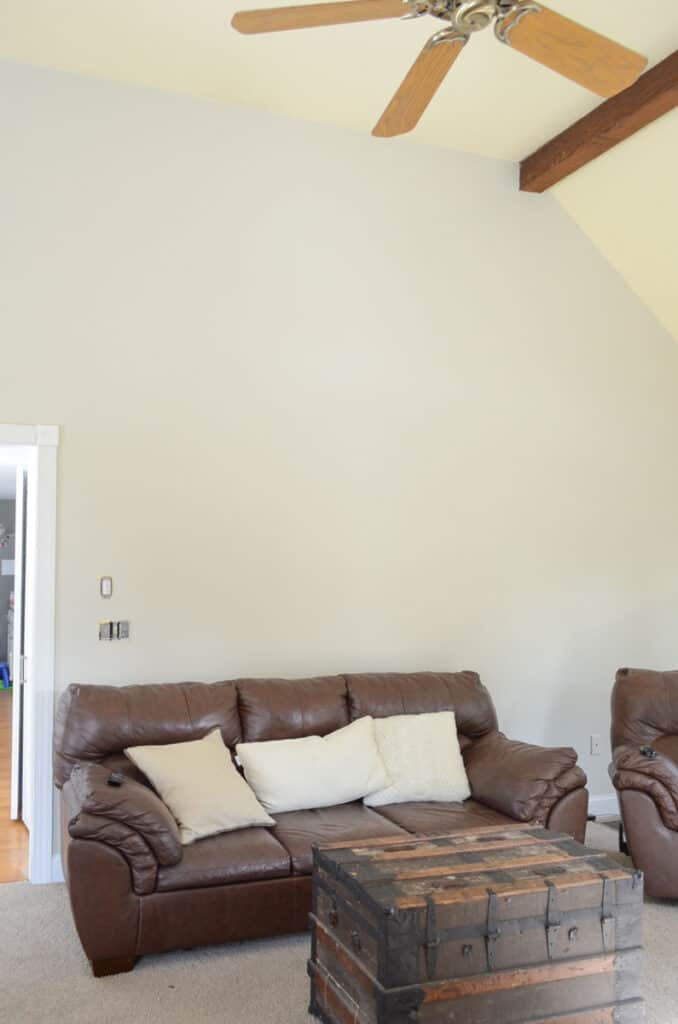
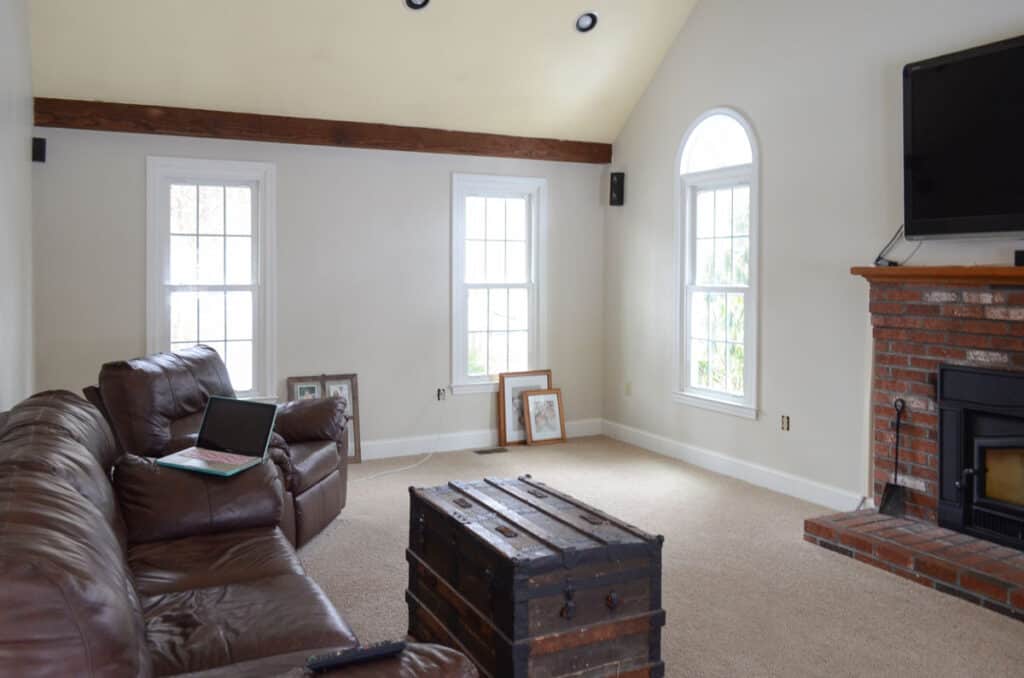
We had the furniture that had been leftover from Mack’s man-cave in our former basement. It was this brown puffy leather that I hadn’t weighed in on the purchase of. Rain had ruined our slightly more aesthetically pleasing microfiber couch while we were moving in. Not only that, but like I just mentioned in my recent post that we ended up with a giant, big screen TV over our fireplace. So I had a big black box over our fireplace and then brown puffy leather furniture.
Family Room with Edgecomb Gray Walls
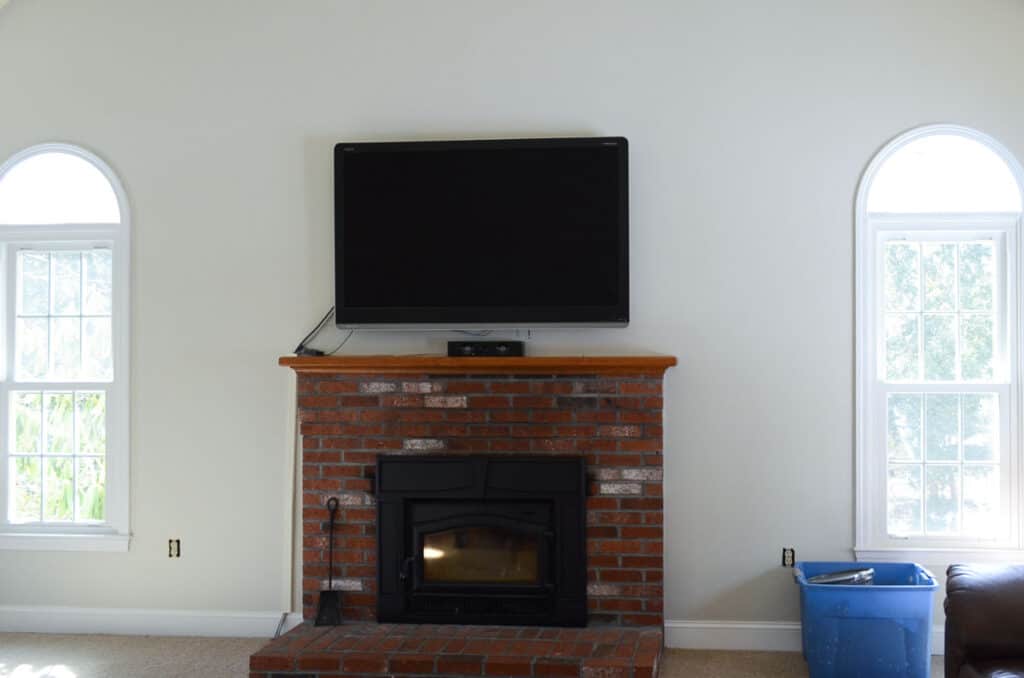
After we painted the walls Benjamin Moore Edgecomb Gray, it looked a lot better. The way Mack tells it — when he got home from work that day, and I had already started painting the walls without a plan,he knew he had to jump in and help. And, unfortunately, a couple of our projects have started that way because of my impatience.
The problem with jumping in this way is that you start without actually knowing where the finish line is. Predicatably, without knowing our next steps, we stalled.
So for a while, that was our family room. We had the Brown leather couches. We had the Edgecomb Gray painted walls, but we did nothing else.
Covering a Brick Fireplace in the Family Room
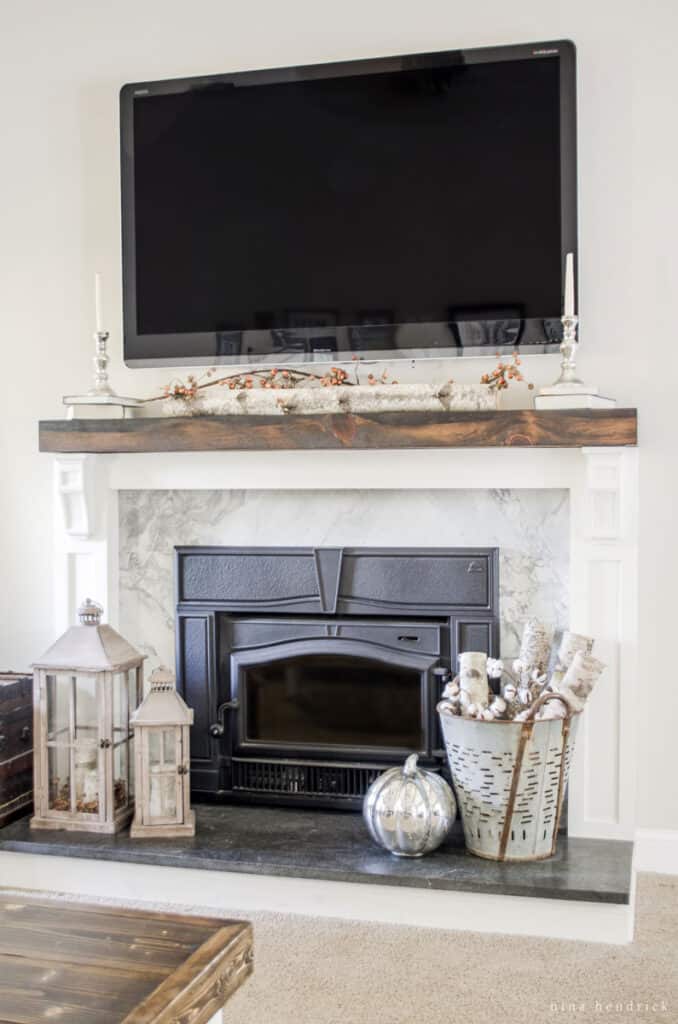
But after a bit, we decided that we wanted to tackle the fireplace. The impetus for returning to the family room project was hiding the TV wires in the walls, which is something that I addressed in my post about how to decorate with TV above your mantle. Once we rerouted those wires through the walls, we wanted to make the fireplace look a bit prettier.
So for a long time, that was where the project sat as we worked on other things. We had this beautiful fireplace, though of course, above it we had that giant TV, we had the puffy brown leather couches, and then we built a coffee table.
DIY Wood Coffee Table
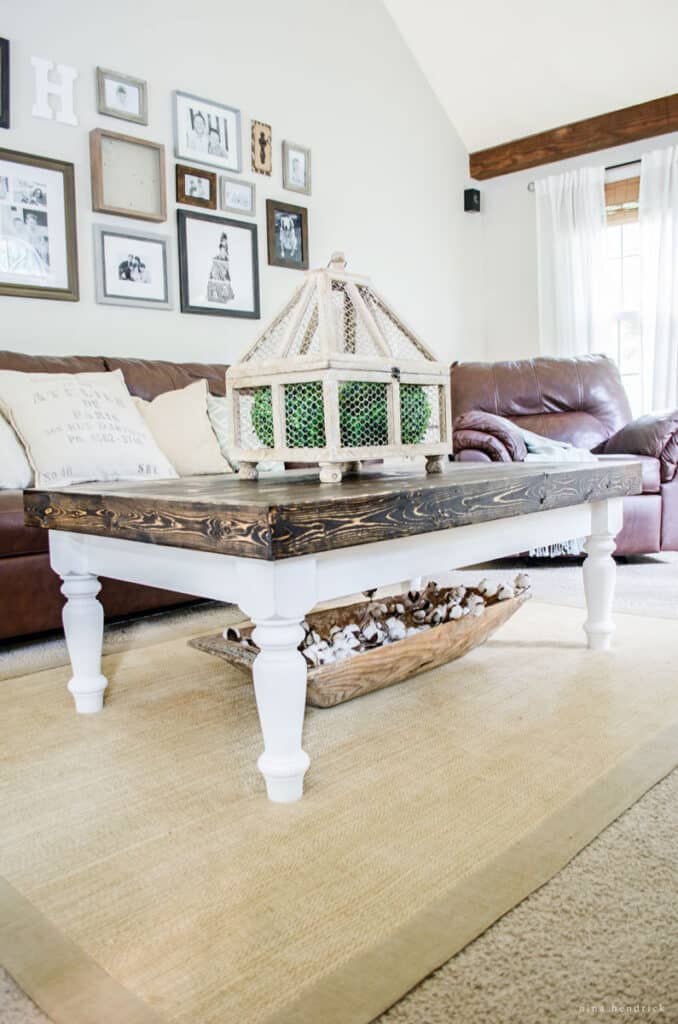
Mack is really great at carpentry. When we first started out, we couldn’t afford to buy solid wood furniture. However, we weren’t really interested in wasting our money on fiberboard, knowing that it would break with our young kids and we just have to buy another piece, anyway.
So he built us a really sturdy, chunky coffee table, and it tied everything together so nicely for a long time because the Brown top really matched the dark Walnut mantle and then the Brown leather of the couches. Obviously, I had other hopes and dreams for this space, but still no plan.
White Slipcovered Sofas
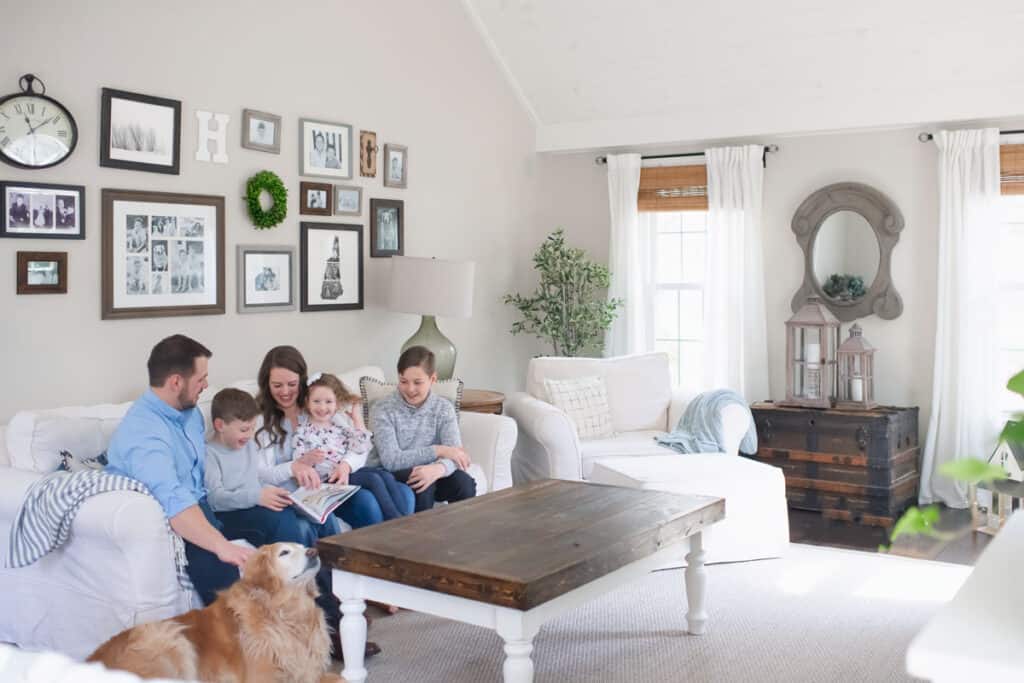
Finally, several years into the family room project process, I came up with a plan, at least for furniture, as a mood board for the family room project. We shopped around and we searched and researched, and we finally settled on Pottery Barn Comfort Sofas. I knew that I also wanted decor that looked neutral and natural and brought in a lot of fresh greenery and neutral textures that could really pair with any seasonal decor.
We added a gallery wall to the tall wall behind the sofa, and it wasn’t the best solution. It looked cute for a long time, but it wasn’t right for the scale of that wall. I knew pretty soon after was complete that it wouldn’t be a permanent solution.
Covering Cathedral Ceilings with Tongue-and-Groove
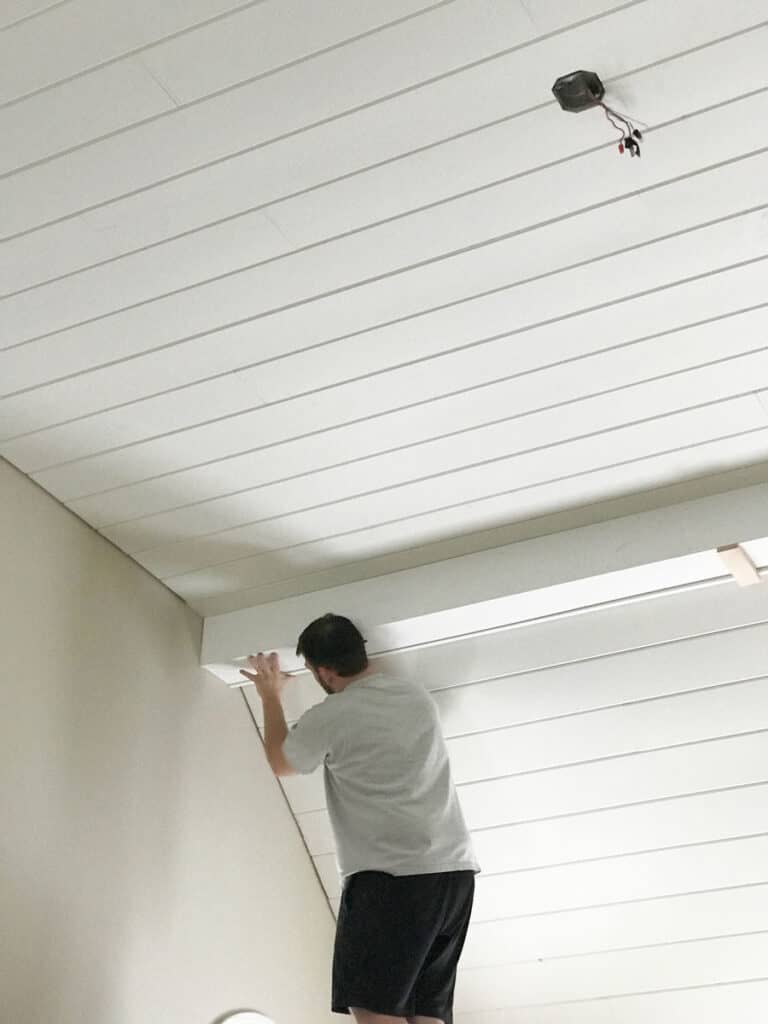
Our next step in the family room project saga was to cover up the yellow ceilings. The wood beams had really deteriorated by that point, and because they were rough, we couldn’t sand and re-stain them easily. Instead, we decided to cover the ceilings and tongue-and-groove wood, and then wrap the beams with trim. Everything would be solid white.
So we tackled that project, getting up on the scaffolding and putting up that tongue and groove. It was a major project, and it looked great for a little while.
Unfortunately, not long after, the knots bled through the paint. We didn’t use the proper products, and we knew we were going to have to repaint it. Another lesson learned: don’t take shortcuts.
Family Room DIY Built-Ins
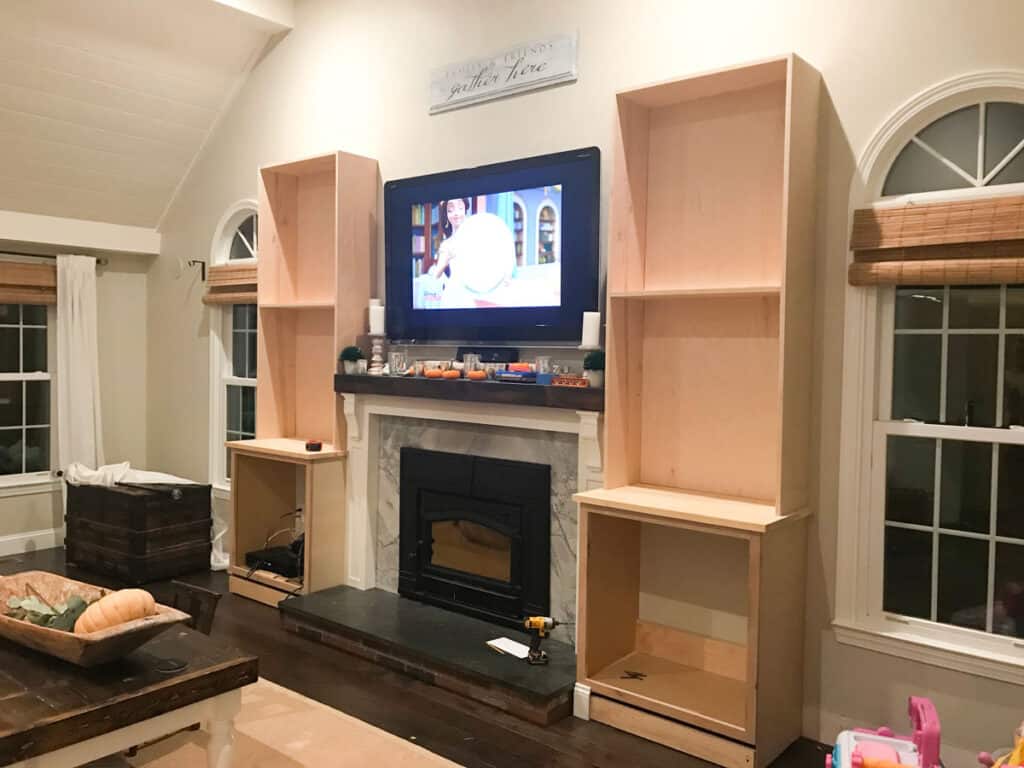
In the meantime, we knew we had another project in the family room that we wanted to tackle, and that was adding the built-ins to our fireplace. We used stock cabinets from Home Depot to create built-ins for either side of our fireplace and then we added bookshelves on top.
We also put a backdrop behind our TV with more tongue-and-groove wood. At that point, our family room was greatly improved.
We tied everything together with a custom sized rug to fit the awkward dimensions of the room. It’s 12 by 20 — so it’s very narrow and very long. A X by X custom rug fits perfectly.
I wanted to add a board-and-batten wall behind the sofa and cover up the knots, but we had other projects, and we couldn’t come back to one that we had already chipped away at so many times. So we stalled there for years.
Lesson learned: never start a family room project (or any room!) without a plan.
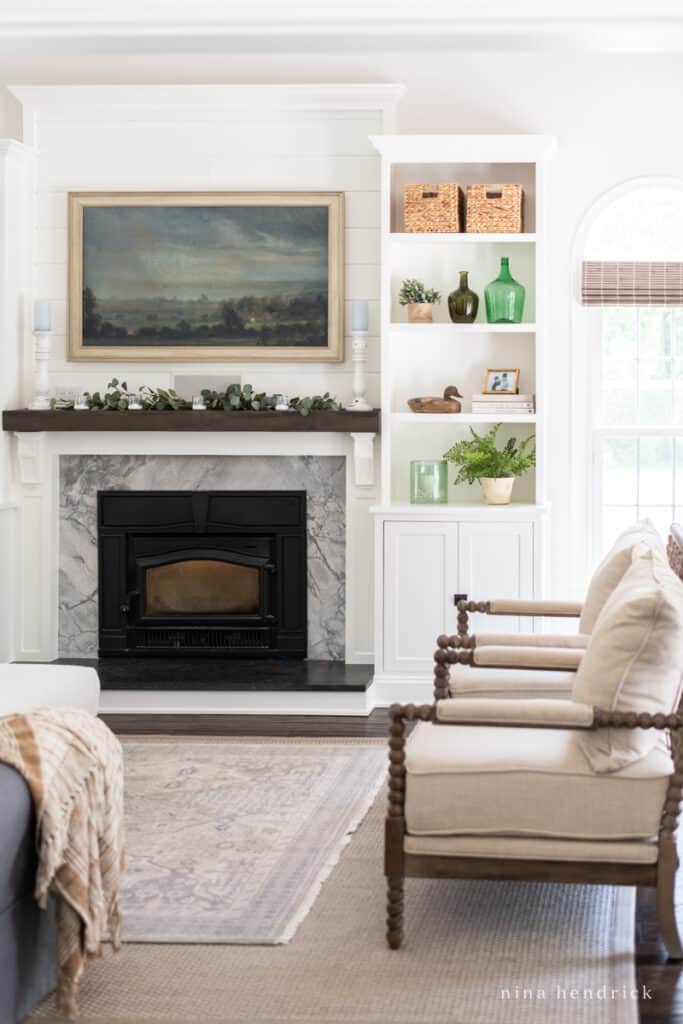
And that’s what happens when you don’t have a plan. The room just gets little pieces done, but ultimately nothing cohesive happens to bring the room together.
I’m excited to share that I finally came up with and executed our plan, and now that I’ve brought you up to speed, I can share the changes that we’ve made to complete this room.
I’ll share the updated mood board next and walk you through the different aspects of the final project. If you want to see more of our projects as they unfold, make sure to subscribe or follow along on Instagram!

